In my youth in rural Maine, when my parents would travel out of town on business, my brother and I would frequently stay with our next-door neighbors; an elderly couple.
I cannot say enough nice things about these people. They were the consummate New England neighbors, but more than that, they seem to have been conjured into existence by the State of Maine itself. In their youth, they had both worked for the Rockefeller family: he as a handyman, and she as a cook. In their retirement, they lived modestly, but with a fullness and self-reliance that shaped my understanding of how best to travel through life.
Aside from a gruff but caring demeanor, and a healthy understanding of personal privacy, they also each possessed a seemingly endless and (frankly) shocking supply of varied skills. Sewing, carpentry, gardening, forestry, automobile AND small engine mechanics, meteorology. The list goes on. If the Farmer’s Almanac had legs, it would have been these people.
And chief among their myriad abilities was the School of Arcane Food Preservation. Fermentation. Dehydration. Curing. And, of course, canning.
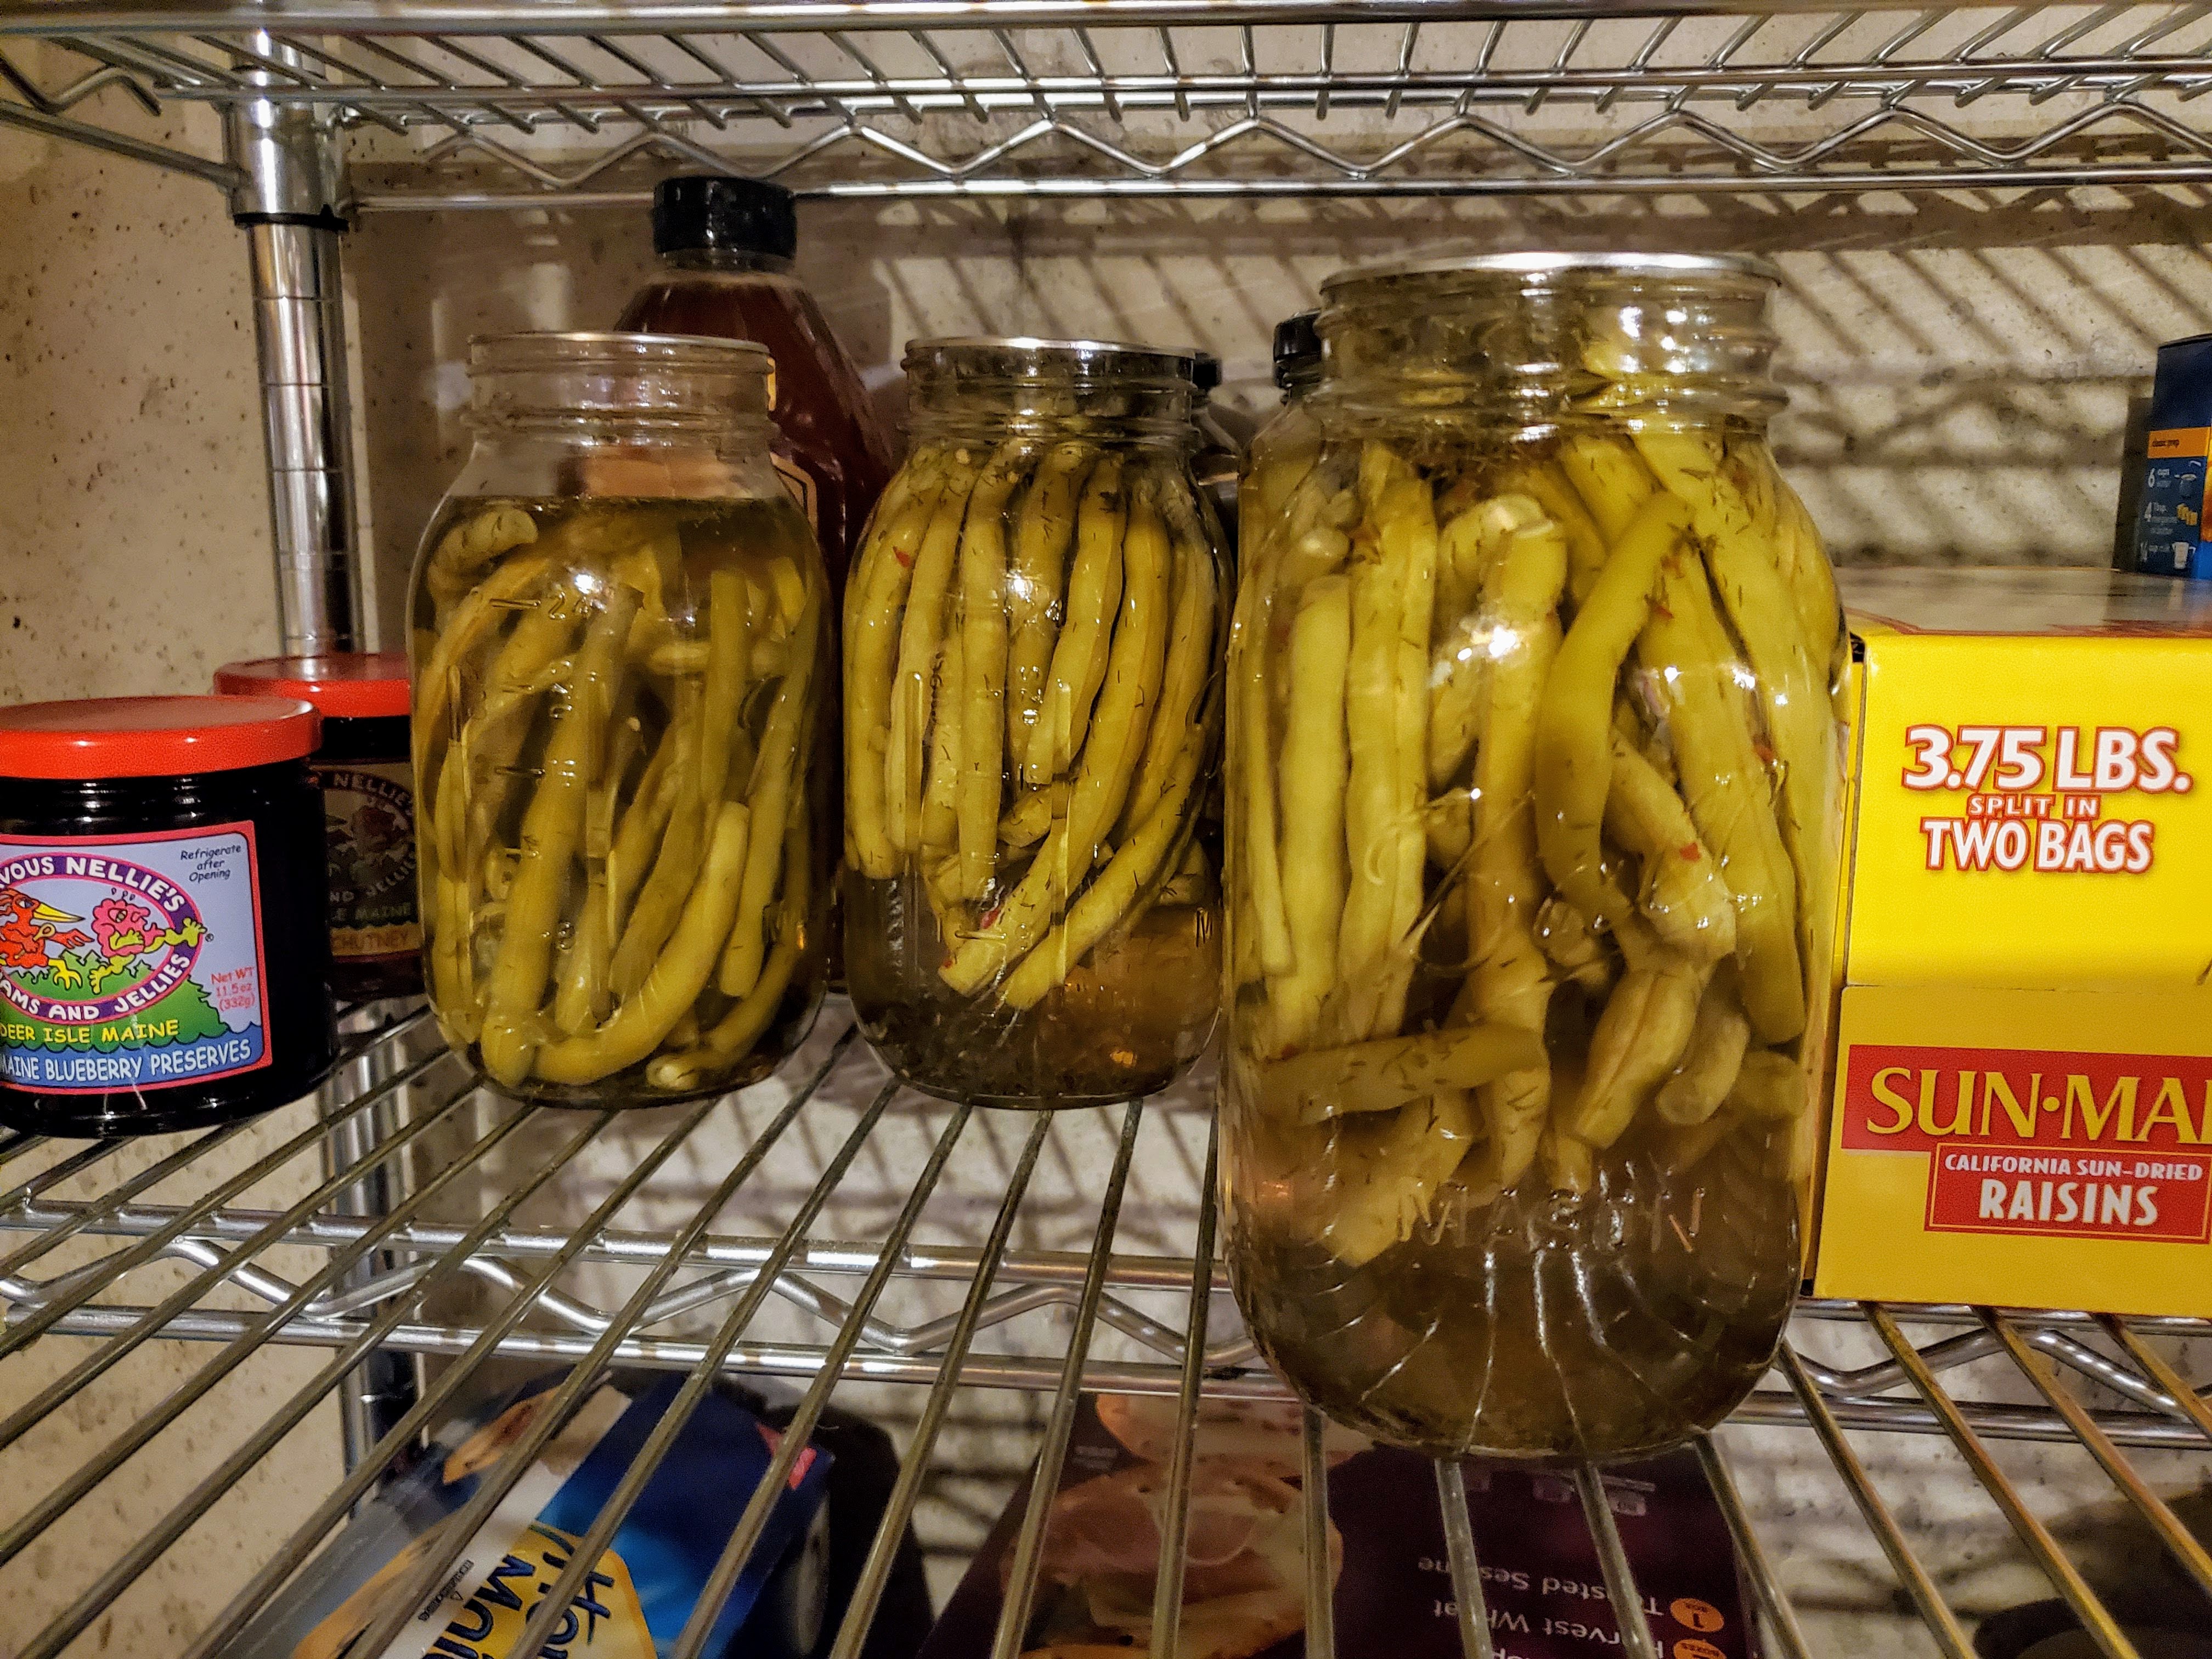
On those occasions when I would stay with them during the winter, I’d be asked before supper to go fetch a few jars of vegetables from their willy-wonka garden-preservation factory of a cellar. Jars of every shape and size, stuffed with bright peppers, striking green pickles, creepy-cloudy potatoes, all arranged in neat rows, and all harvested from their own small garden the summer before.
And now here I find myself, some thirty years later, having my own garden and my own harvest, crawling across every stitch of information I can find about the canning process.
I’ll share here what I’ve learned so far, but take this all with a healthy grain of salt as I am no expert. But, hopefully this may be a good starting point if you, like me, are interested in the process.
The Gear
When people talk about at-home canning, they’re generally talking about two specific things: “water bath” canning; and “pressure” canning.
The water bath method (which we’ll be doing today) is great for foods that are highly acidic, either naturally or through the addition of acid. These are things like fruit jellies and jams, most garden veggies (though they may need to be pickled – more on that later), and various sauces.
The pressure method is for everything else, like meat, non-acid fruits and veggies, soups and stocks, etc.
So, why? What’s the difference? Well, the goal of any type of food preservation (including refrigeration) is to inhibit microbial growth. The ultimate aim of canning is to achieve a shelf-stable product, meaning preserving the food without the need for refrigeration. This is important when talking about a large amount of food that would easily overwhelm freezer space.
Without refrigeration, you’re fighting a lot of microbial foes, but the big bad guy is botulism. It’s insidious, tasteless, odorless, doesn’t produce mold or any discoloration. It comes from a spore that, given time to reproduce in favorable environments, produces a toxin which can be deadly. The big ways to deal with botulism is to either hit it with sufficient acid, or heat your product well above the boiling point of water (which is where pressure canning comes in).
This is also why it’s important to always use known “safe” recipes from approved sources. Personally, I like the folks over at the National Center for Home Food Preservation, but there are plenty of reliable and safe sources out there.
So, today we’re using my water bath canning rig. That’s it on the left:

That’s it. Literally a big pot with a lid. This one came with a little wire rack on the inside to keep the jars off the bottom of the pot, but that’s really the sum total of things.
Speaking of jars:
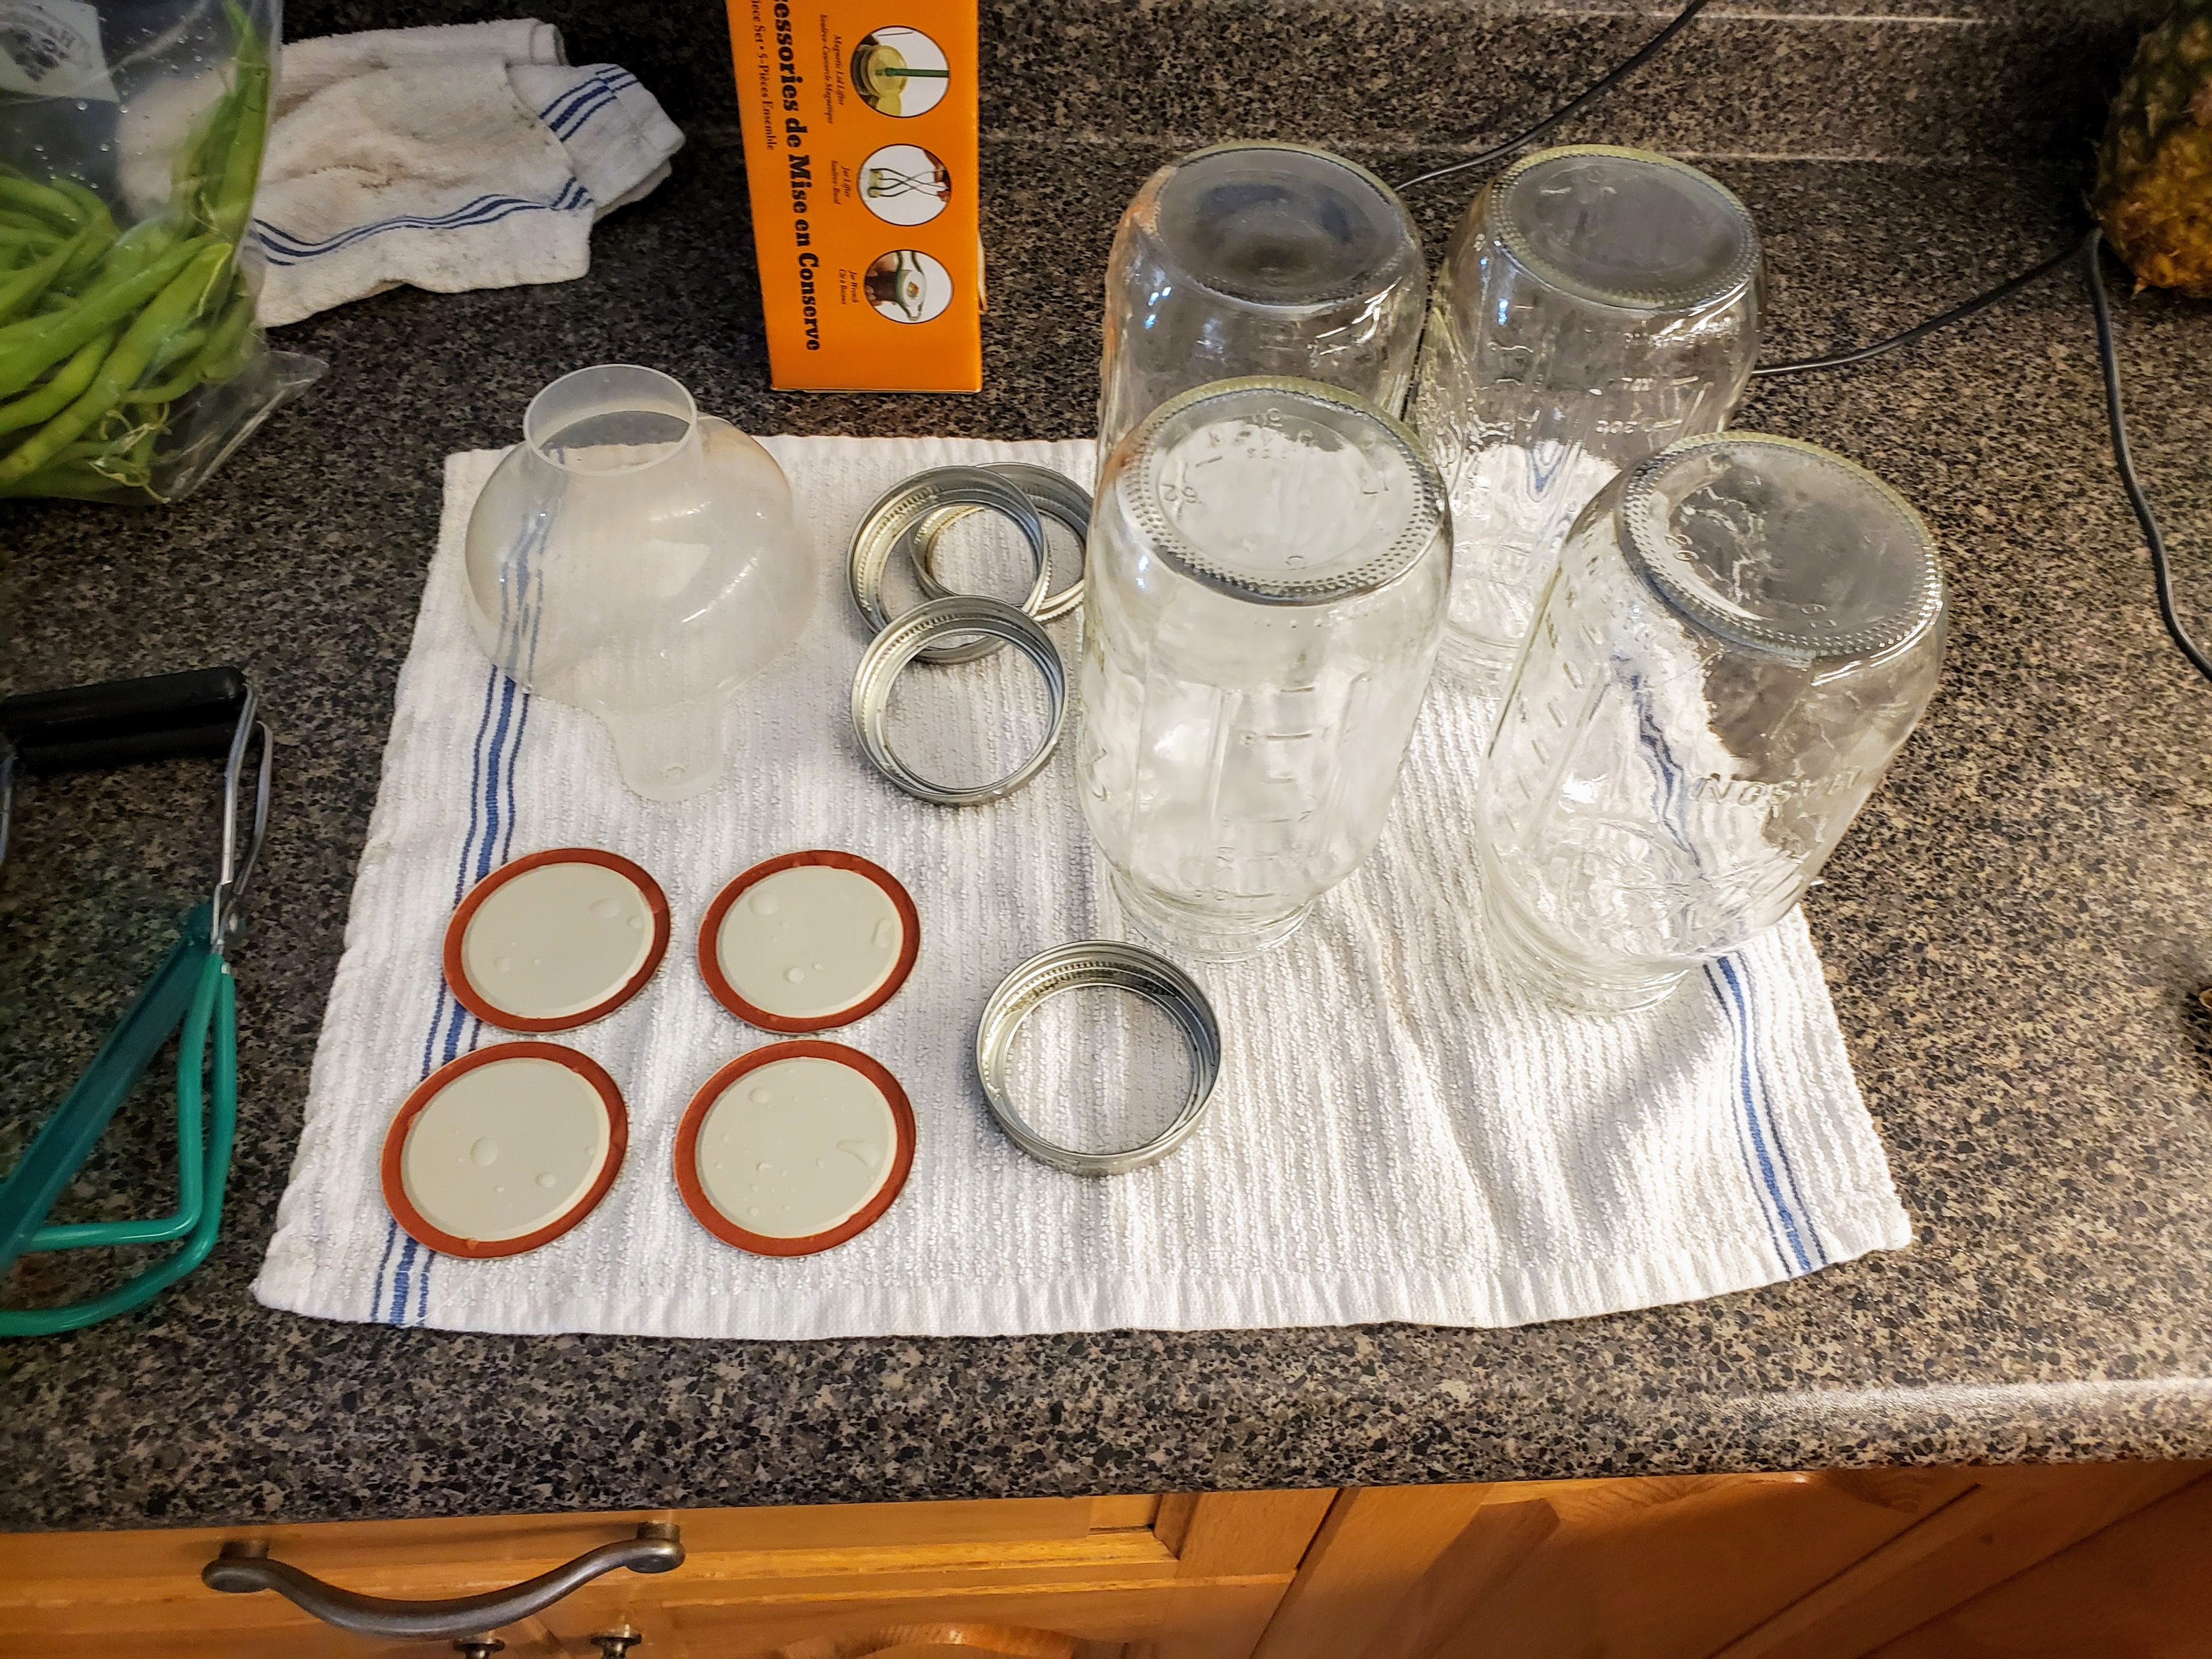
These are quart canning jars, I think Ball brand. One of the benefits of living in rural Maine is these are available and CHEAP at my local market, but you should be able to find them relatively easily wherever you are. Importantly: the lids (not the rings) are ONE TIME ONLY use, at least for canning. Also in this picture are my canning funnel and my jar lifting tongs on the left.
The Process
Today I’m putting up some of my green bean harvest, and I’ve decided to make them into spicy pickles (highly acidic!) with a recipe from those good people over at the NCHFP. I encourage you to take a look if you want the specific quantities involved here (which you need if you’re going to be canning).
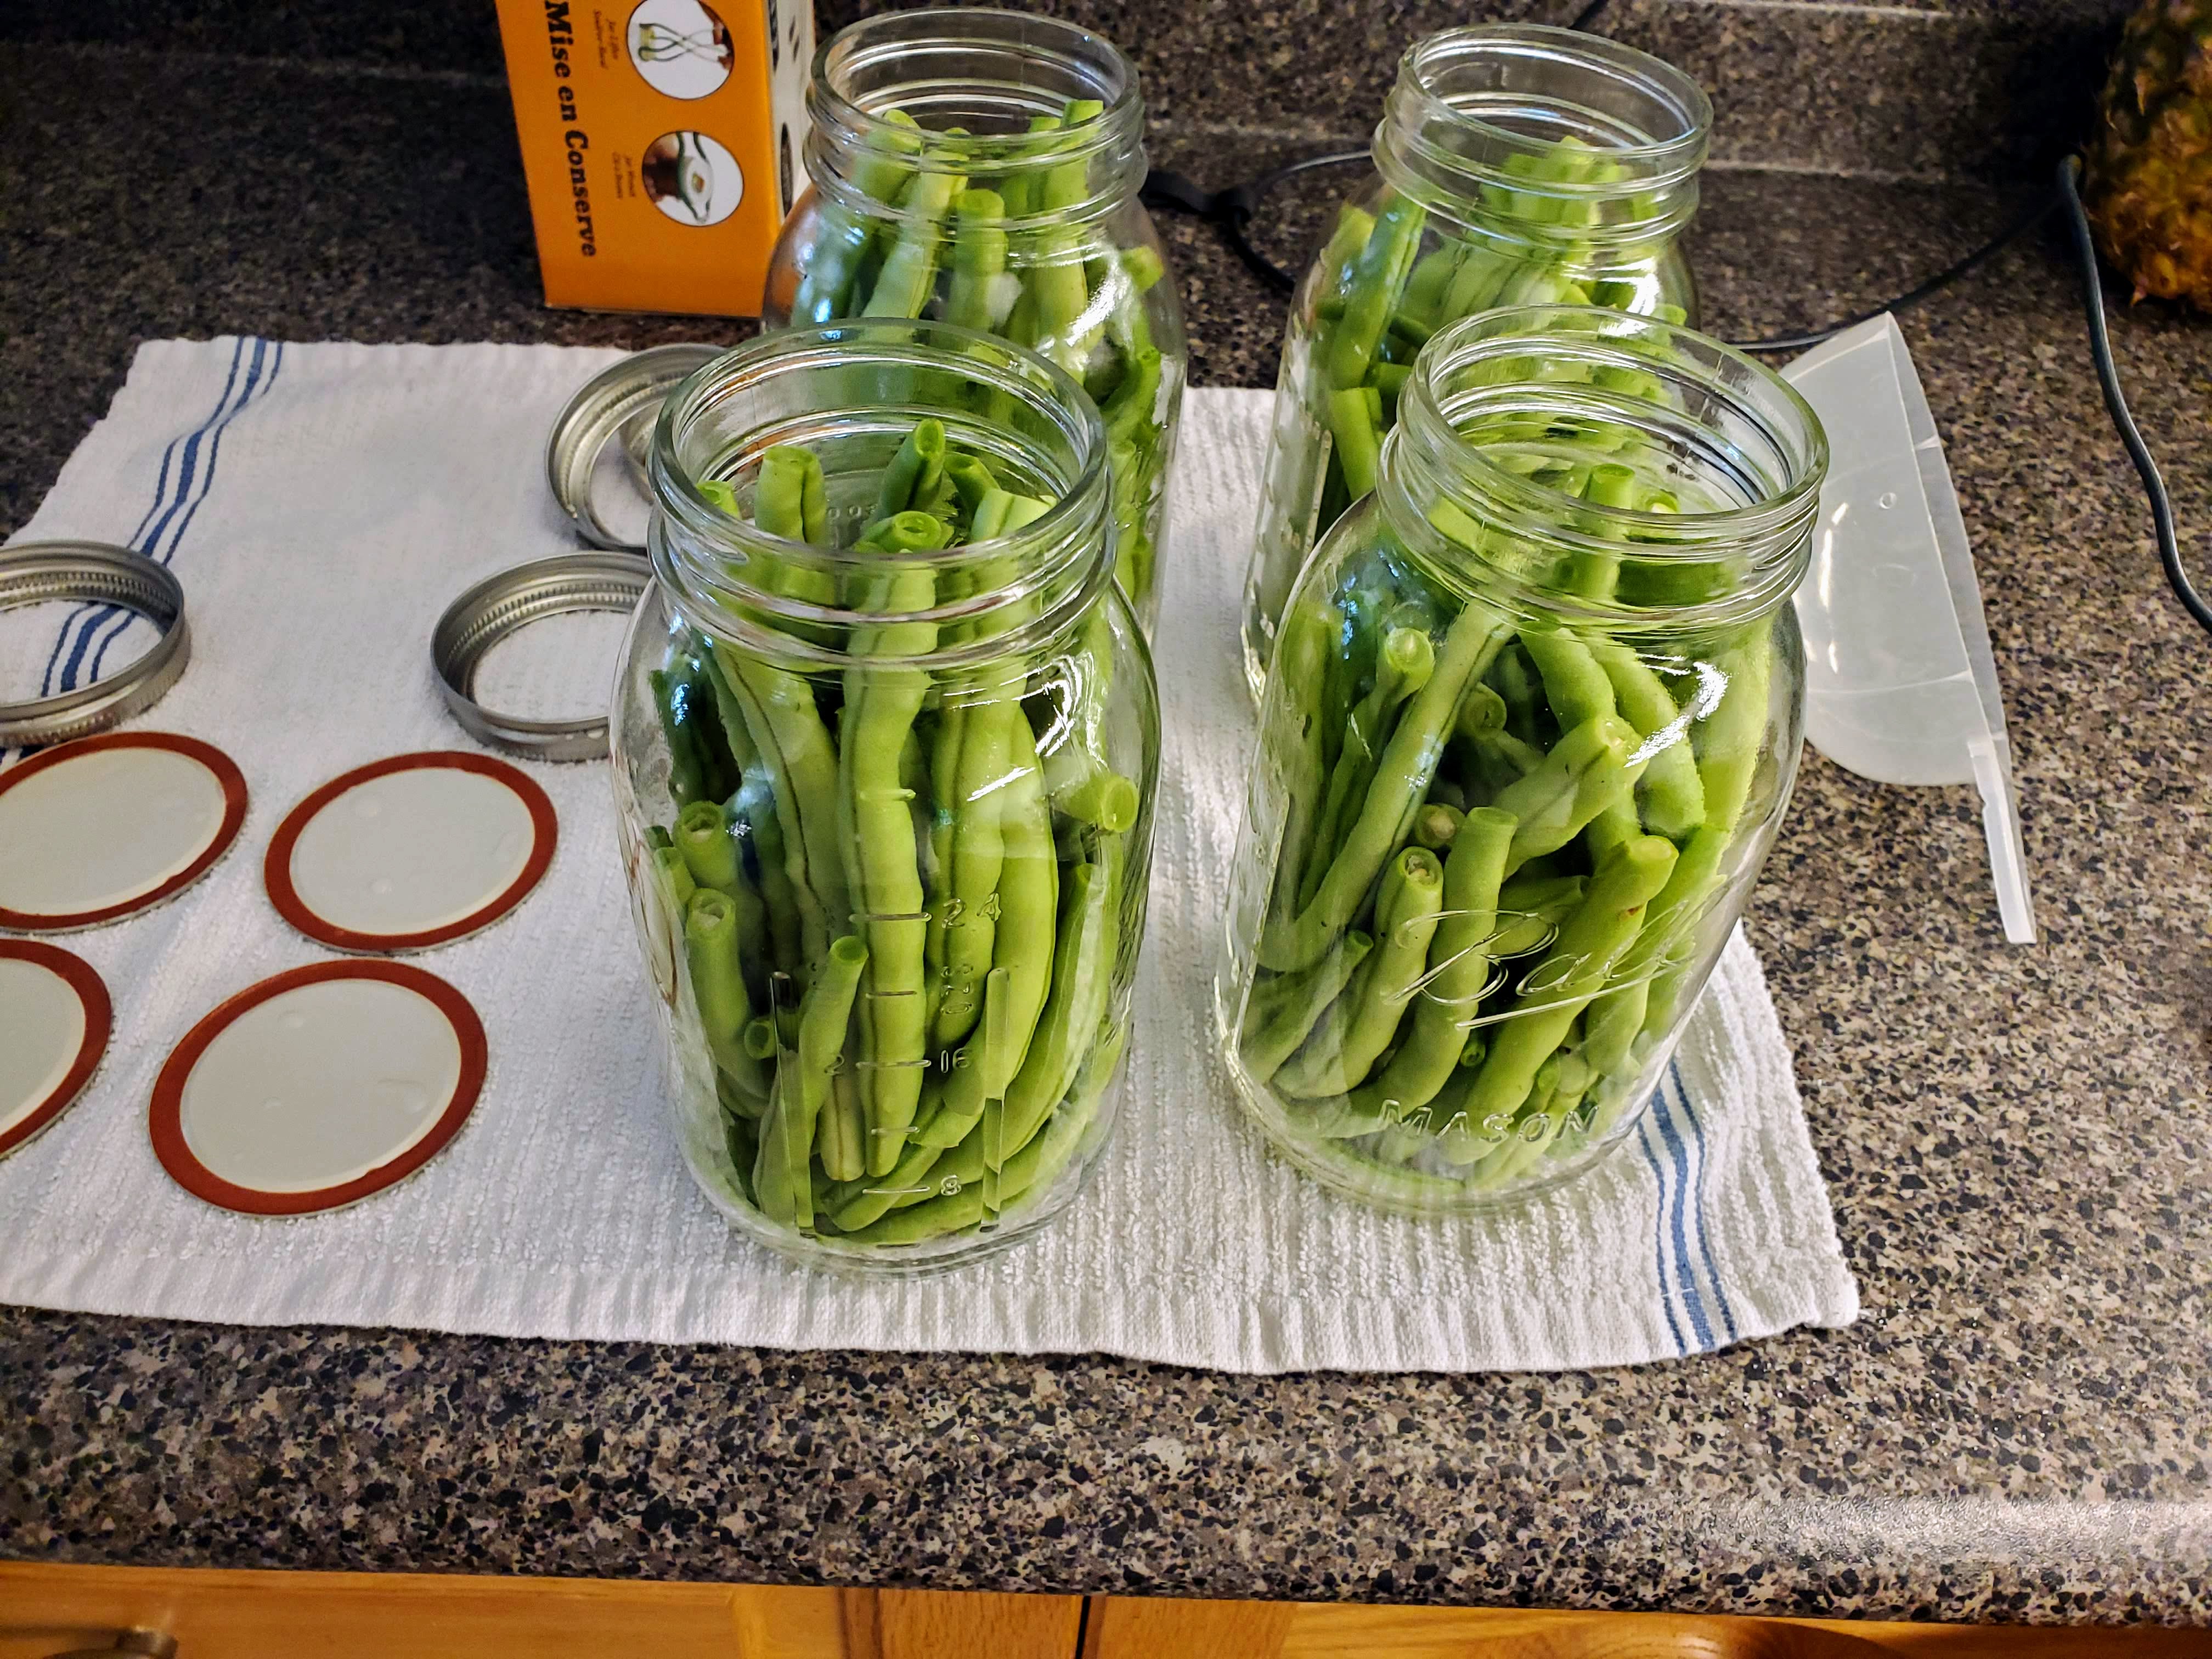
Step one: wash the beans really well, and cut the ends:

Step two: make sure your jars are clean, then pack the beans vertically:
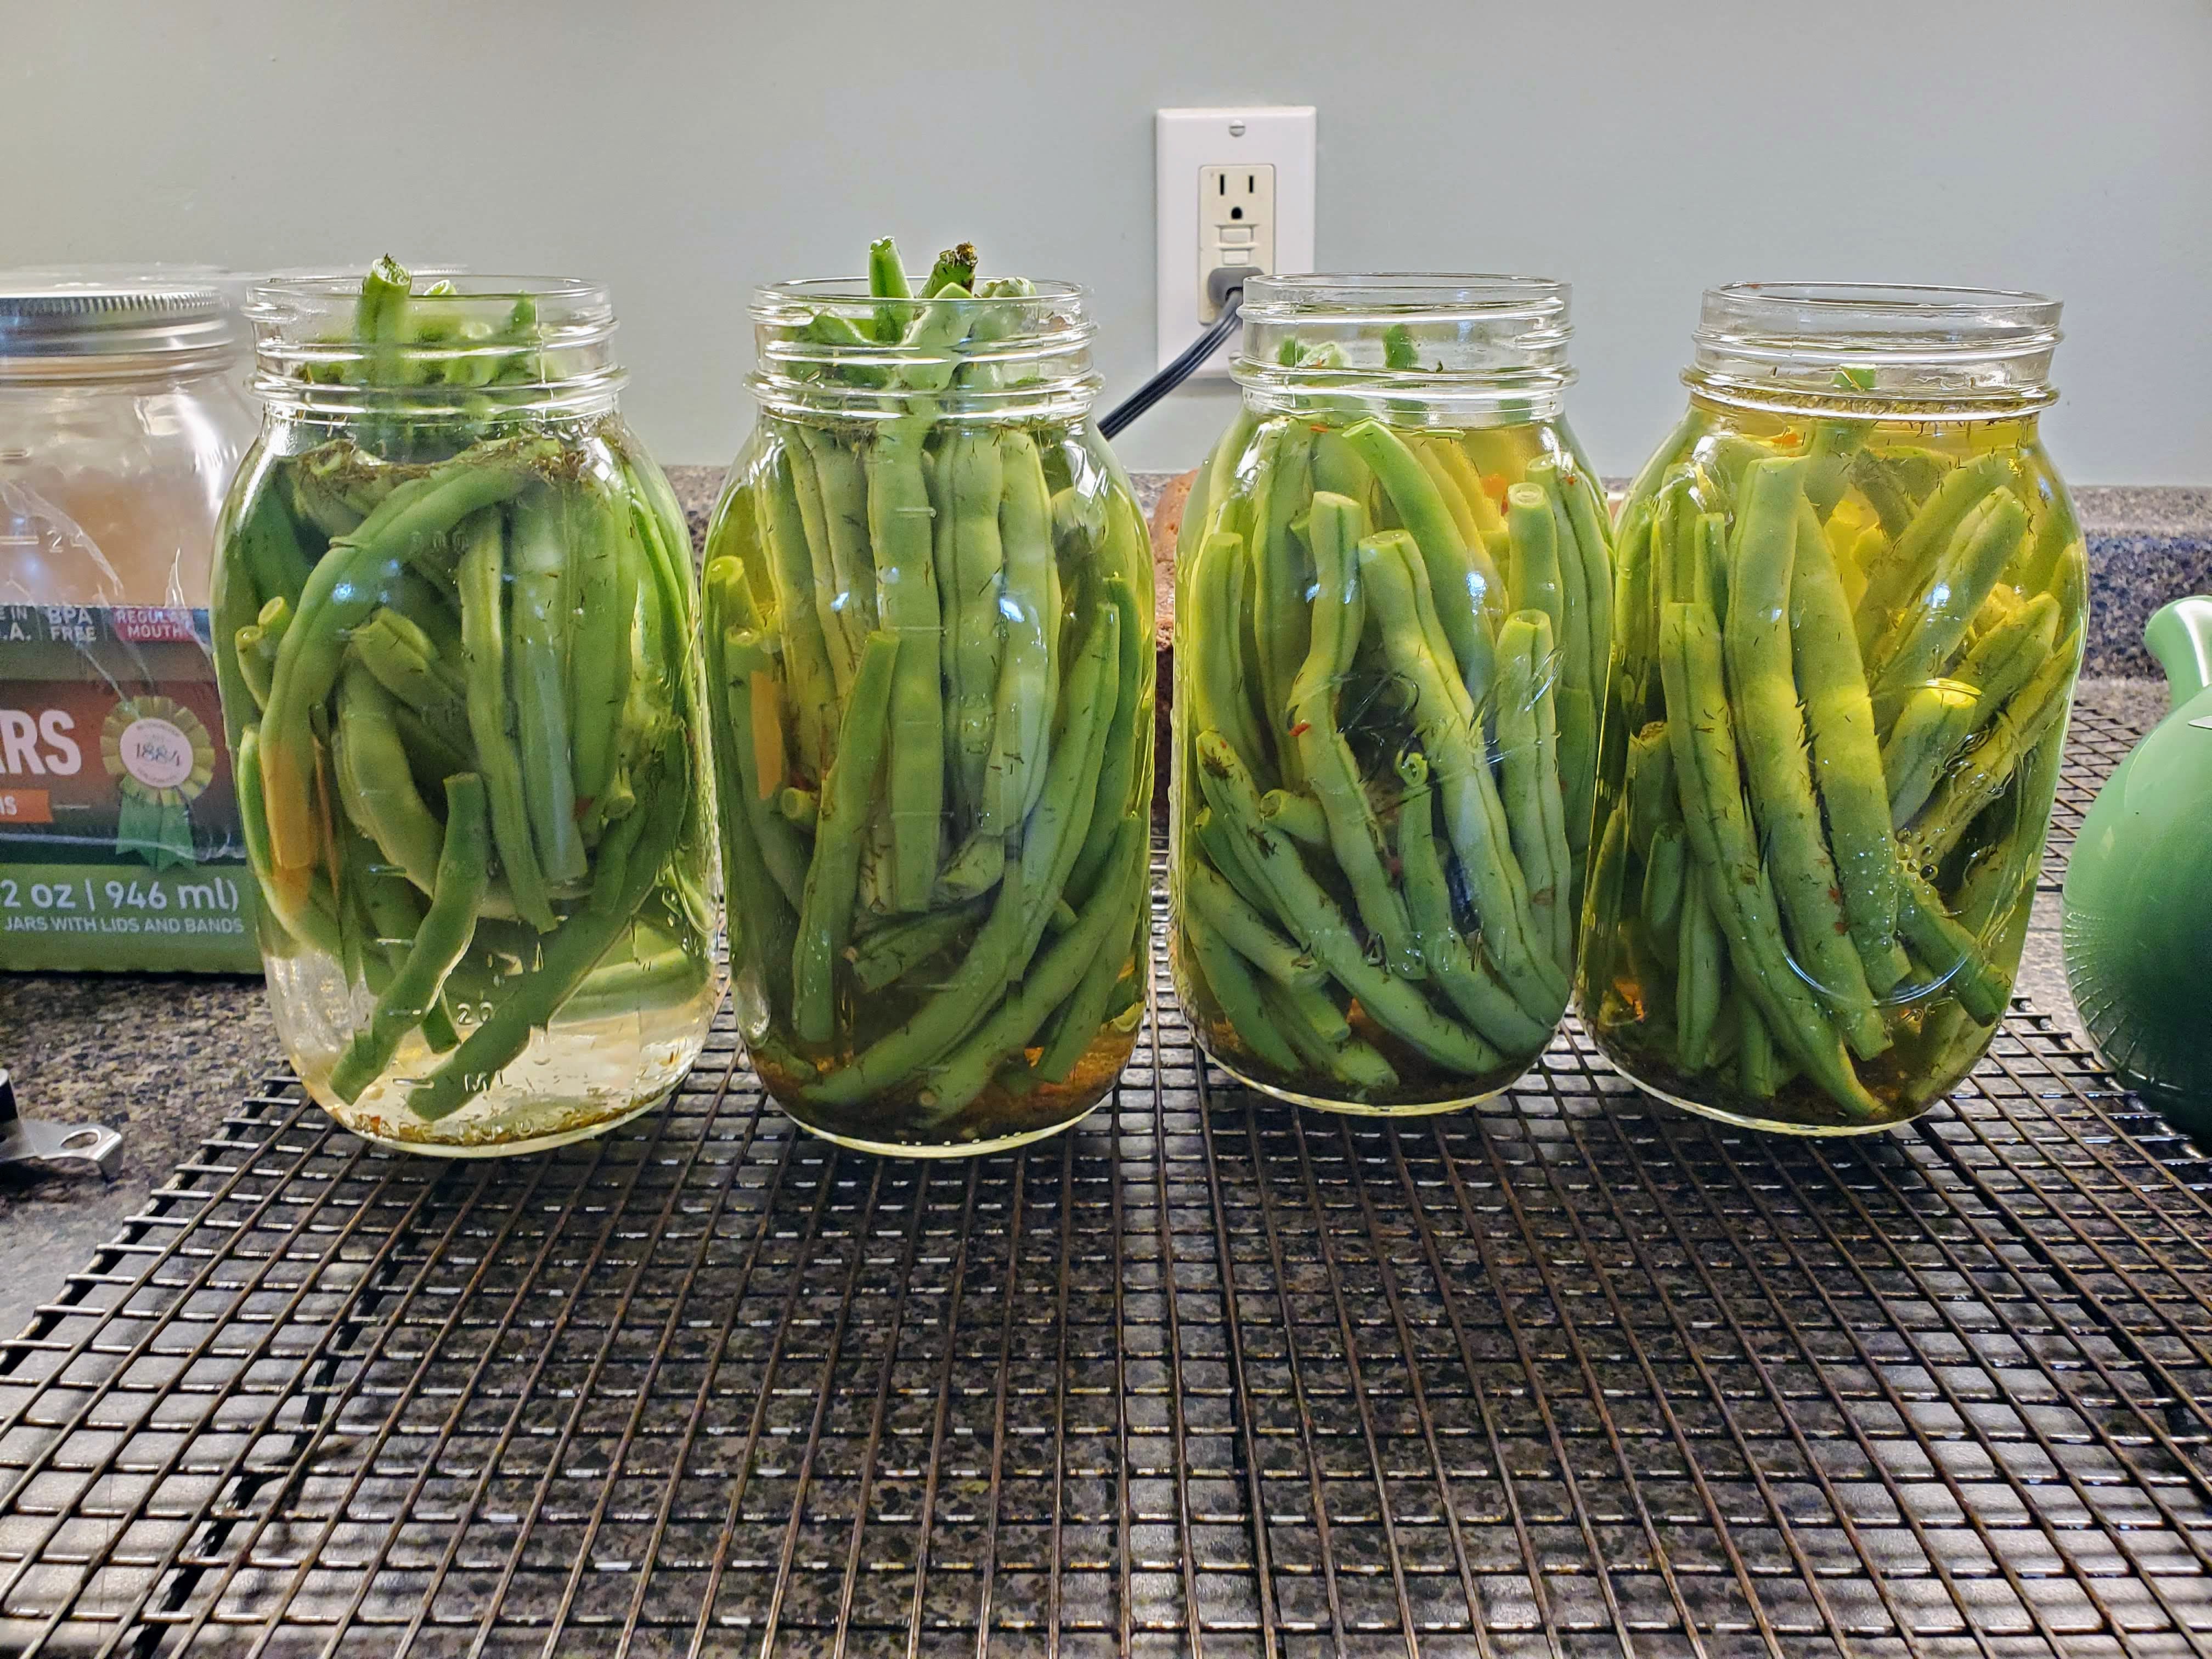
Step three: prepare your pickle brine, which in this case is a magic mixture of vinegar, water, dill, salt, and hot pepper flakes:

Step four: get the brine into the jars, leaving the appropriate air-gap between the brine and the lid (called “headspace” in the canning circles).
At this point, you already have pickles. You can just stick these in the refrigerator if you want, and they’ll keep a good, long time so long as they stay refrigerated. BUT, if you want to be able to put them on a shelf in the cellar until some cold, gray winter day, we need to “process” them.
Step five: add the lids, use the rings to hold them in place (only finger tight), and get them in the boiling water canner for the instructed amount of time (this is called “processing”):

So what’s happening here? Well, two things. First, the product is obviously being heated (and held) at 212F for a period of time. That’s going to hopefully kill the bulk of any nasty microbes in there, while our acid will play defense against the botulism.
Second, the mechanism of the can lids and the rings, together with the heating, will form a vacuum seal, which will hopefully keep out any NEW bad guys from sneaking in.
After the designated processing time, move the cans to a rack to cool. If you’re lucky, you’ll hear four “pings” as each lid collapses down from the vacuum effect and locks into place. After that, put them in a cool, dark place until that one winter morning where you need the best damn Bloody Mary garnish on earth.