
No #RecipeUpTop today because this is a BBQ post, and, well, it’s literally all technique. Were I to summarize: season several chuck roasts with salt and cracked black pepper, then cook over coals and woodsmoke until 205F internal. Rest and serve. The end.
But there’s more to the story. Oh, so much more.
In the beginning, there was brisket. It was cheap because it was tough, and took a lot of time and effort to cook. The same thing that made it initially undesirable – namely, a ton of connective tissue – became its greatest strength. When cooked long and slow, those tissues break down in to lip-smackin’ gelatin, and deliver something truly magical. Thus, like so much incredible cuisine, from poverty and necessity, rose art. Now, (depending on where you live) brisket is a high-end cut, so much so that I frankly can’t justify buying it.
But, sometimes on a breezy, summer day, the unquenchable urge strikes for that buttery, smoky, peppery slice of glistening heaven that is Texas-style brisket.
My solution? Turn to that cut I love so much, the lowly chuck roast:
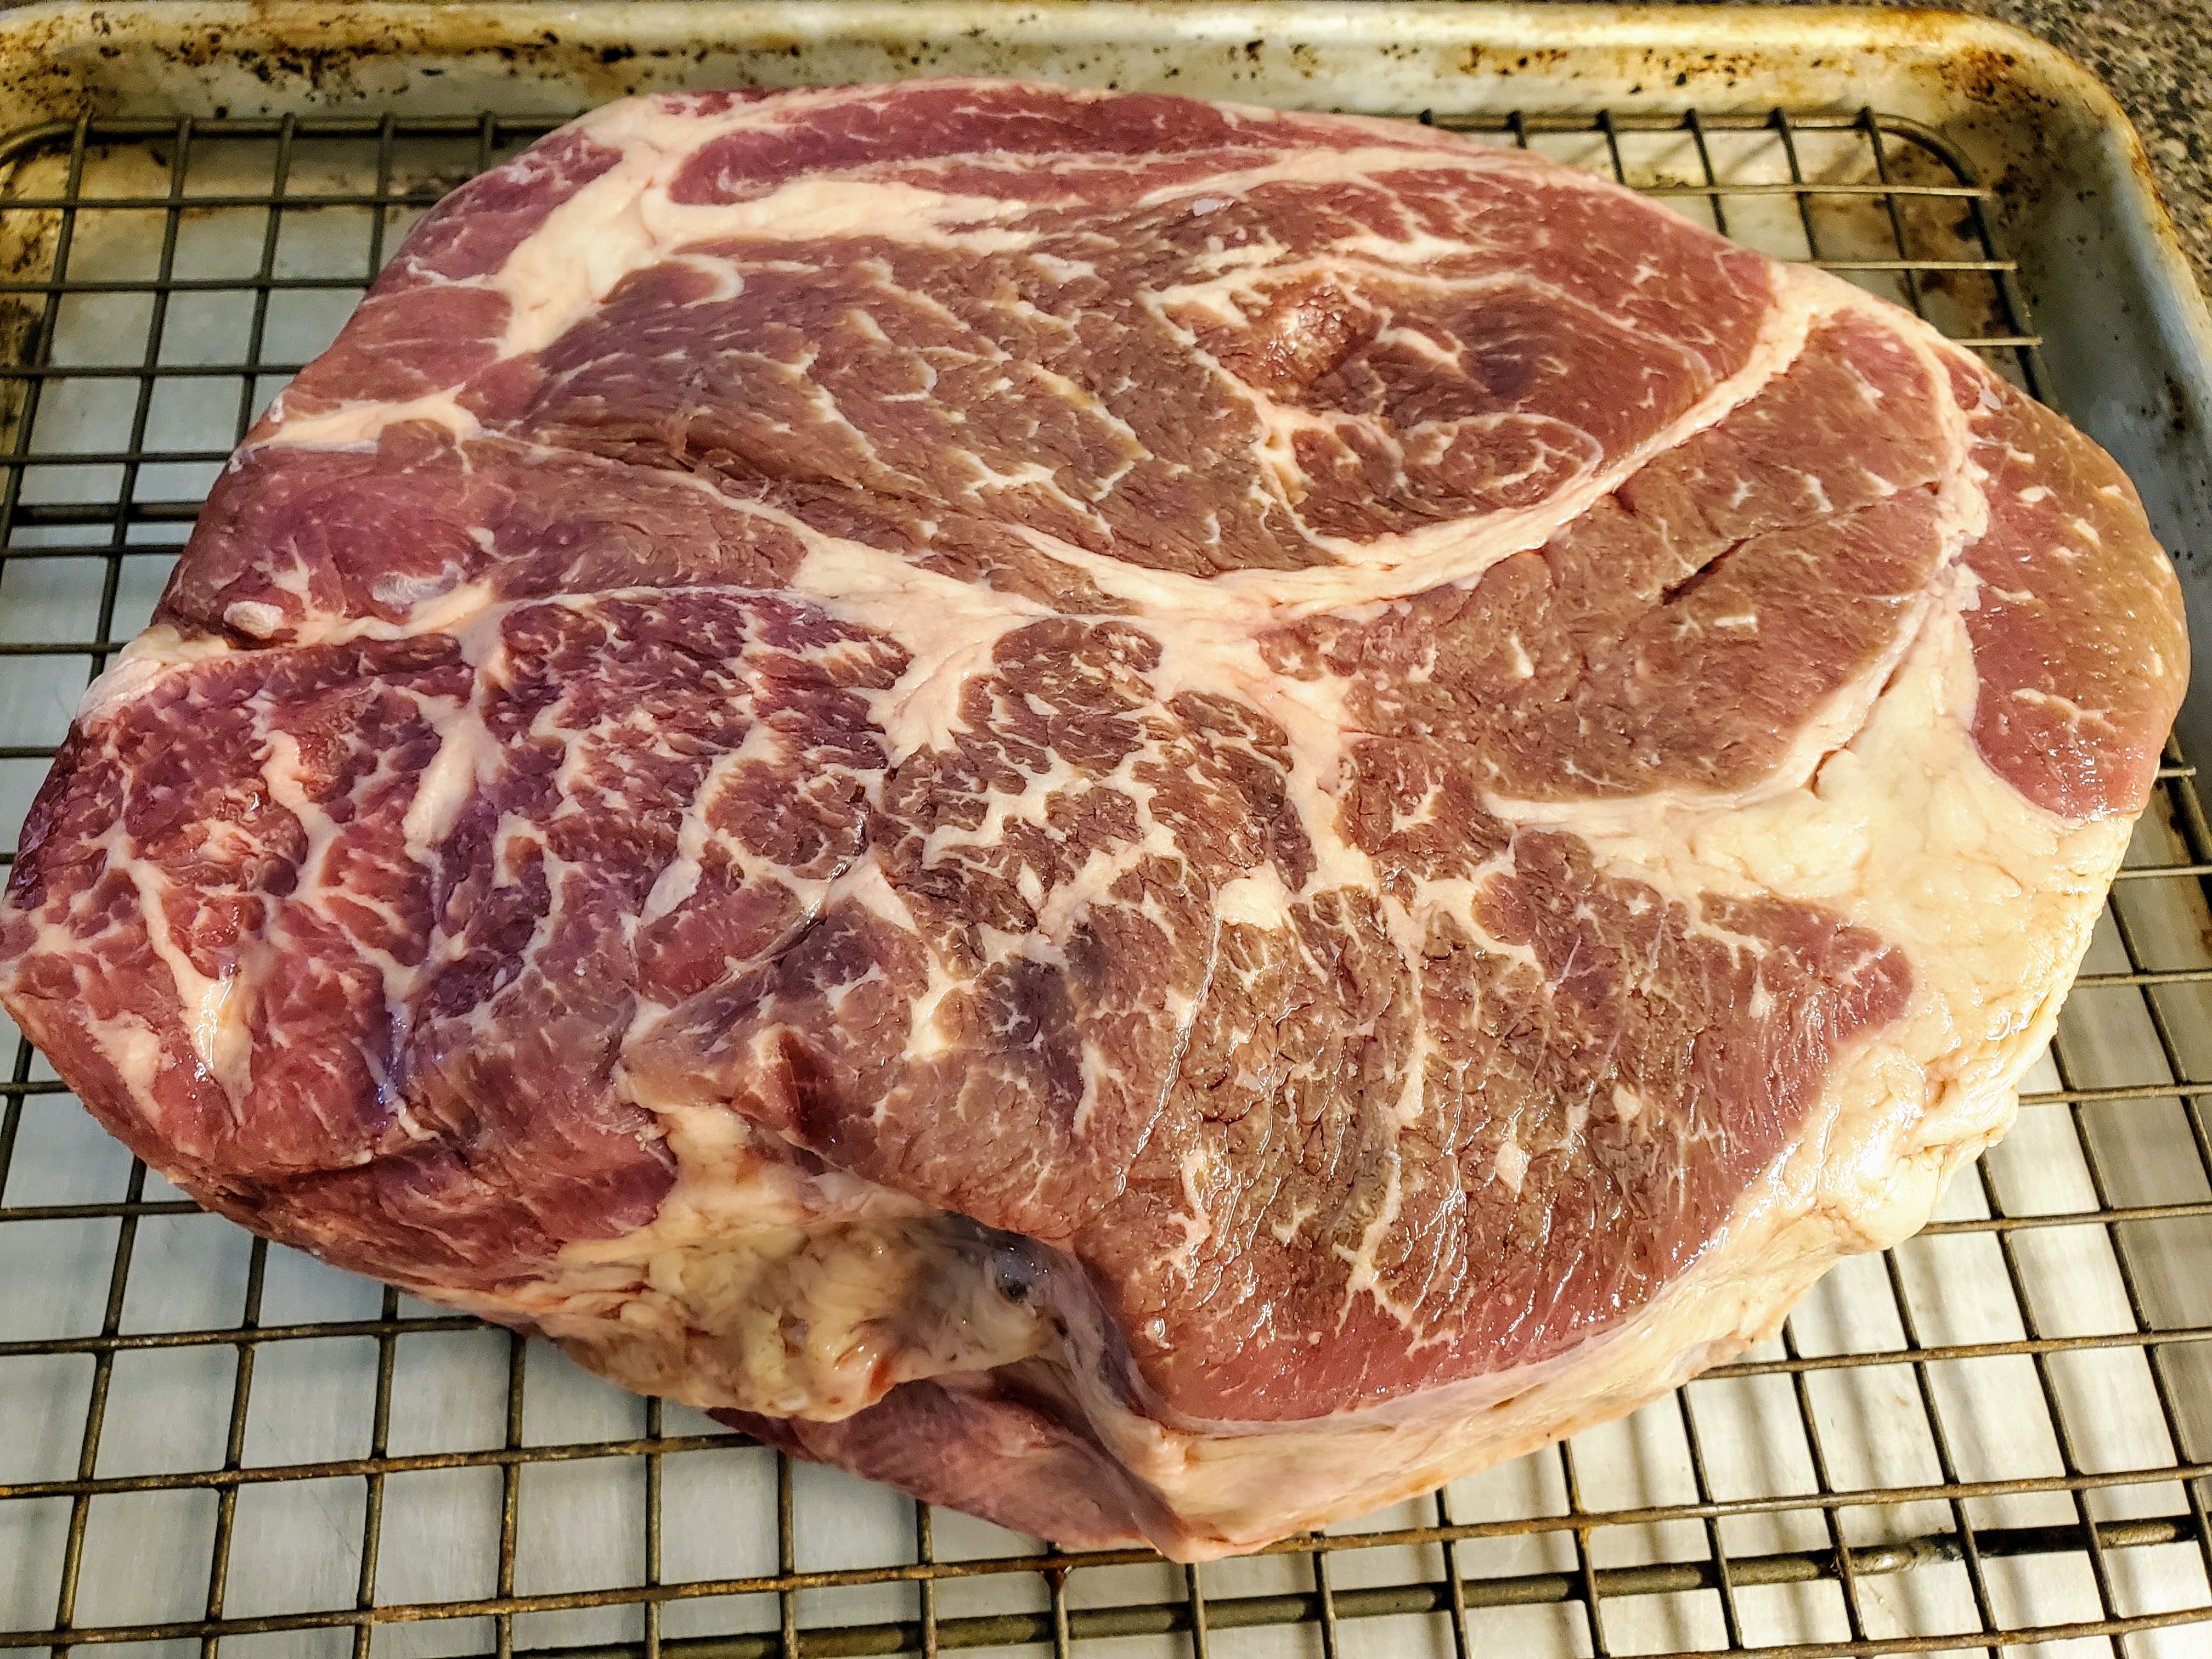
The chuck roast is a lot like brisket in some very important ways. First, it has a lot of that connective tissue that we were just talking about. Second, there’s a ton of intramuscular fat (take a look at that marbling). Those two things mean that it needs to be exposed to long cooking, but also that it won’t dry out from all that time in the heat (unlike say, a sirloin or “eye roast” or “top round” or any of the other oddball names they like to give lean roasts).
But most importantly, chuck roasts are CHEAP and can be used for a million different things. I keep them around, vacuum sealed and frozen, for everything from pot roast and pot roast turnovers, to chili, to beef stew, to grinding for burgers, and the list goes on.
So, the meat selected, let’s talk BBQ.
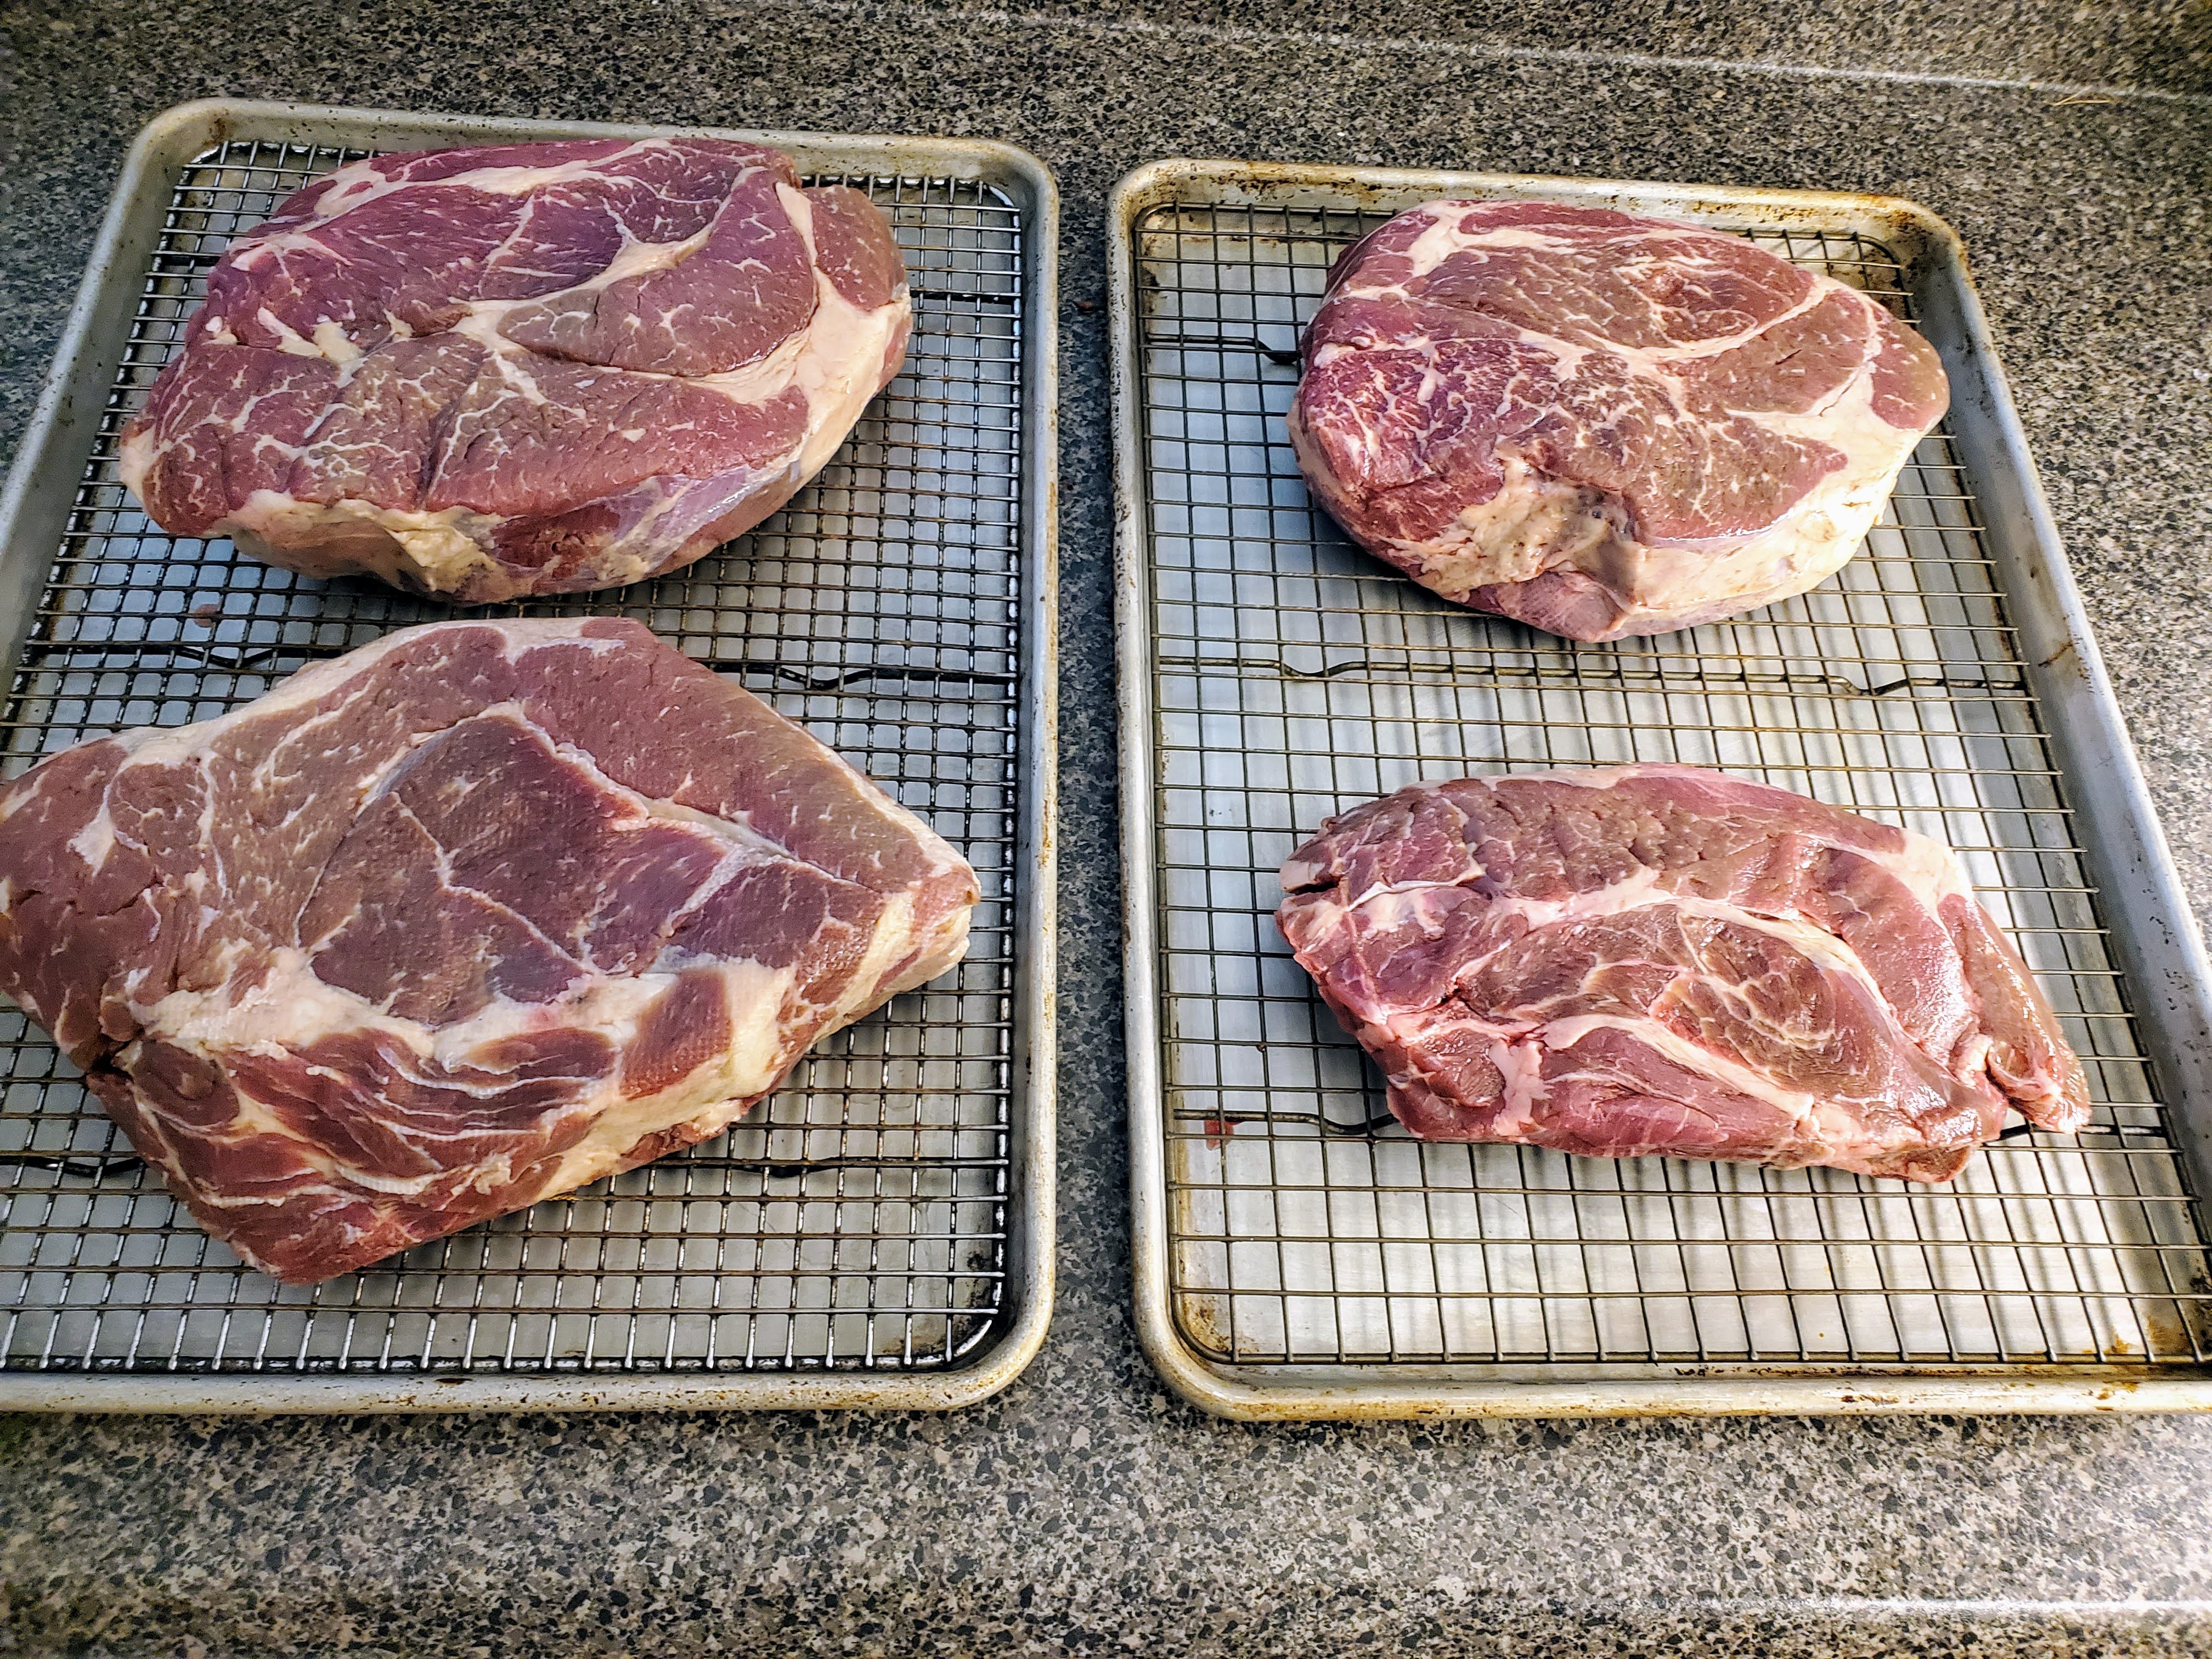
As we discussed in the potato chip post, I despise waste. Whether I’m heating up a pot of oil, or starting a fire in the smoker, I want to get the most out of it. So, we’re doing four (4) of these chonkers:
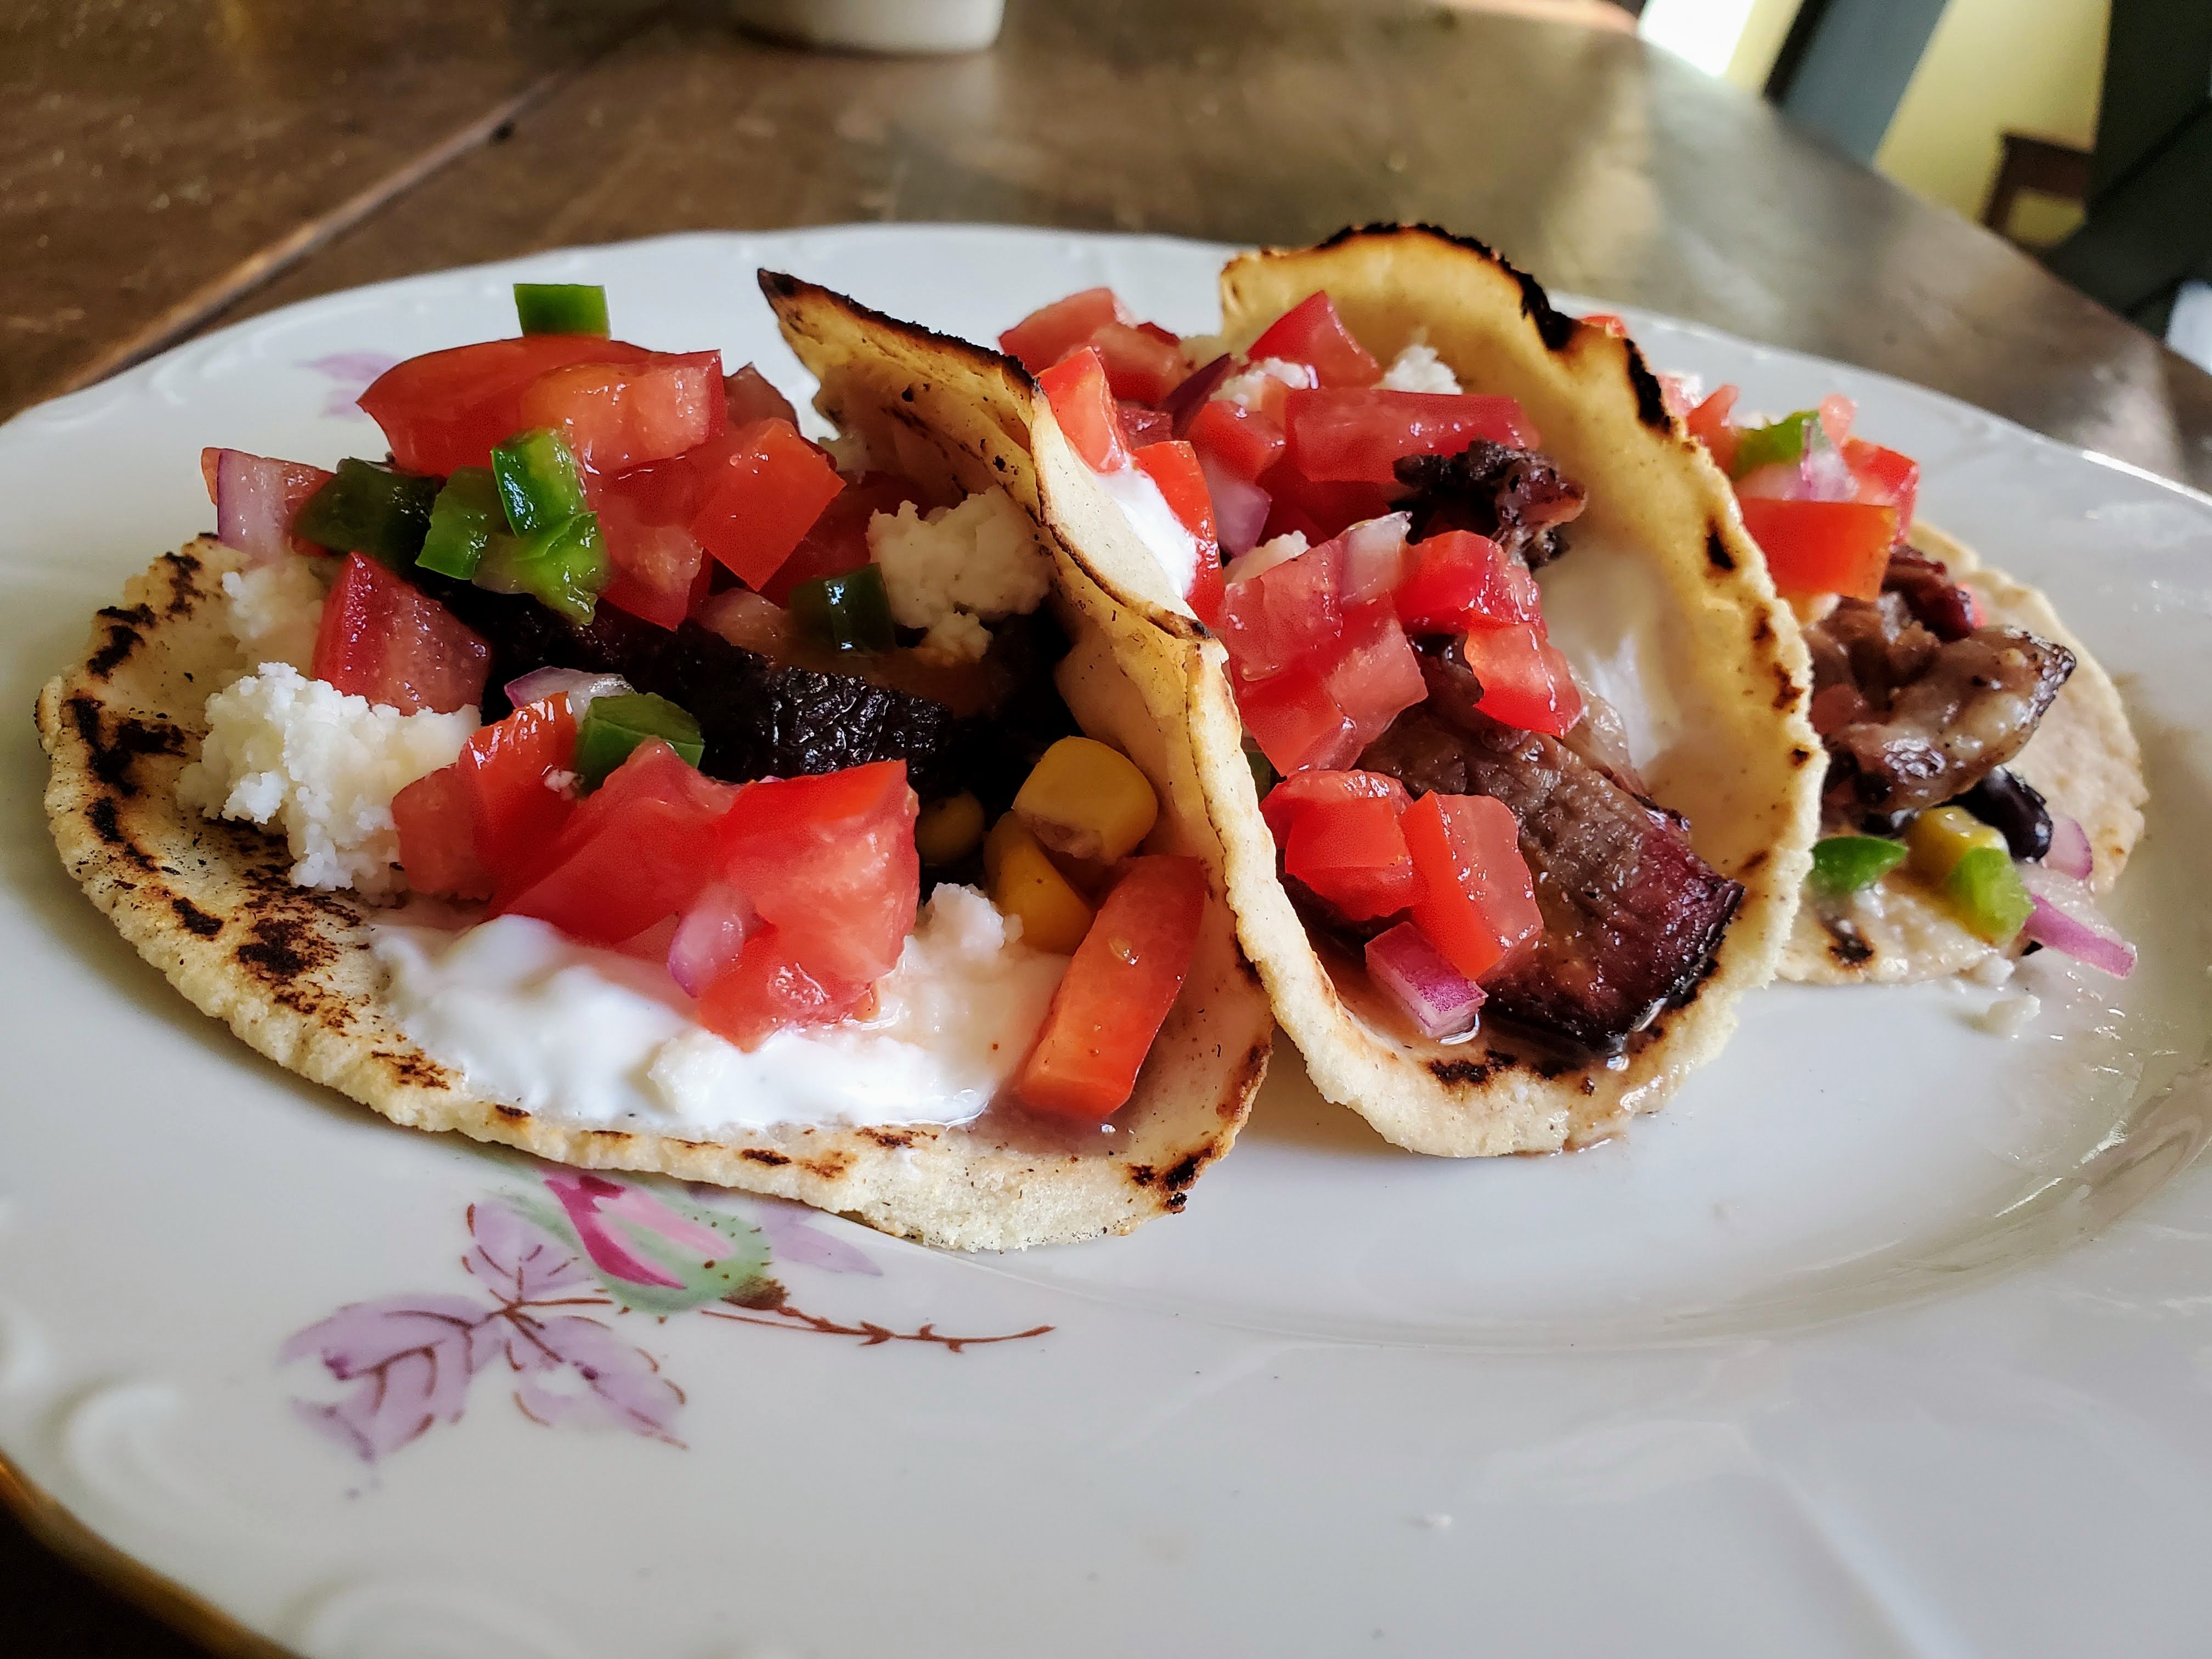
What the hell am I going to do with all this? Well, it freezes with almost no loss of quality, and in the Maine winter, running the smoker isn’t feasible. So, portioned out and frozen, this will provide a quick grab-and-thaw delicious component for sandwiches, breakfast hash, or (my favorite) tacos with homemade tortillas:
But before we get there, we have some cooking to do. First up, the rub.
We’ve talked about this before in our pulled pork screed, but BBQ spice rubs are the stuff of blood-feuds. For pork (and chicken), I have no issue with a complex mix of spices and sugar, but for brisket (even the fake kind), I don’t think you can top classic salt and pepper.
A lot of folks initially buck this notion, thinking it’s too basic. But that’s exactly the point: in its simplicity lies its perfection. And look, if you don’t believe me, ask Aaron Franklin, the king of Texas brisket.
That said, there’s slightly more to the discussion. First, I use kosher salt, and a lot of it. The shape of the flakes are designed to cling to the surface of meat, and really there’s no substitute. Second, I use freshly-cracked black pepper, and I grind it very coarse in a mortar and pestle. If you’re thinking of using pre-ground pepper, just eat a hot dog instead.
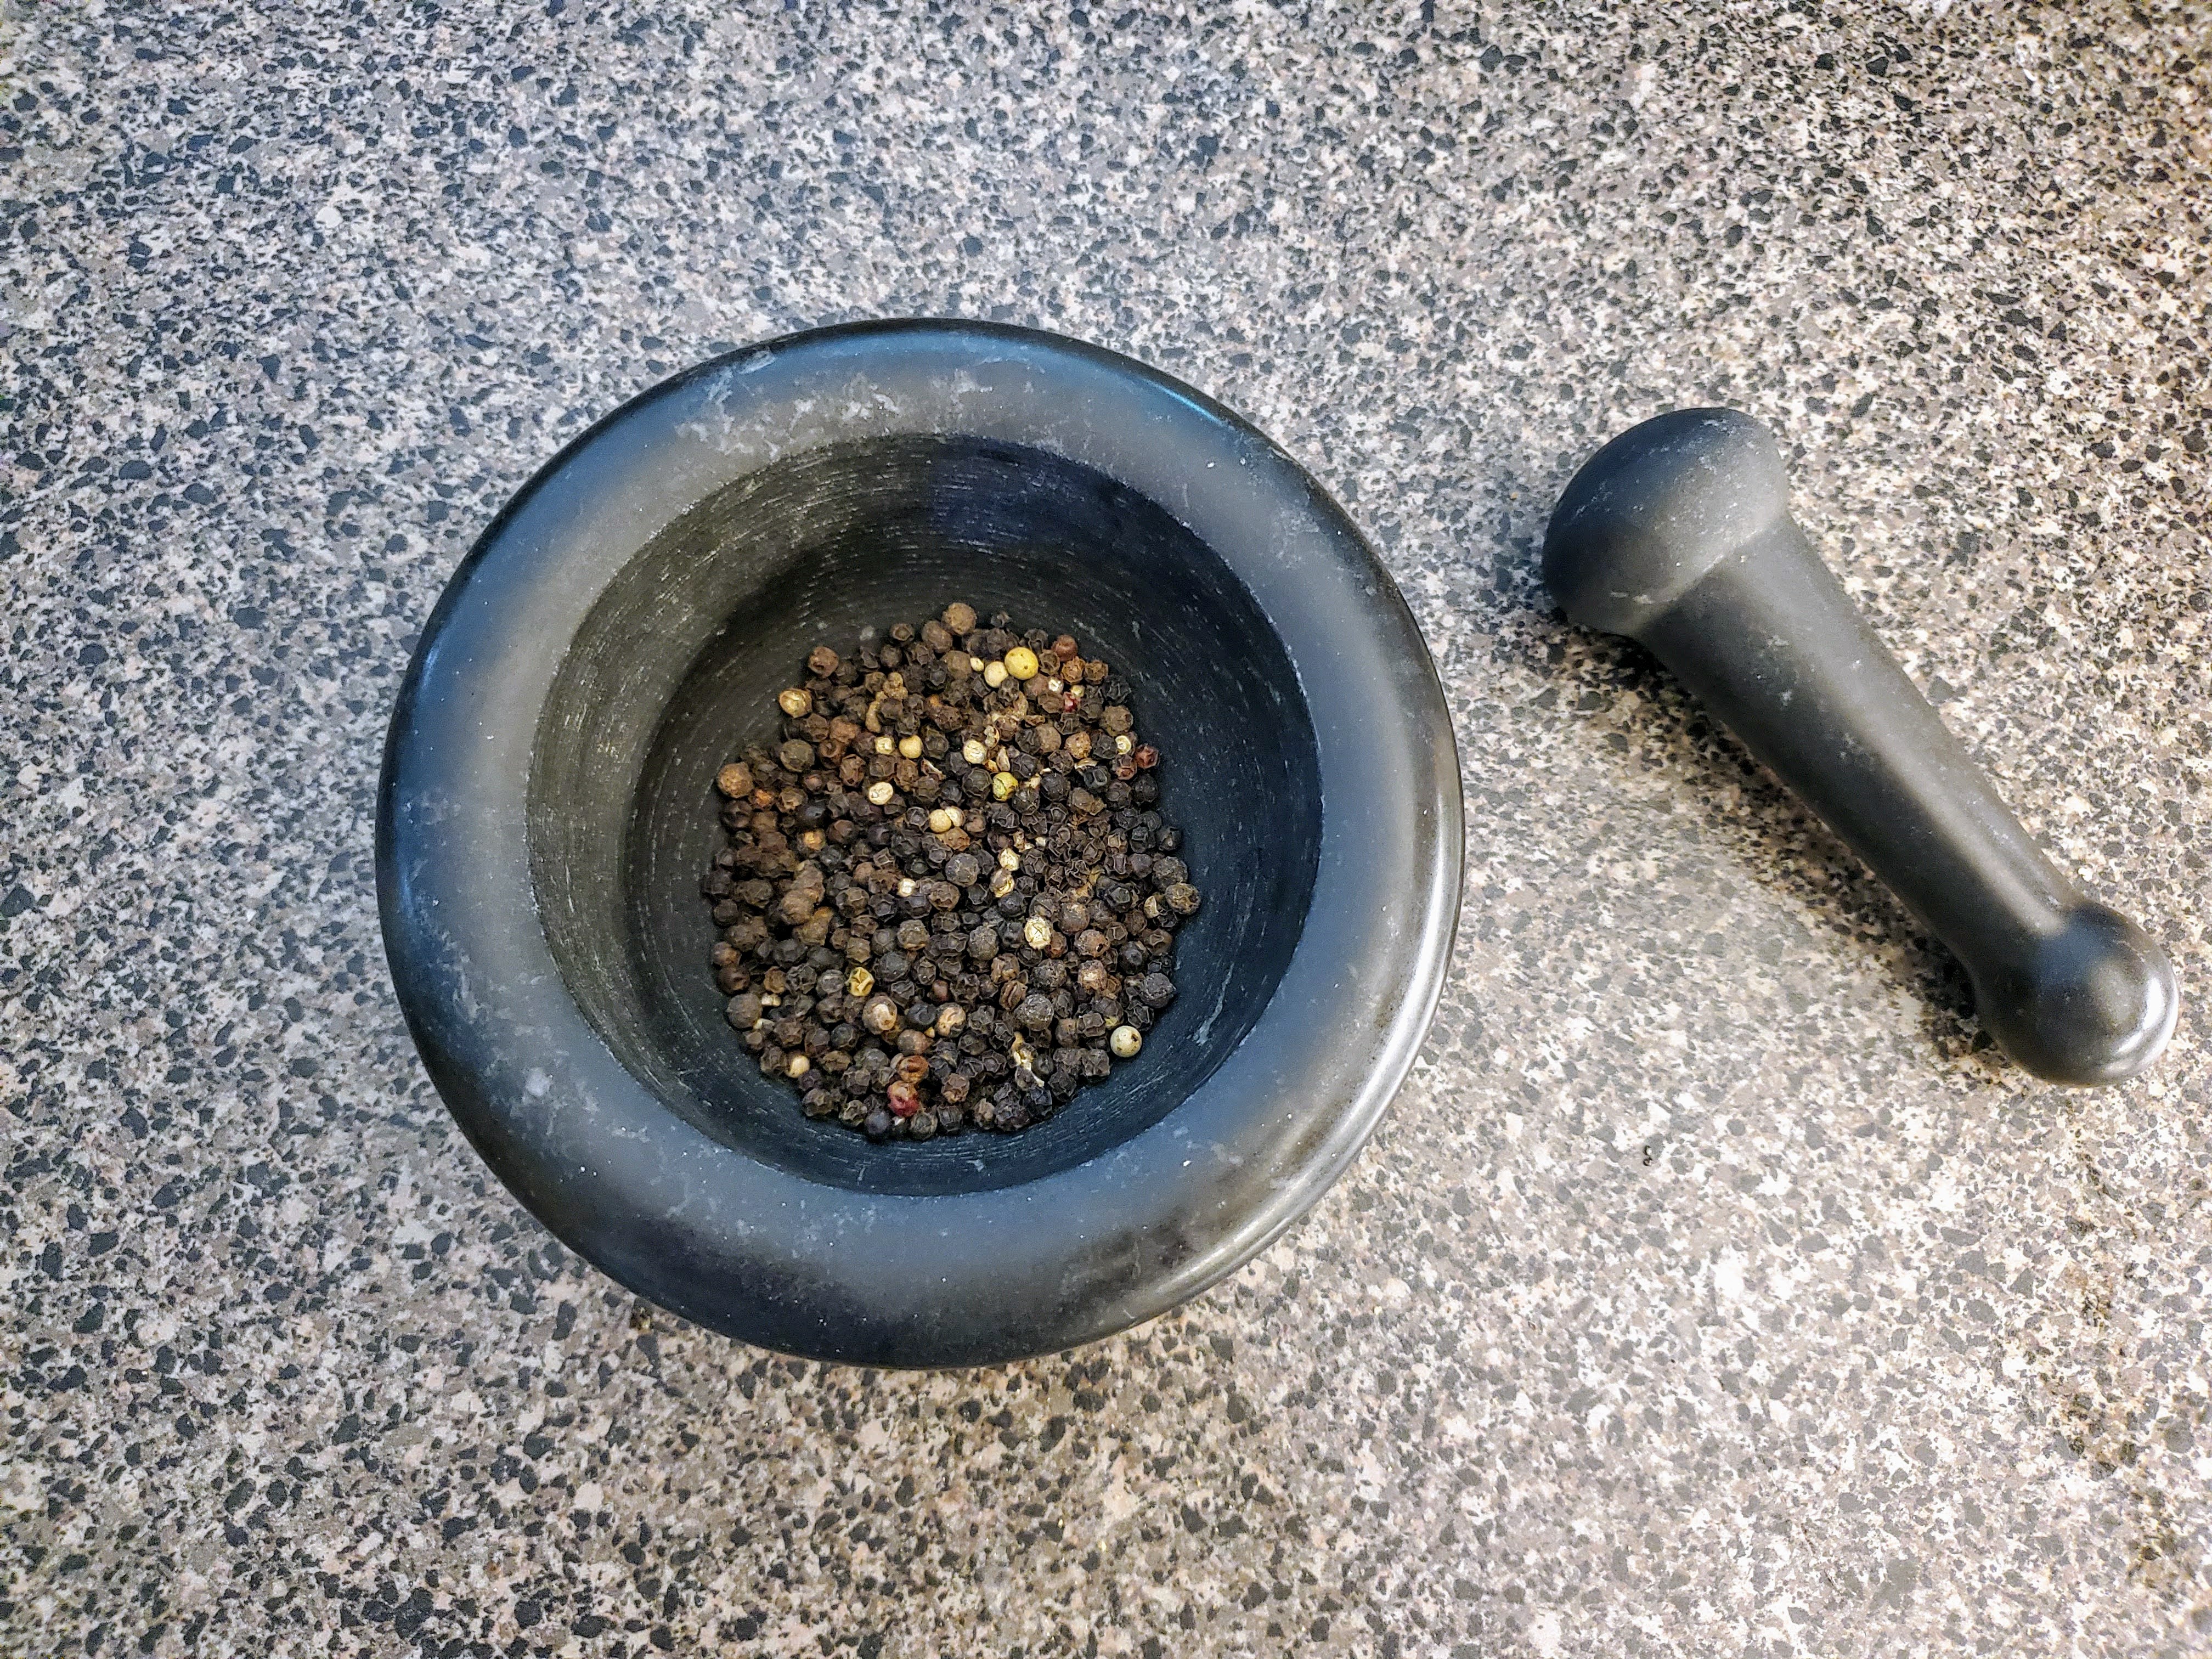
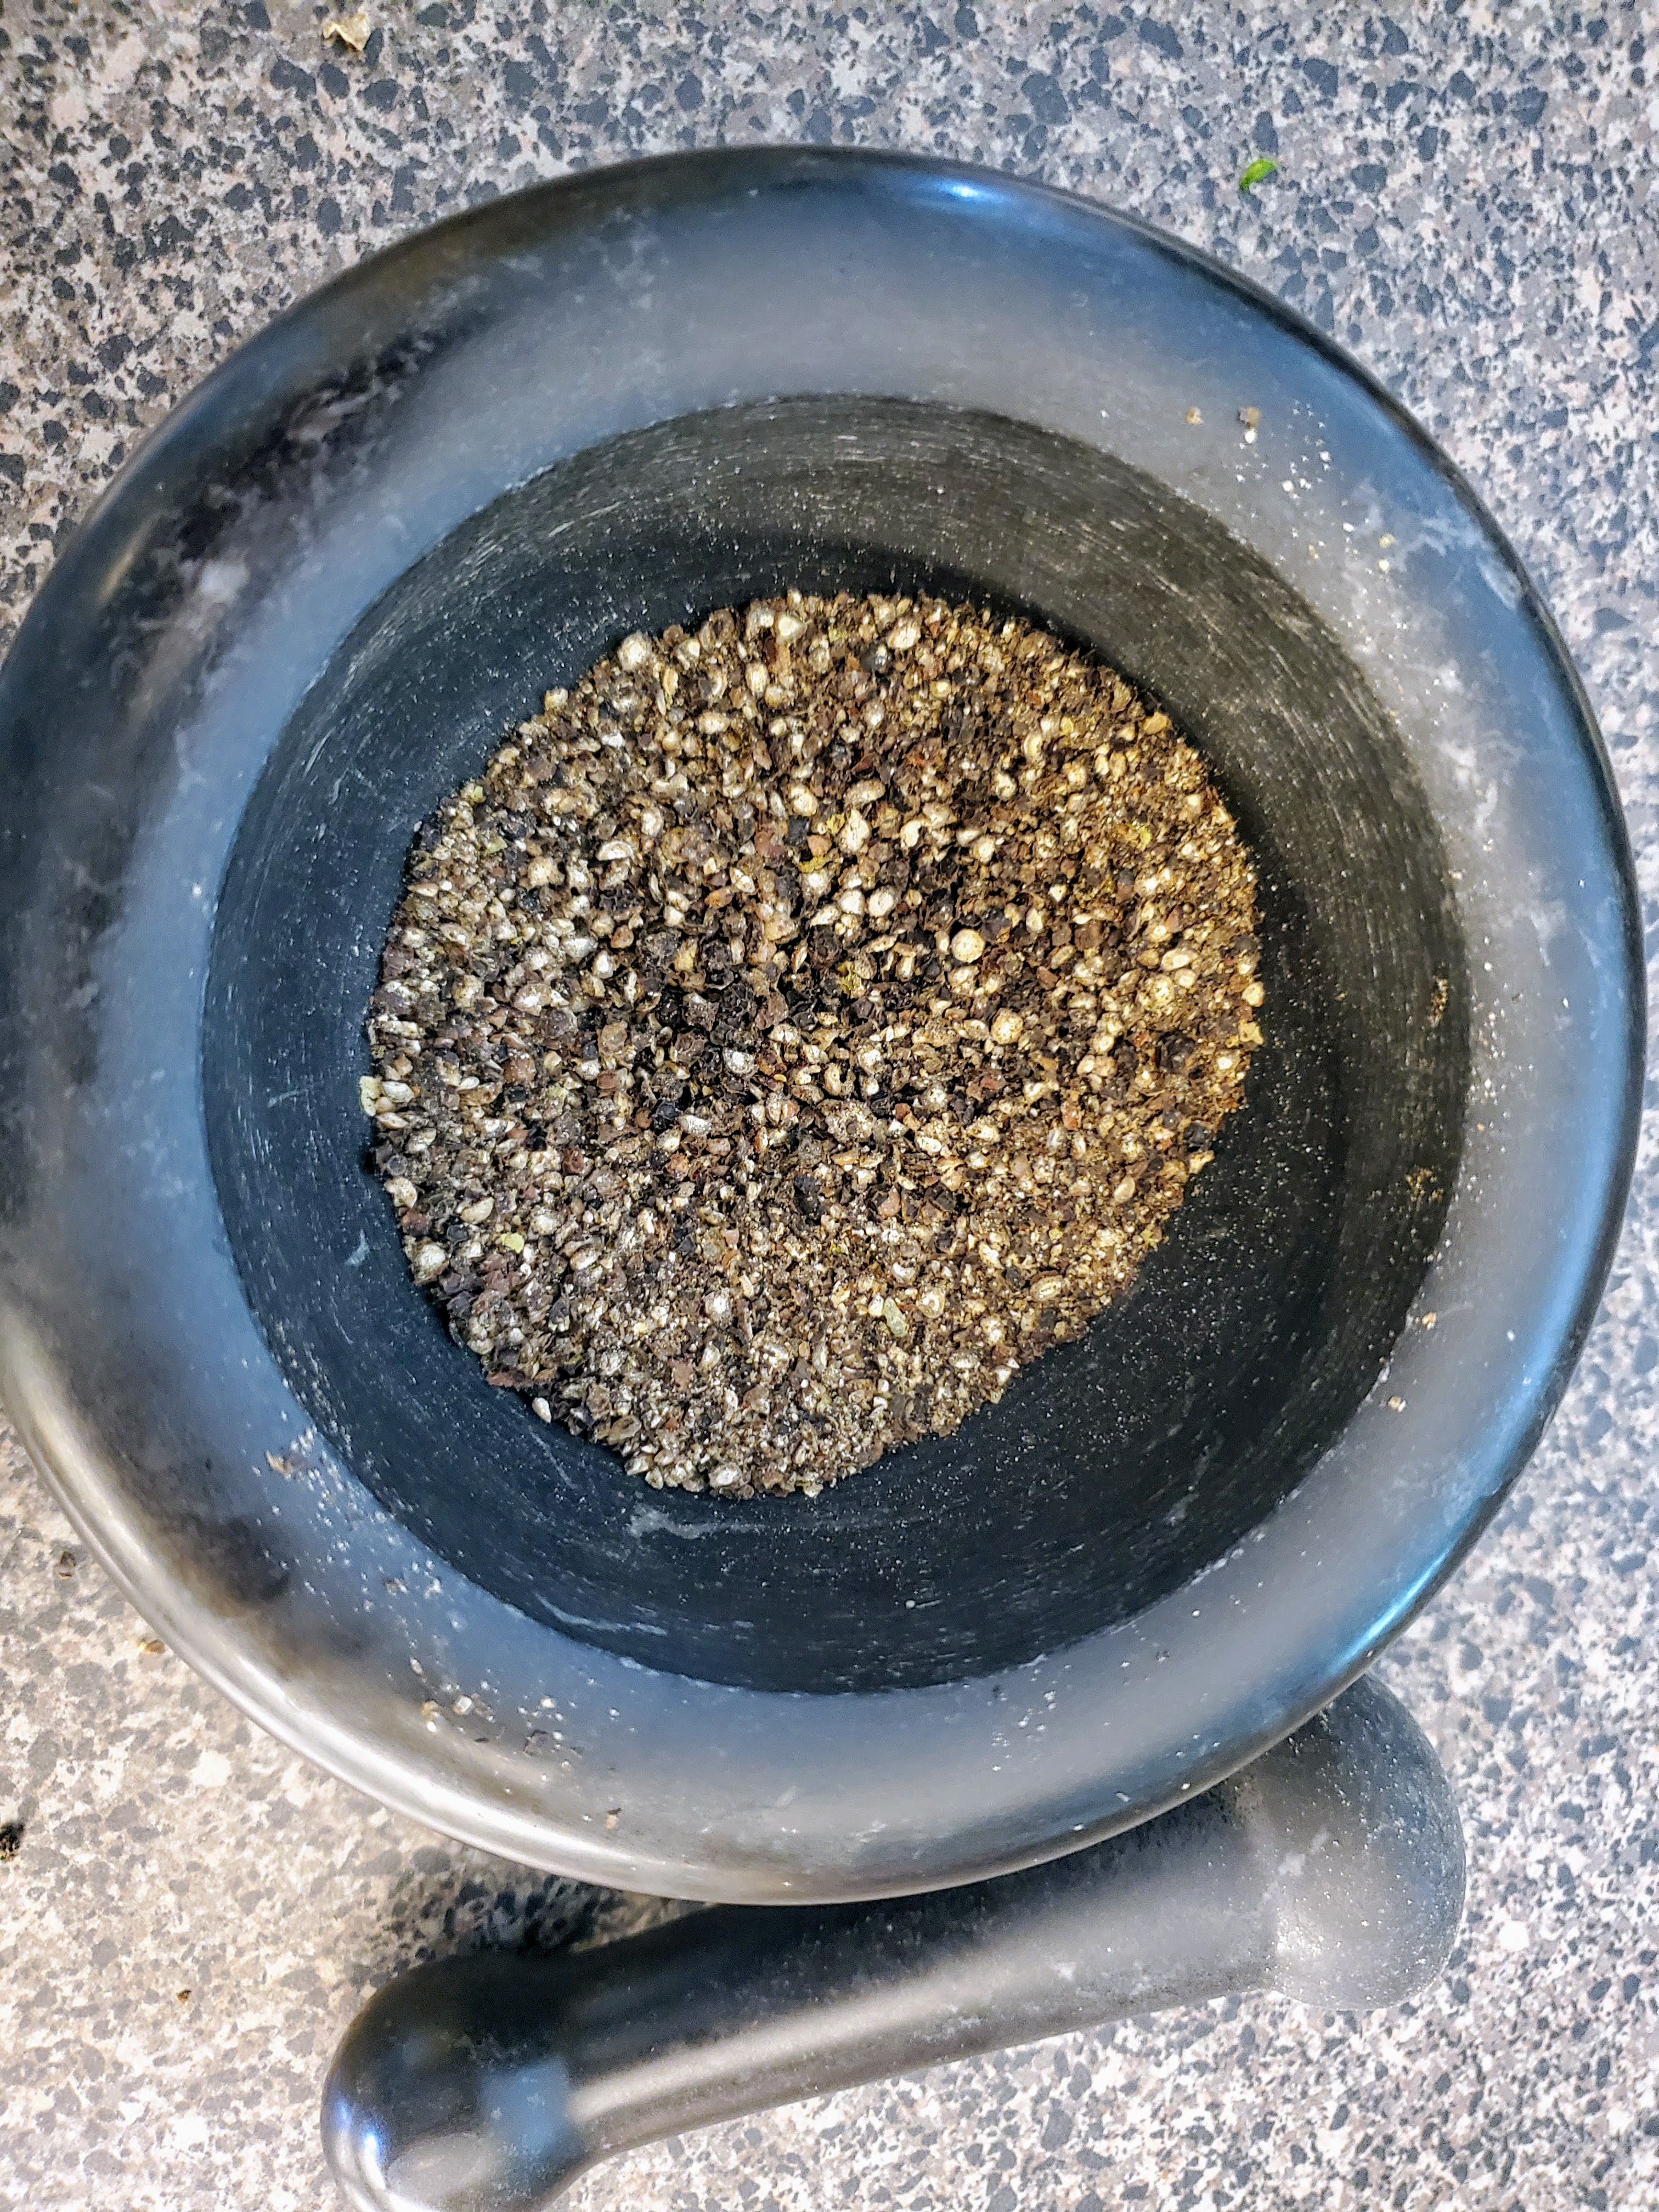
Pepper is like coffee. It’s a dried bean (a berry, really) that’s full of volatile oils and aromatic compounds. That means once it’s ground, it’s like a jailbreak for all of the things that make it great. The longer it’s been ground, the less of those compounds remain. There’s a reason that grocery stores started selling whole peppercorns with built in grinders two decades ago. There’s a huge difference.
Now, you don’t need to use a mortar if you don’t want. A spice grinder or a pepper mill will work just fine if that’s you’re preference. BUT… I’m looking for a very specific texture, somewhere around au poivre, but slightly finer. I like the coarseness on the final product, almost like a pastrami.
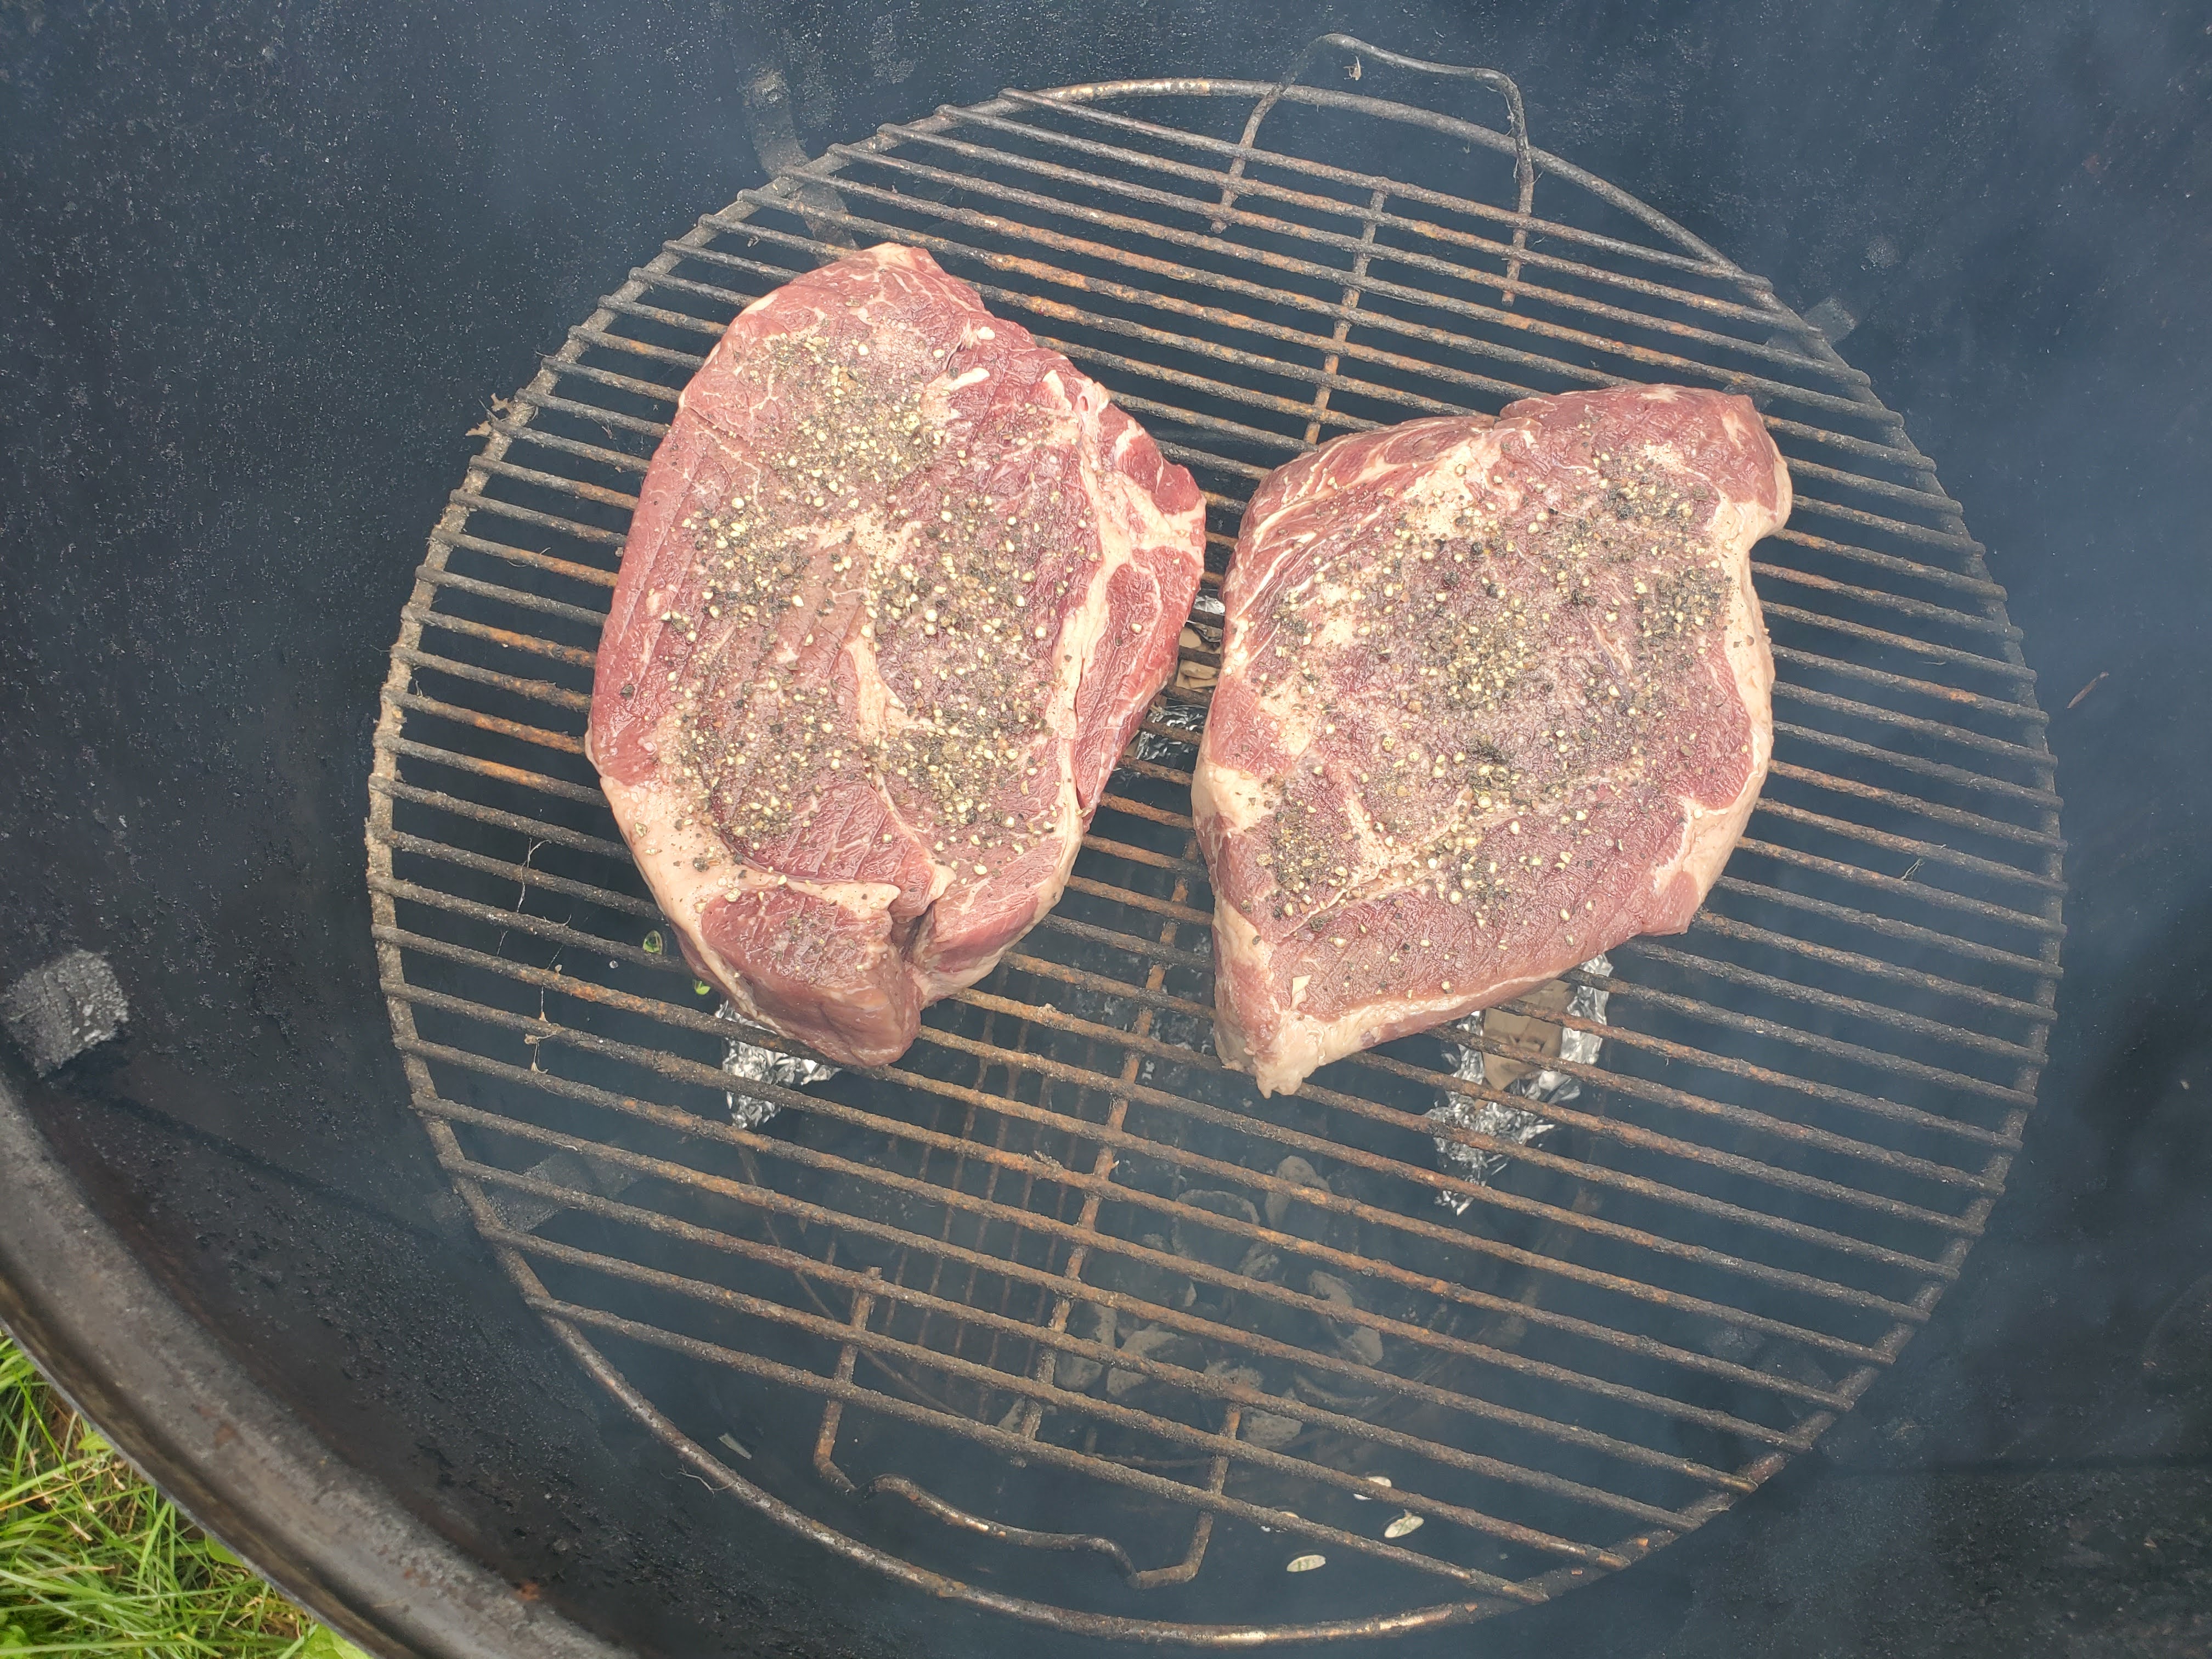
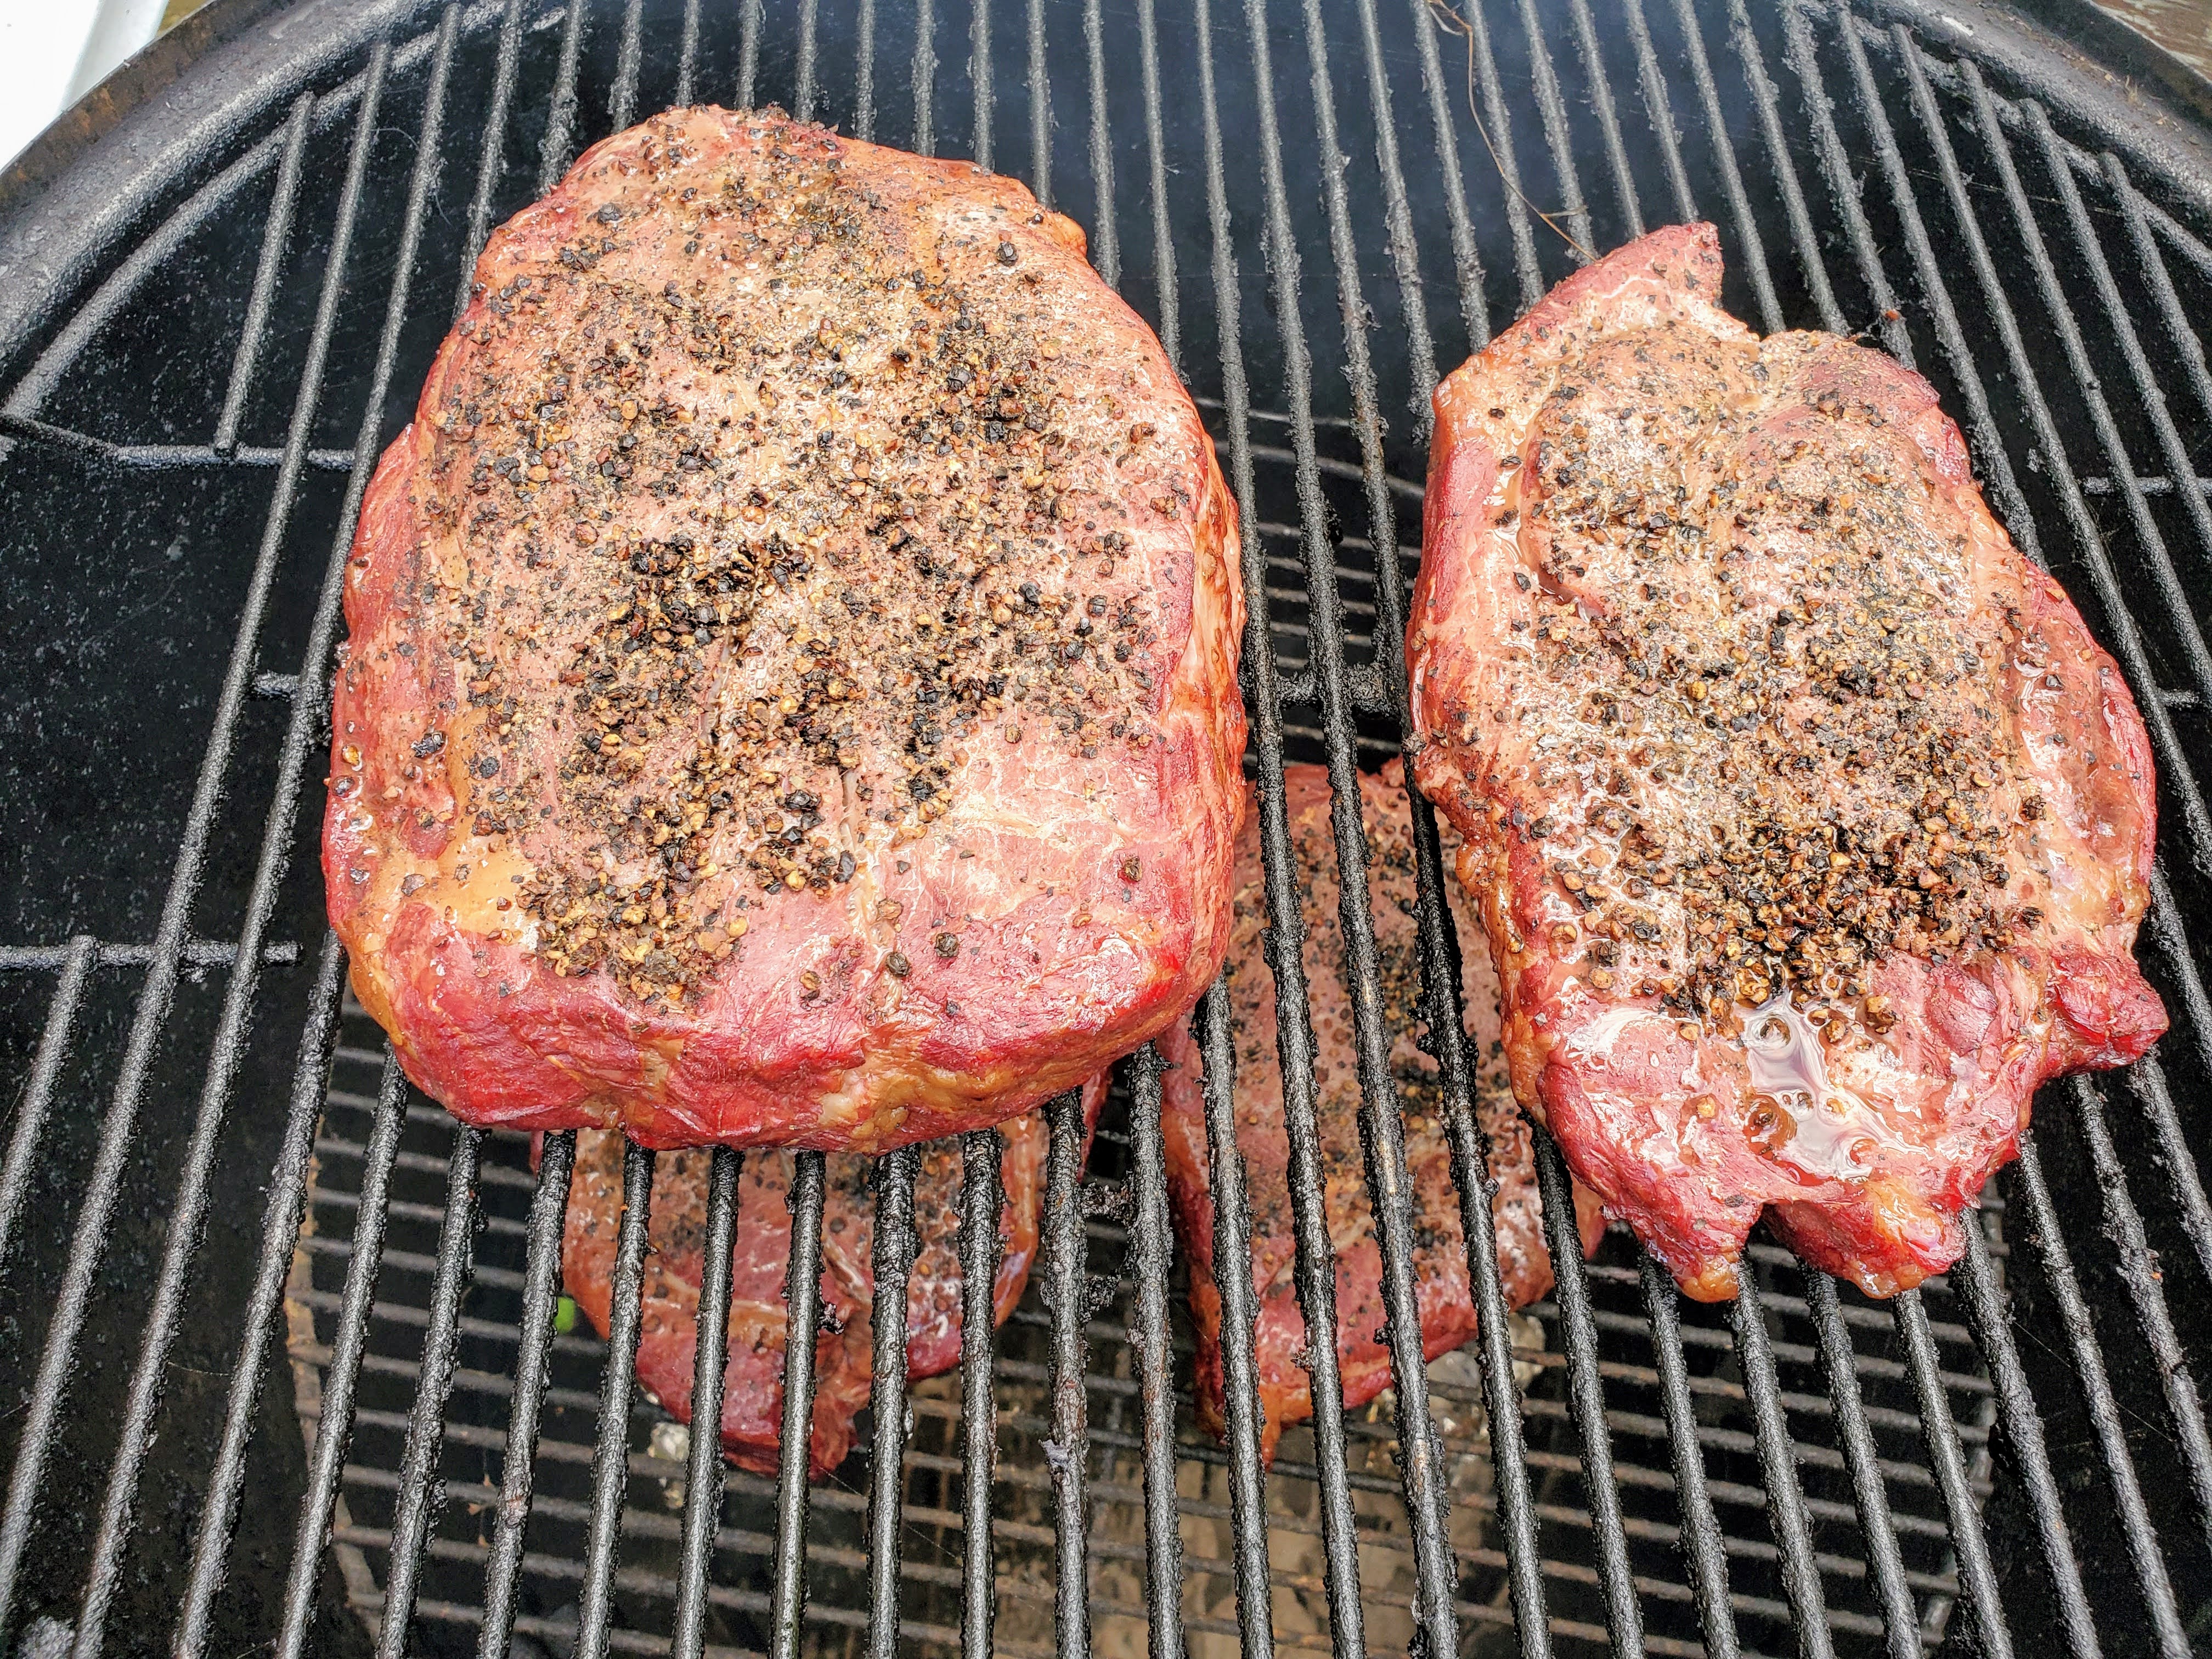
The next step: season LIBERALLY:
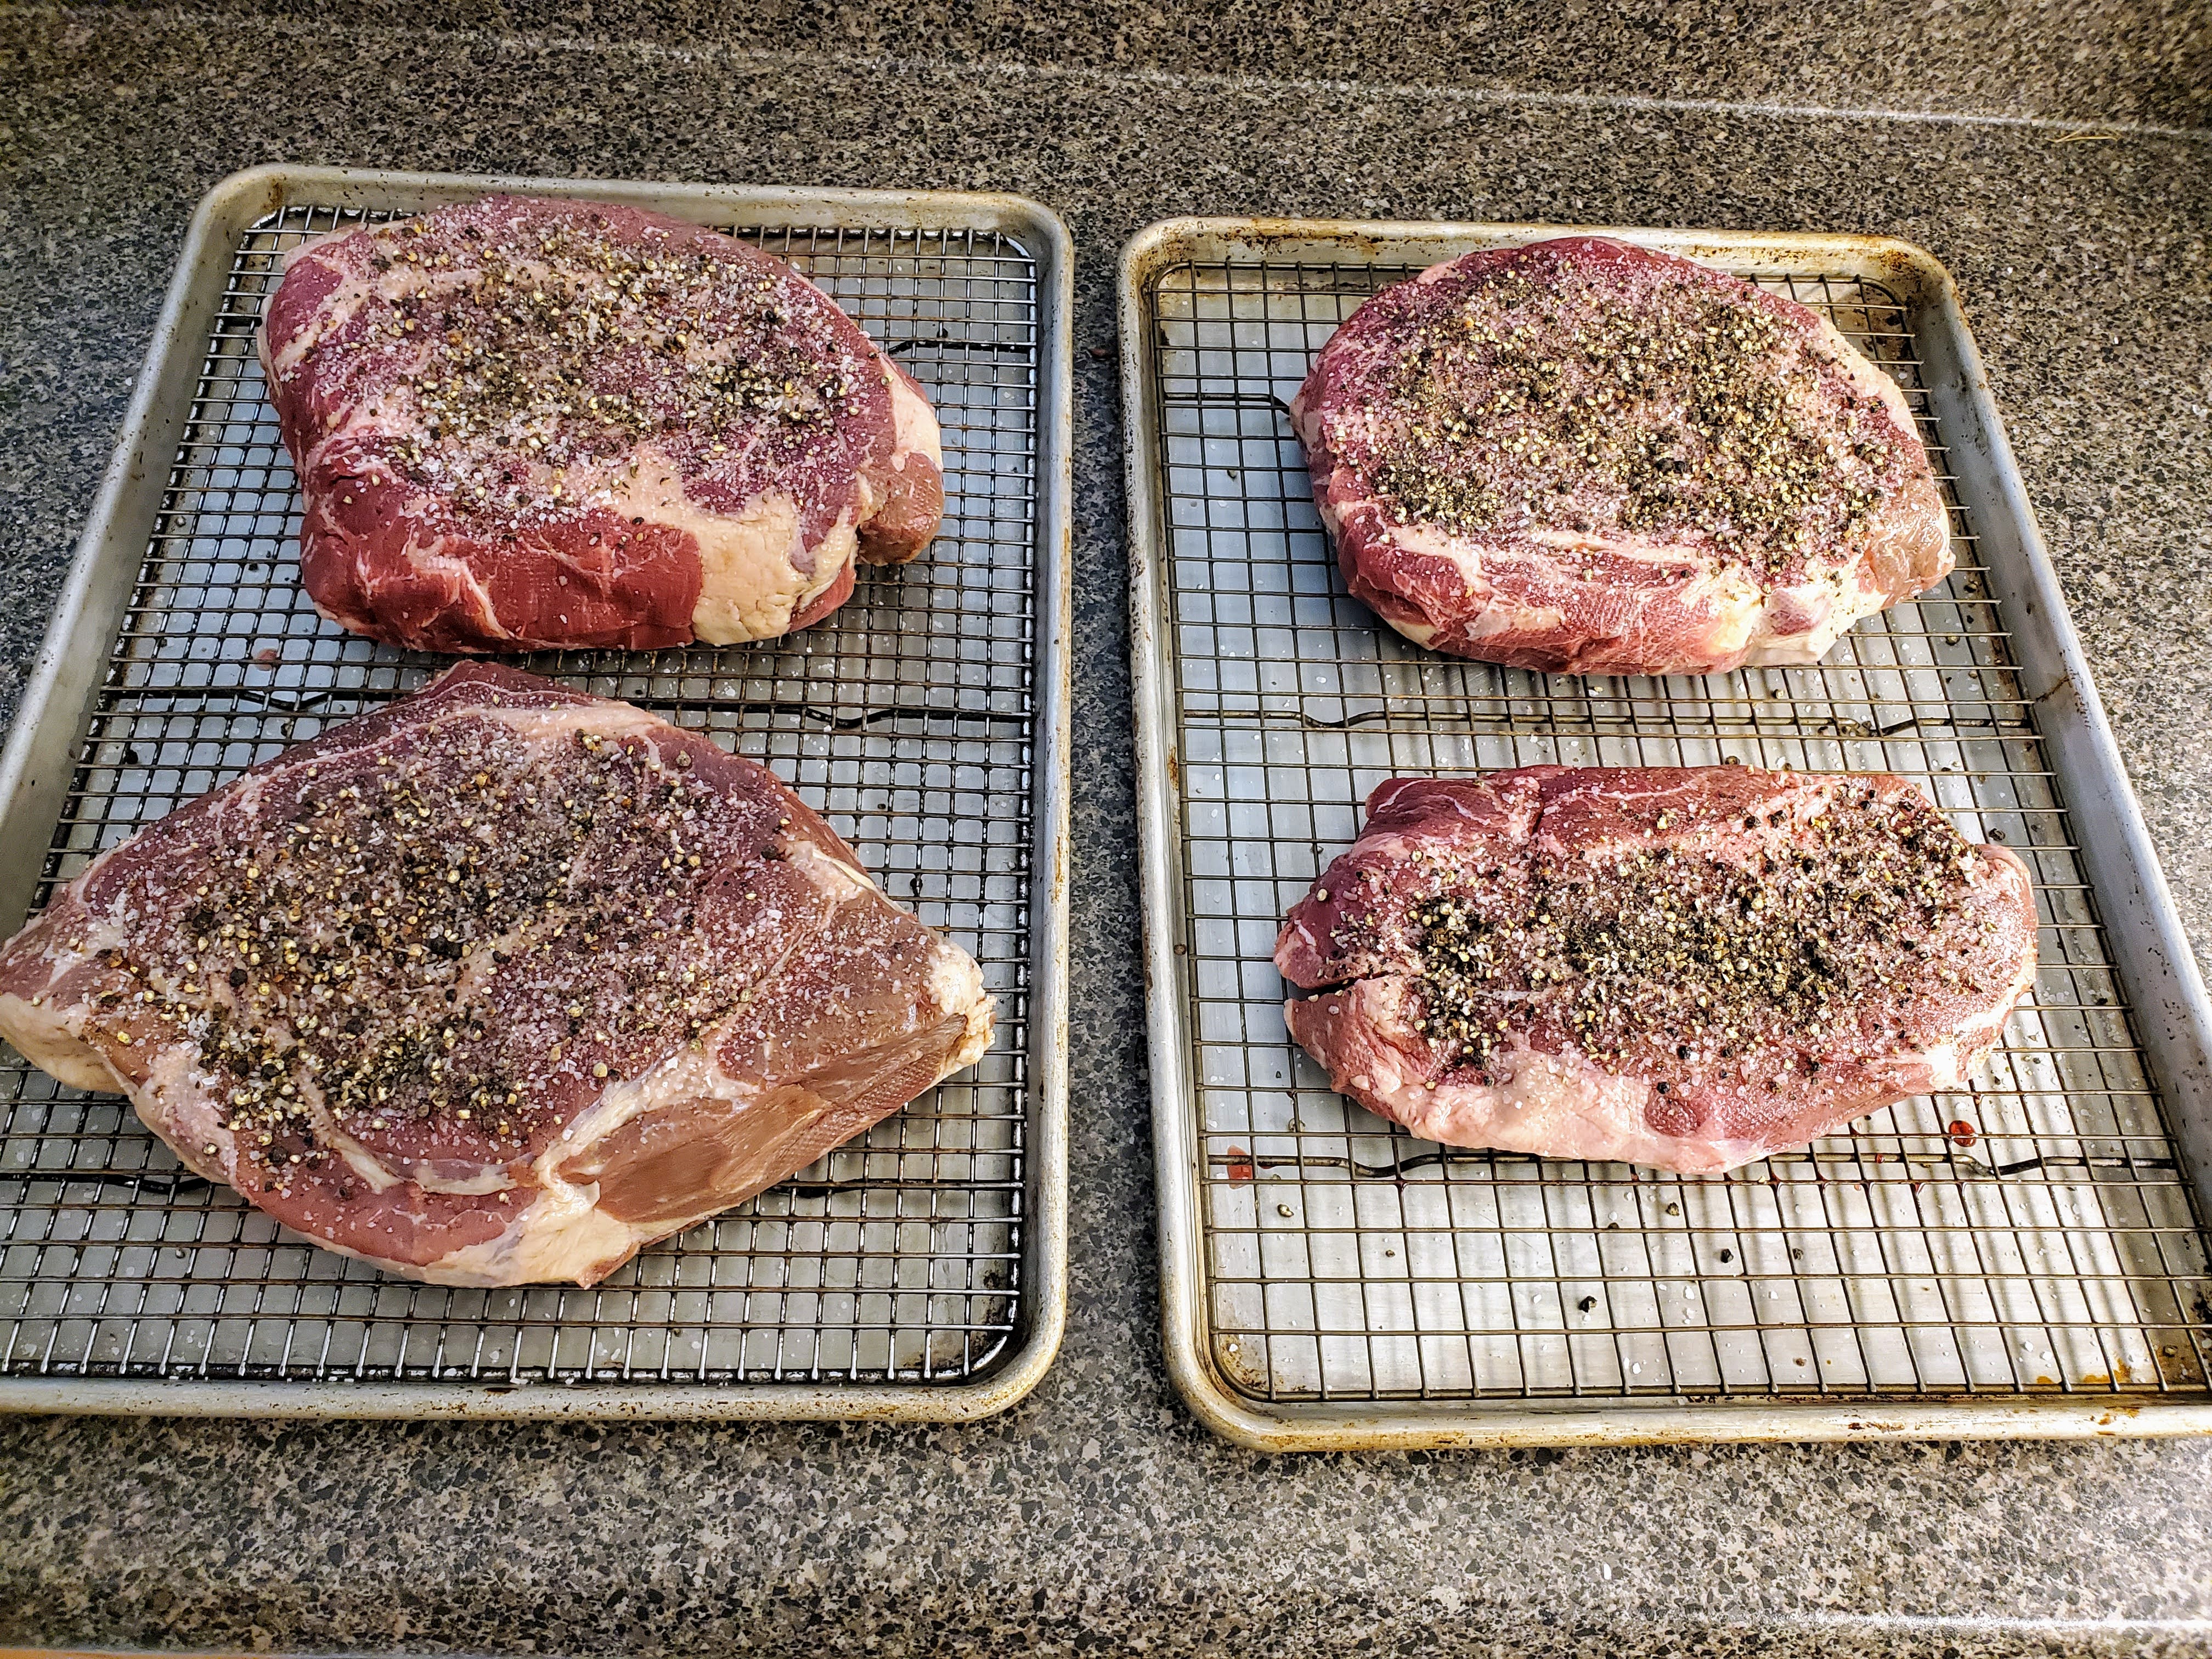
Unlike a steak (which I salt at least an hour out, and preferably the night before), I season these right before they go on the grill. The reason? I want a crust or “bark” on the finished product, and (unlike a steak) these are going to be on the smoker so long that the salt will have plenty of time to work its way into the roasts.
Speaking of the smoker, let’s talk rigs. We’ve covered it a bit in our pulled pork post, but I’ll sum up with this: I’ve owned and cooked on everything from purloined cinder blocks to high-end ceramic “eggs”, and this the end result of my journey:

A 22″ diameter Weber Smoky Mountain. Is it the best smoker in the world? No, of course not. Is it the best smoker for the money? Without question. It’s made of enameled steel, so it won’t rust. It has the capacity of a small apartment. It has a huge following, which means a lot of after-market mods and add-ons if that’s your jam. It takes up no space. Its direct-fire design allows the juices of whatever you’re cooking to drip, sizzle, steam, smoke, and return back up the stack.
And, it’s simple.
But, like everything else with smoking and BBQ, there are some tricks to really get the best out of it.
First, I almost always use a “fuse” or “snake” method with my charcoal. This is a technique that allows a few coals to burn at a time, then ignite the next coals, providing long, even heat:
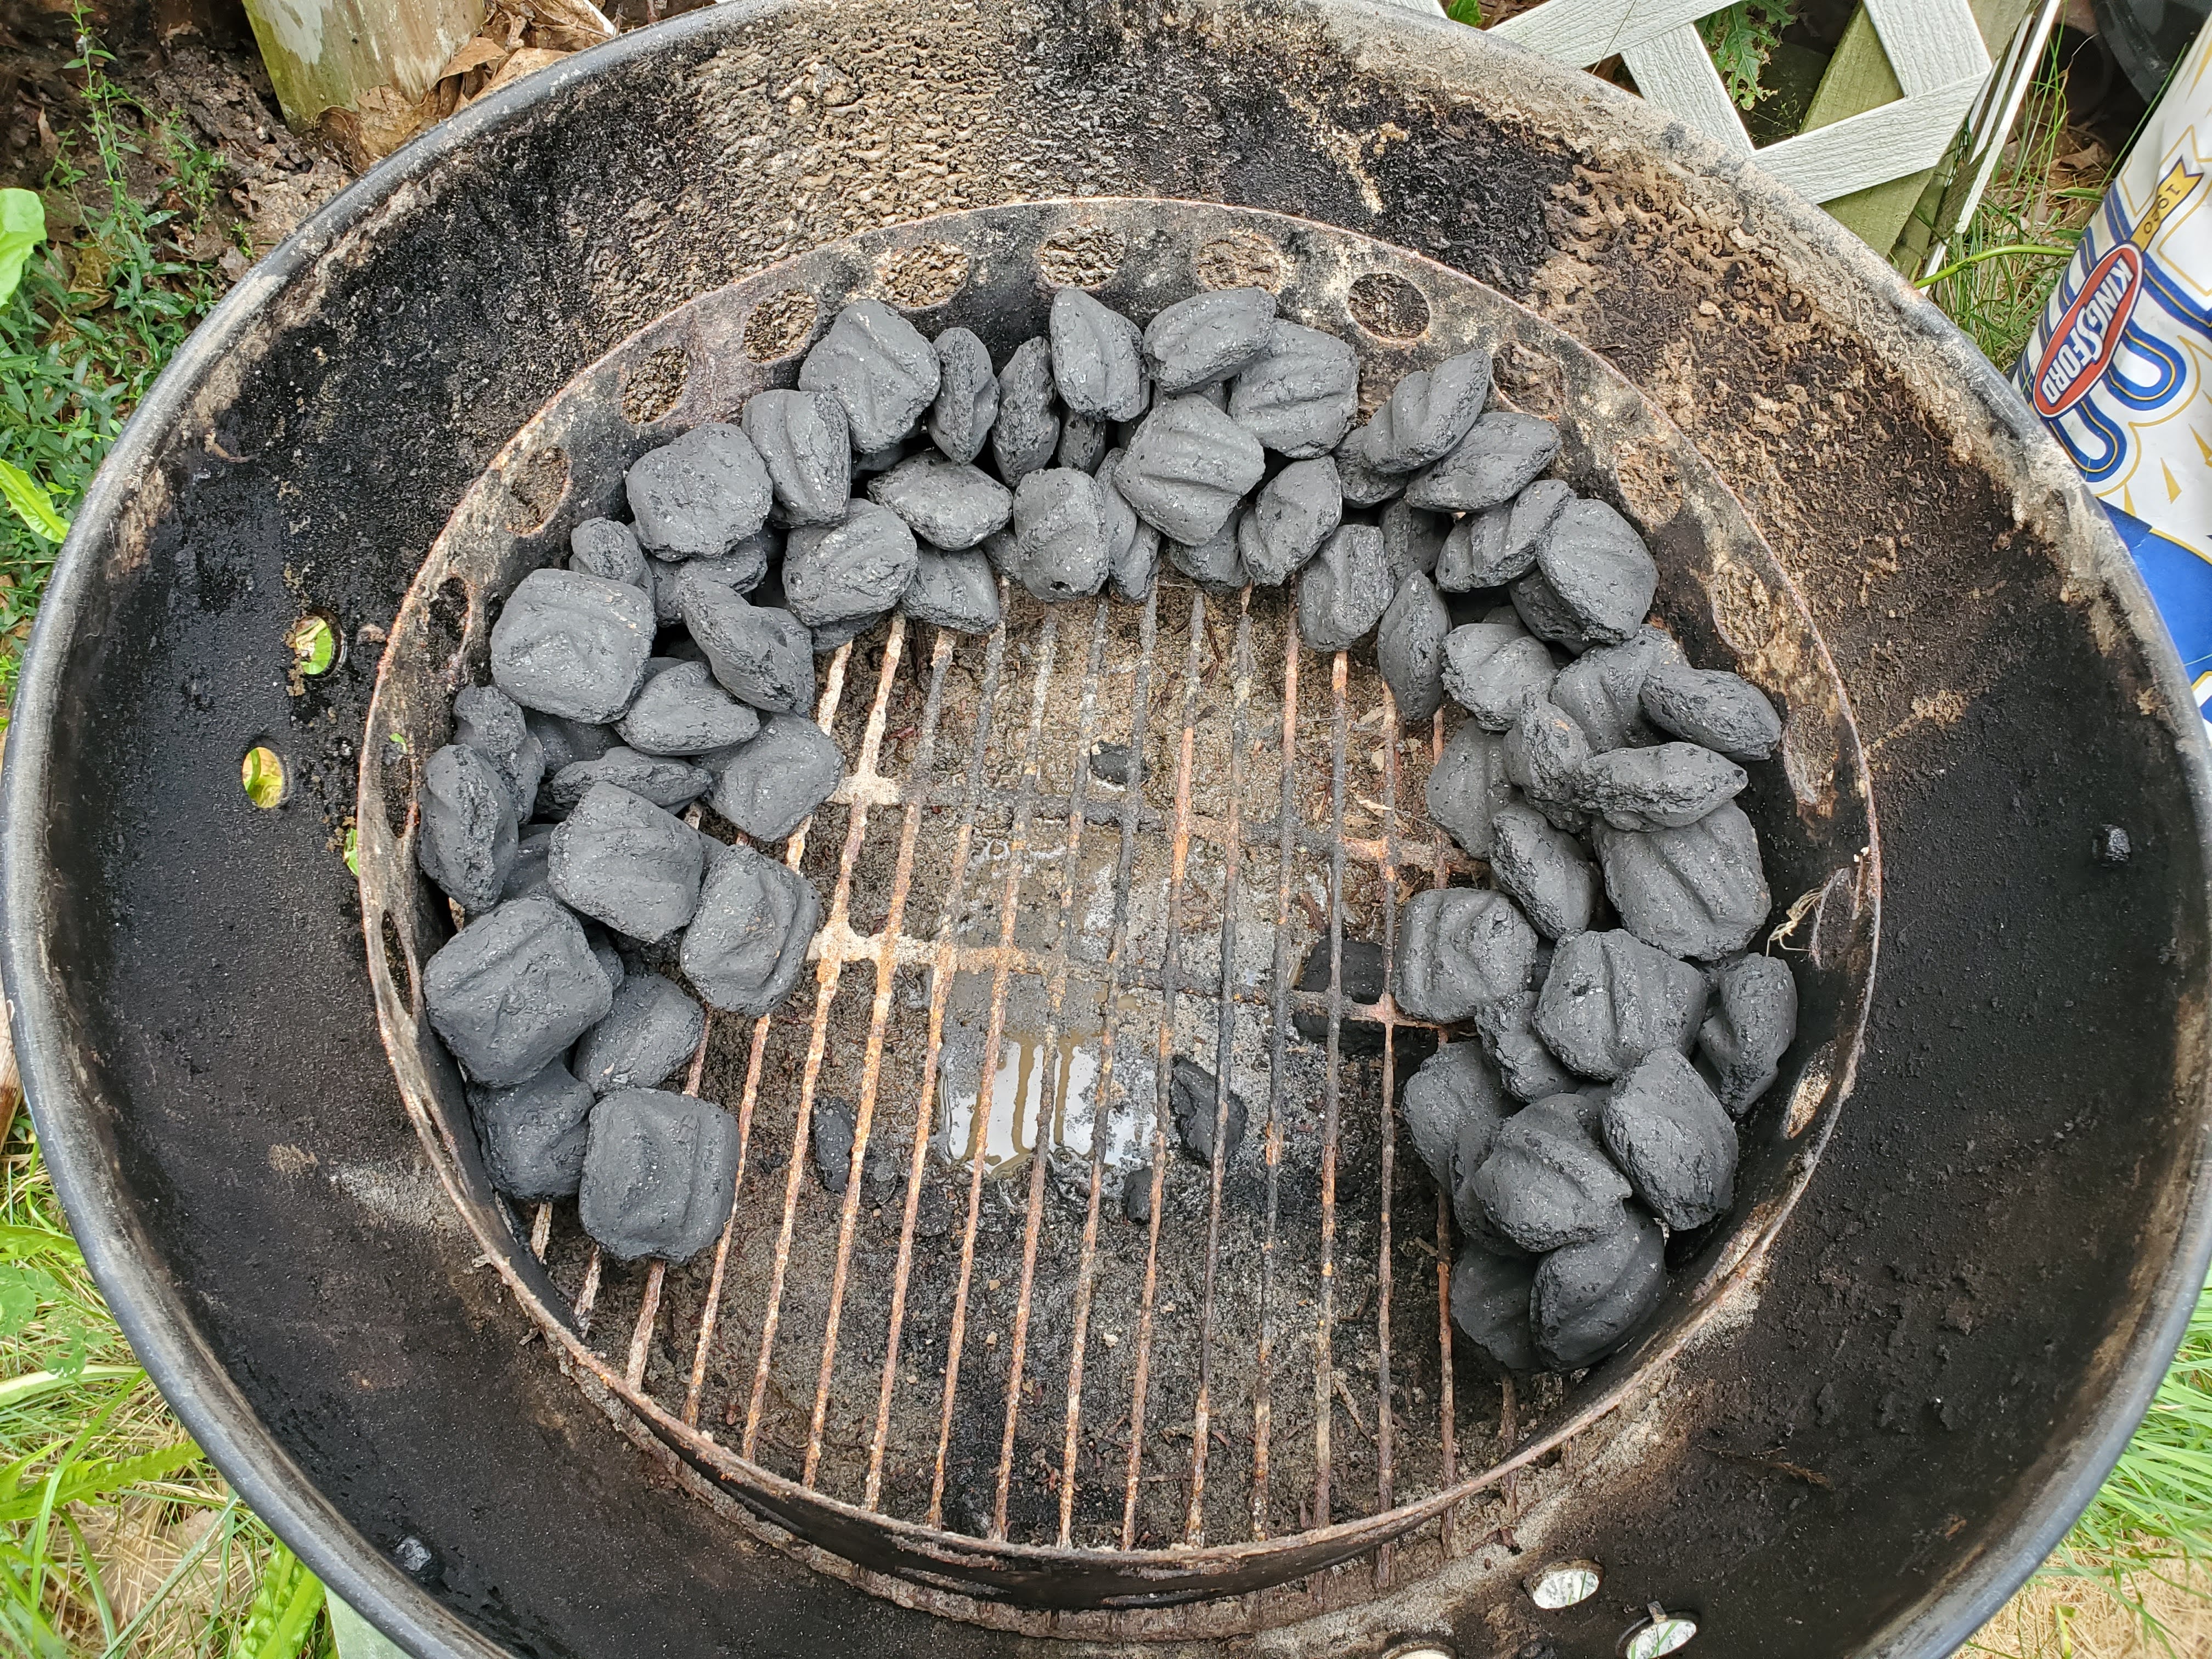
We’re also smoking these things “hot and fast,” which really means somewhere around 325F (versus “low and slow” of 225F, which some prefer, but we’ll get to that later). The upshot is I’m leaving my vents wide open on the bottom and the top, and letting her do her thing.
But, it’s not a smoker without smoke, so we need some wood. Typically, I like to use chunks, but, well, I couldn’t get any on my last trip to town for supplies, so I’m stuck with chips. But all is not lost!
The problem with chips is they tend to ignite, which defeats the purpose. You want slow, smoldering smoke, which chunks tend to do on their own. The goal, then, is to stop the chips from catching fire. So, here comes the foil.

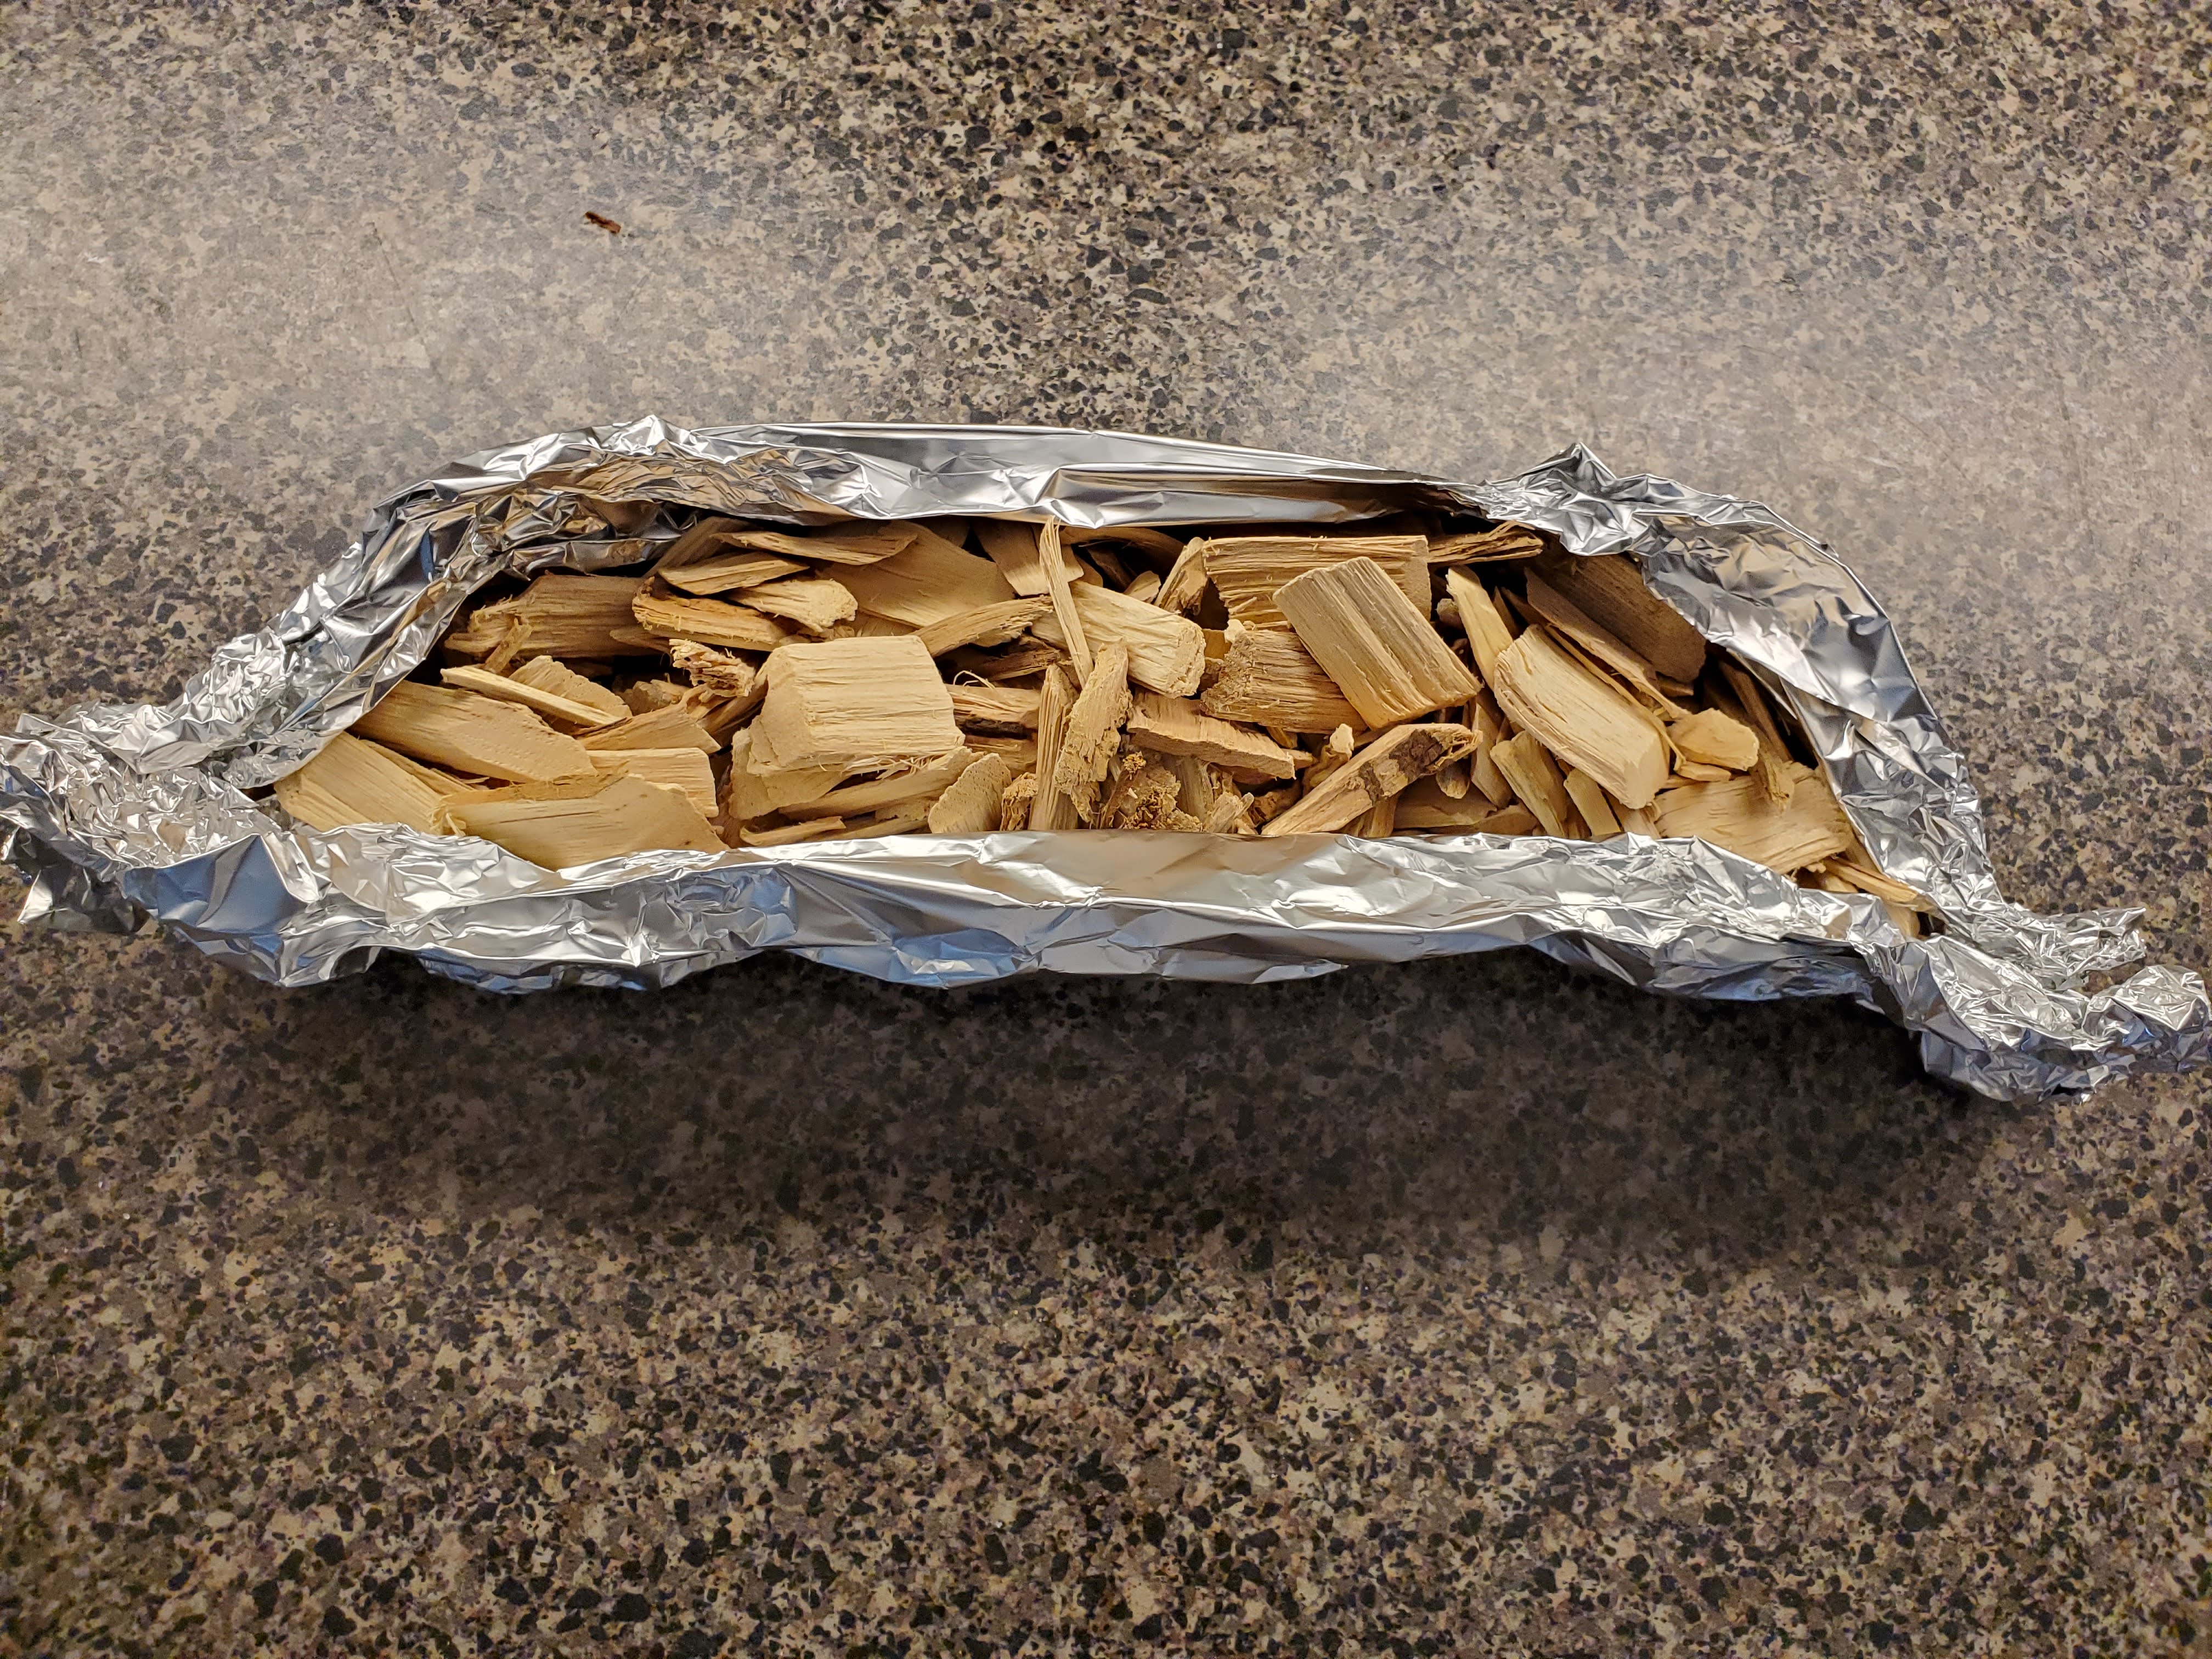
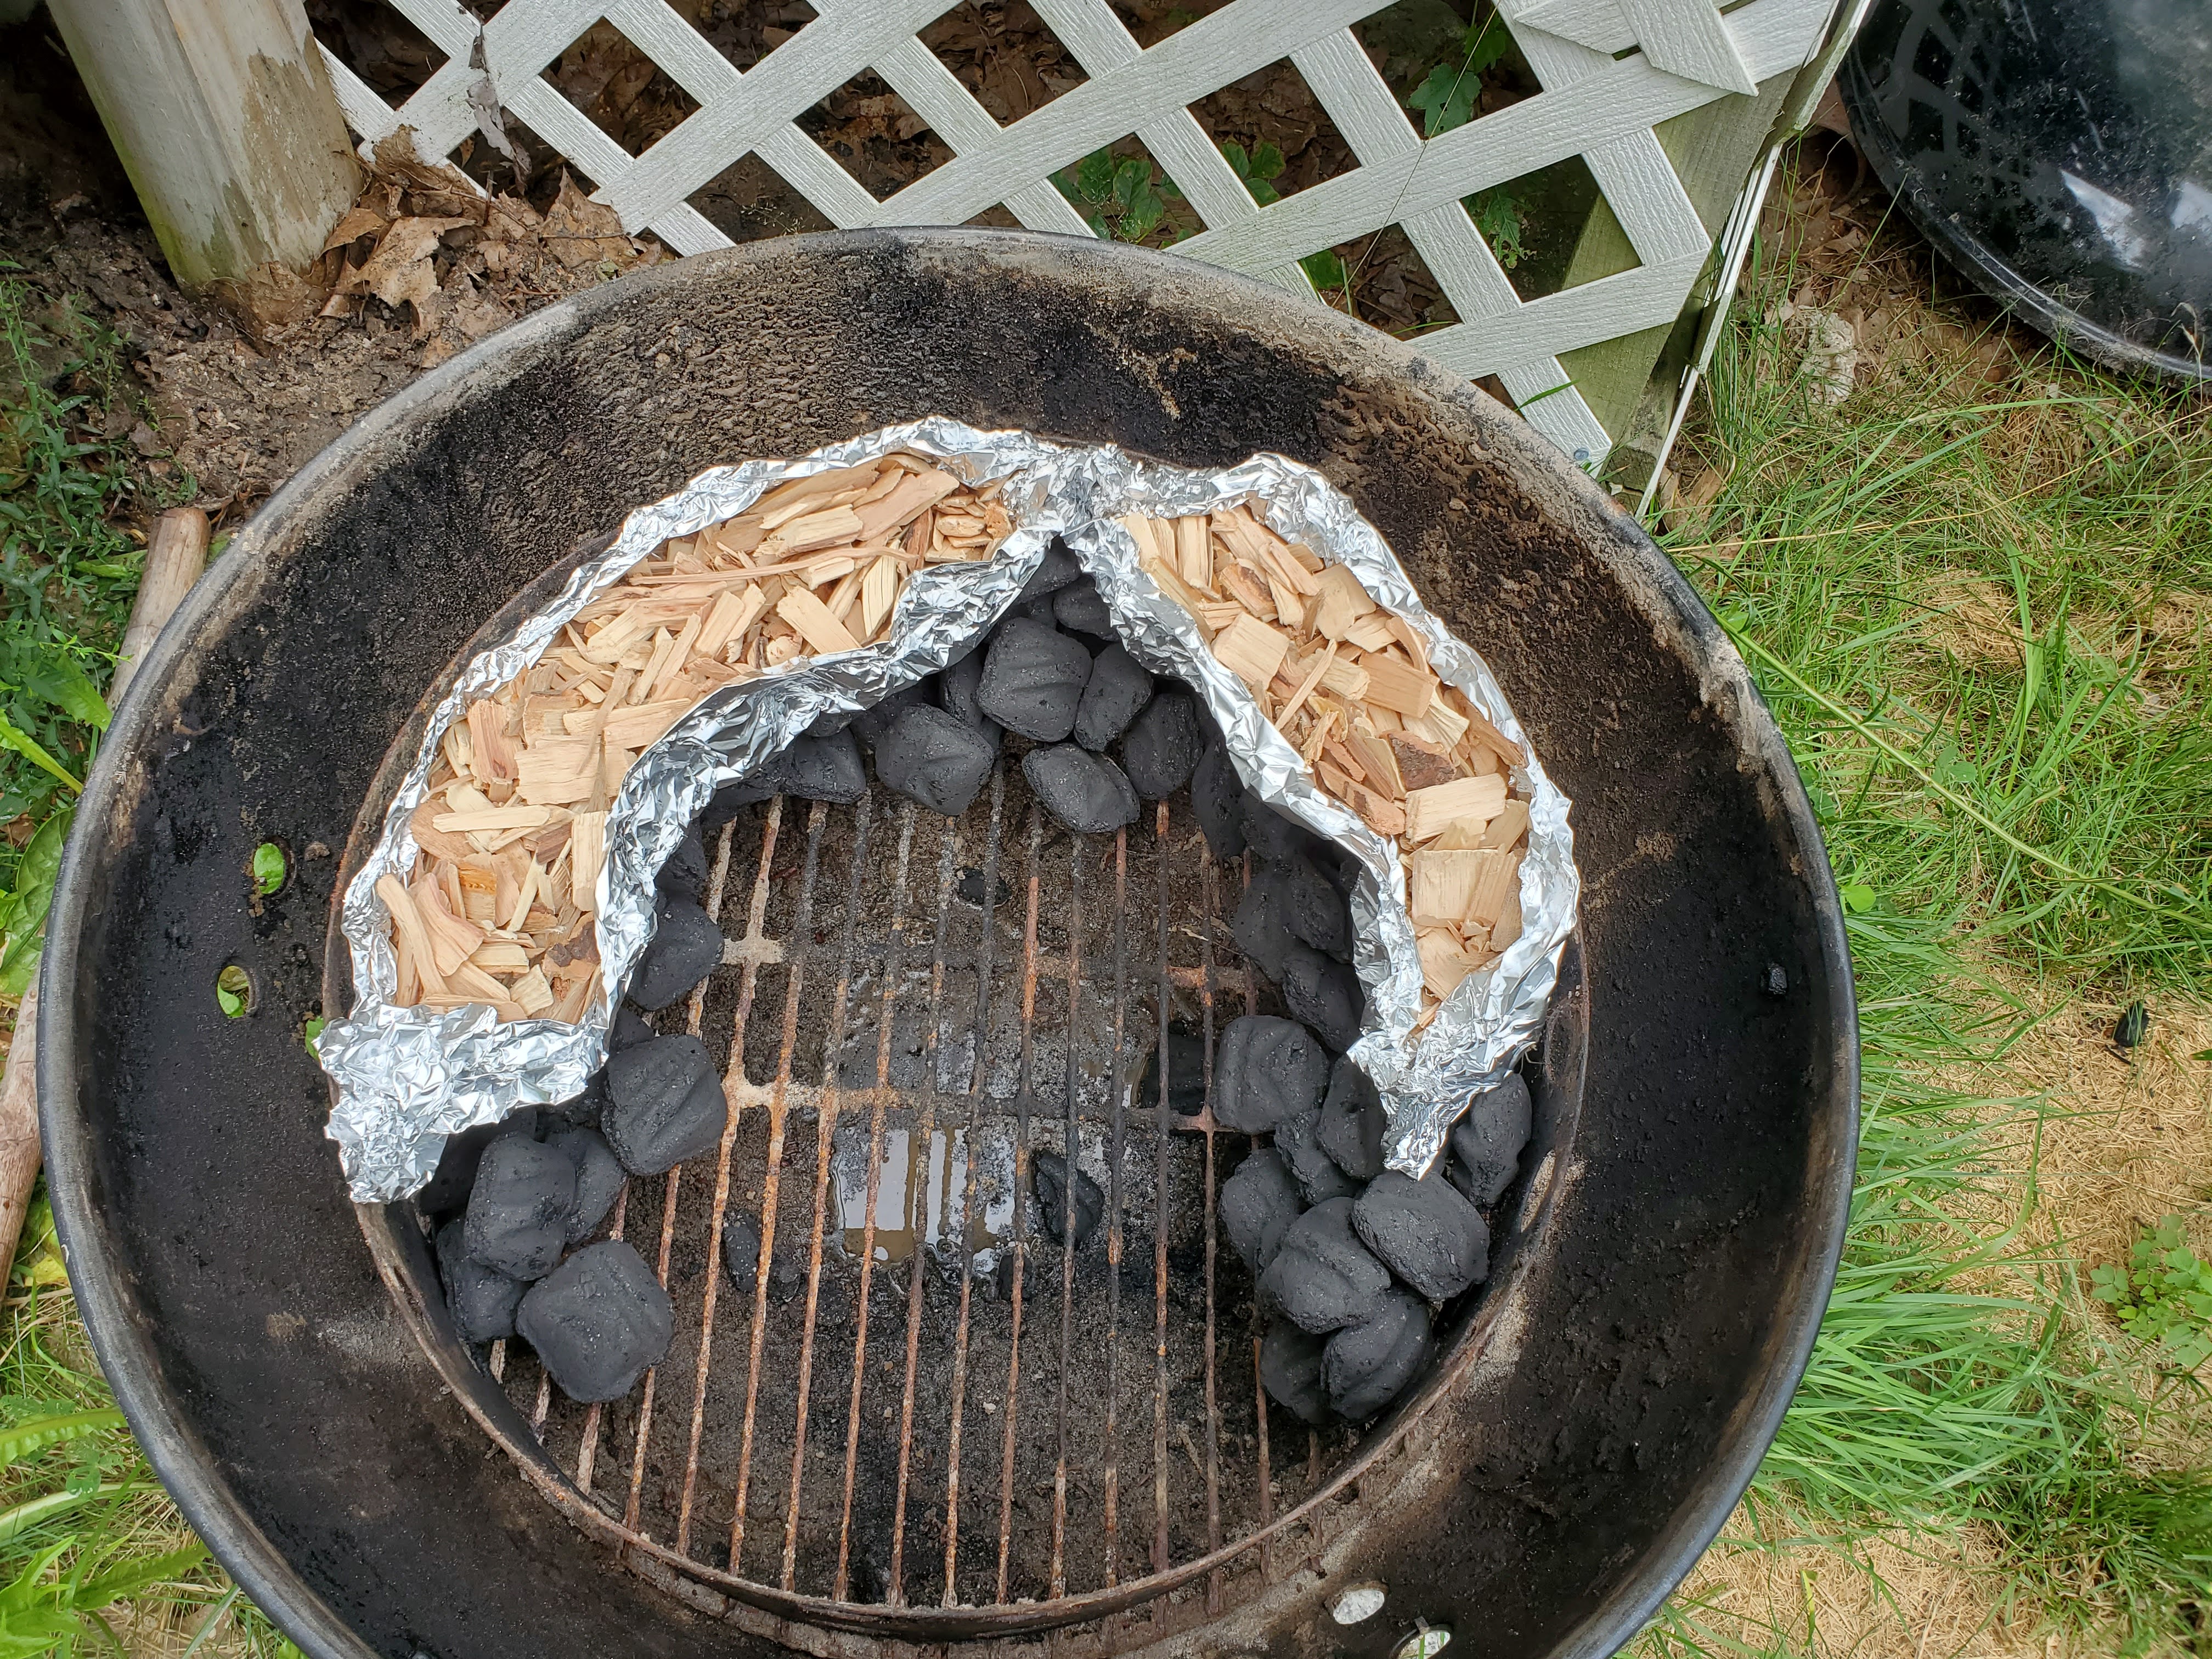
And just like that, smoke snakes. The coals will ignite, and heat the chips which will smolder into ash. Pretty great.
About the wood: there are those who claim the choice of smoker wood doesn’t matter, so long as it’s hardwood. Those people are idiots and shouldn’t be trusted with any sort of real decision-making.
For pork and chicken, I prefer fruit woods, namely apple or cherry. They tend to put off an aroma that’s similar to classic pipe smoke. Smoky (of course), but slightly sweet, rounded, mild.
For beef, it’s oak or hickory. The smoke from these is more like a nice cigar. Assertive, pointed, complex. Today, we’re using hickory.
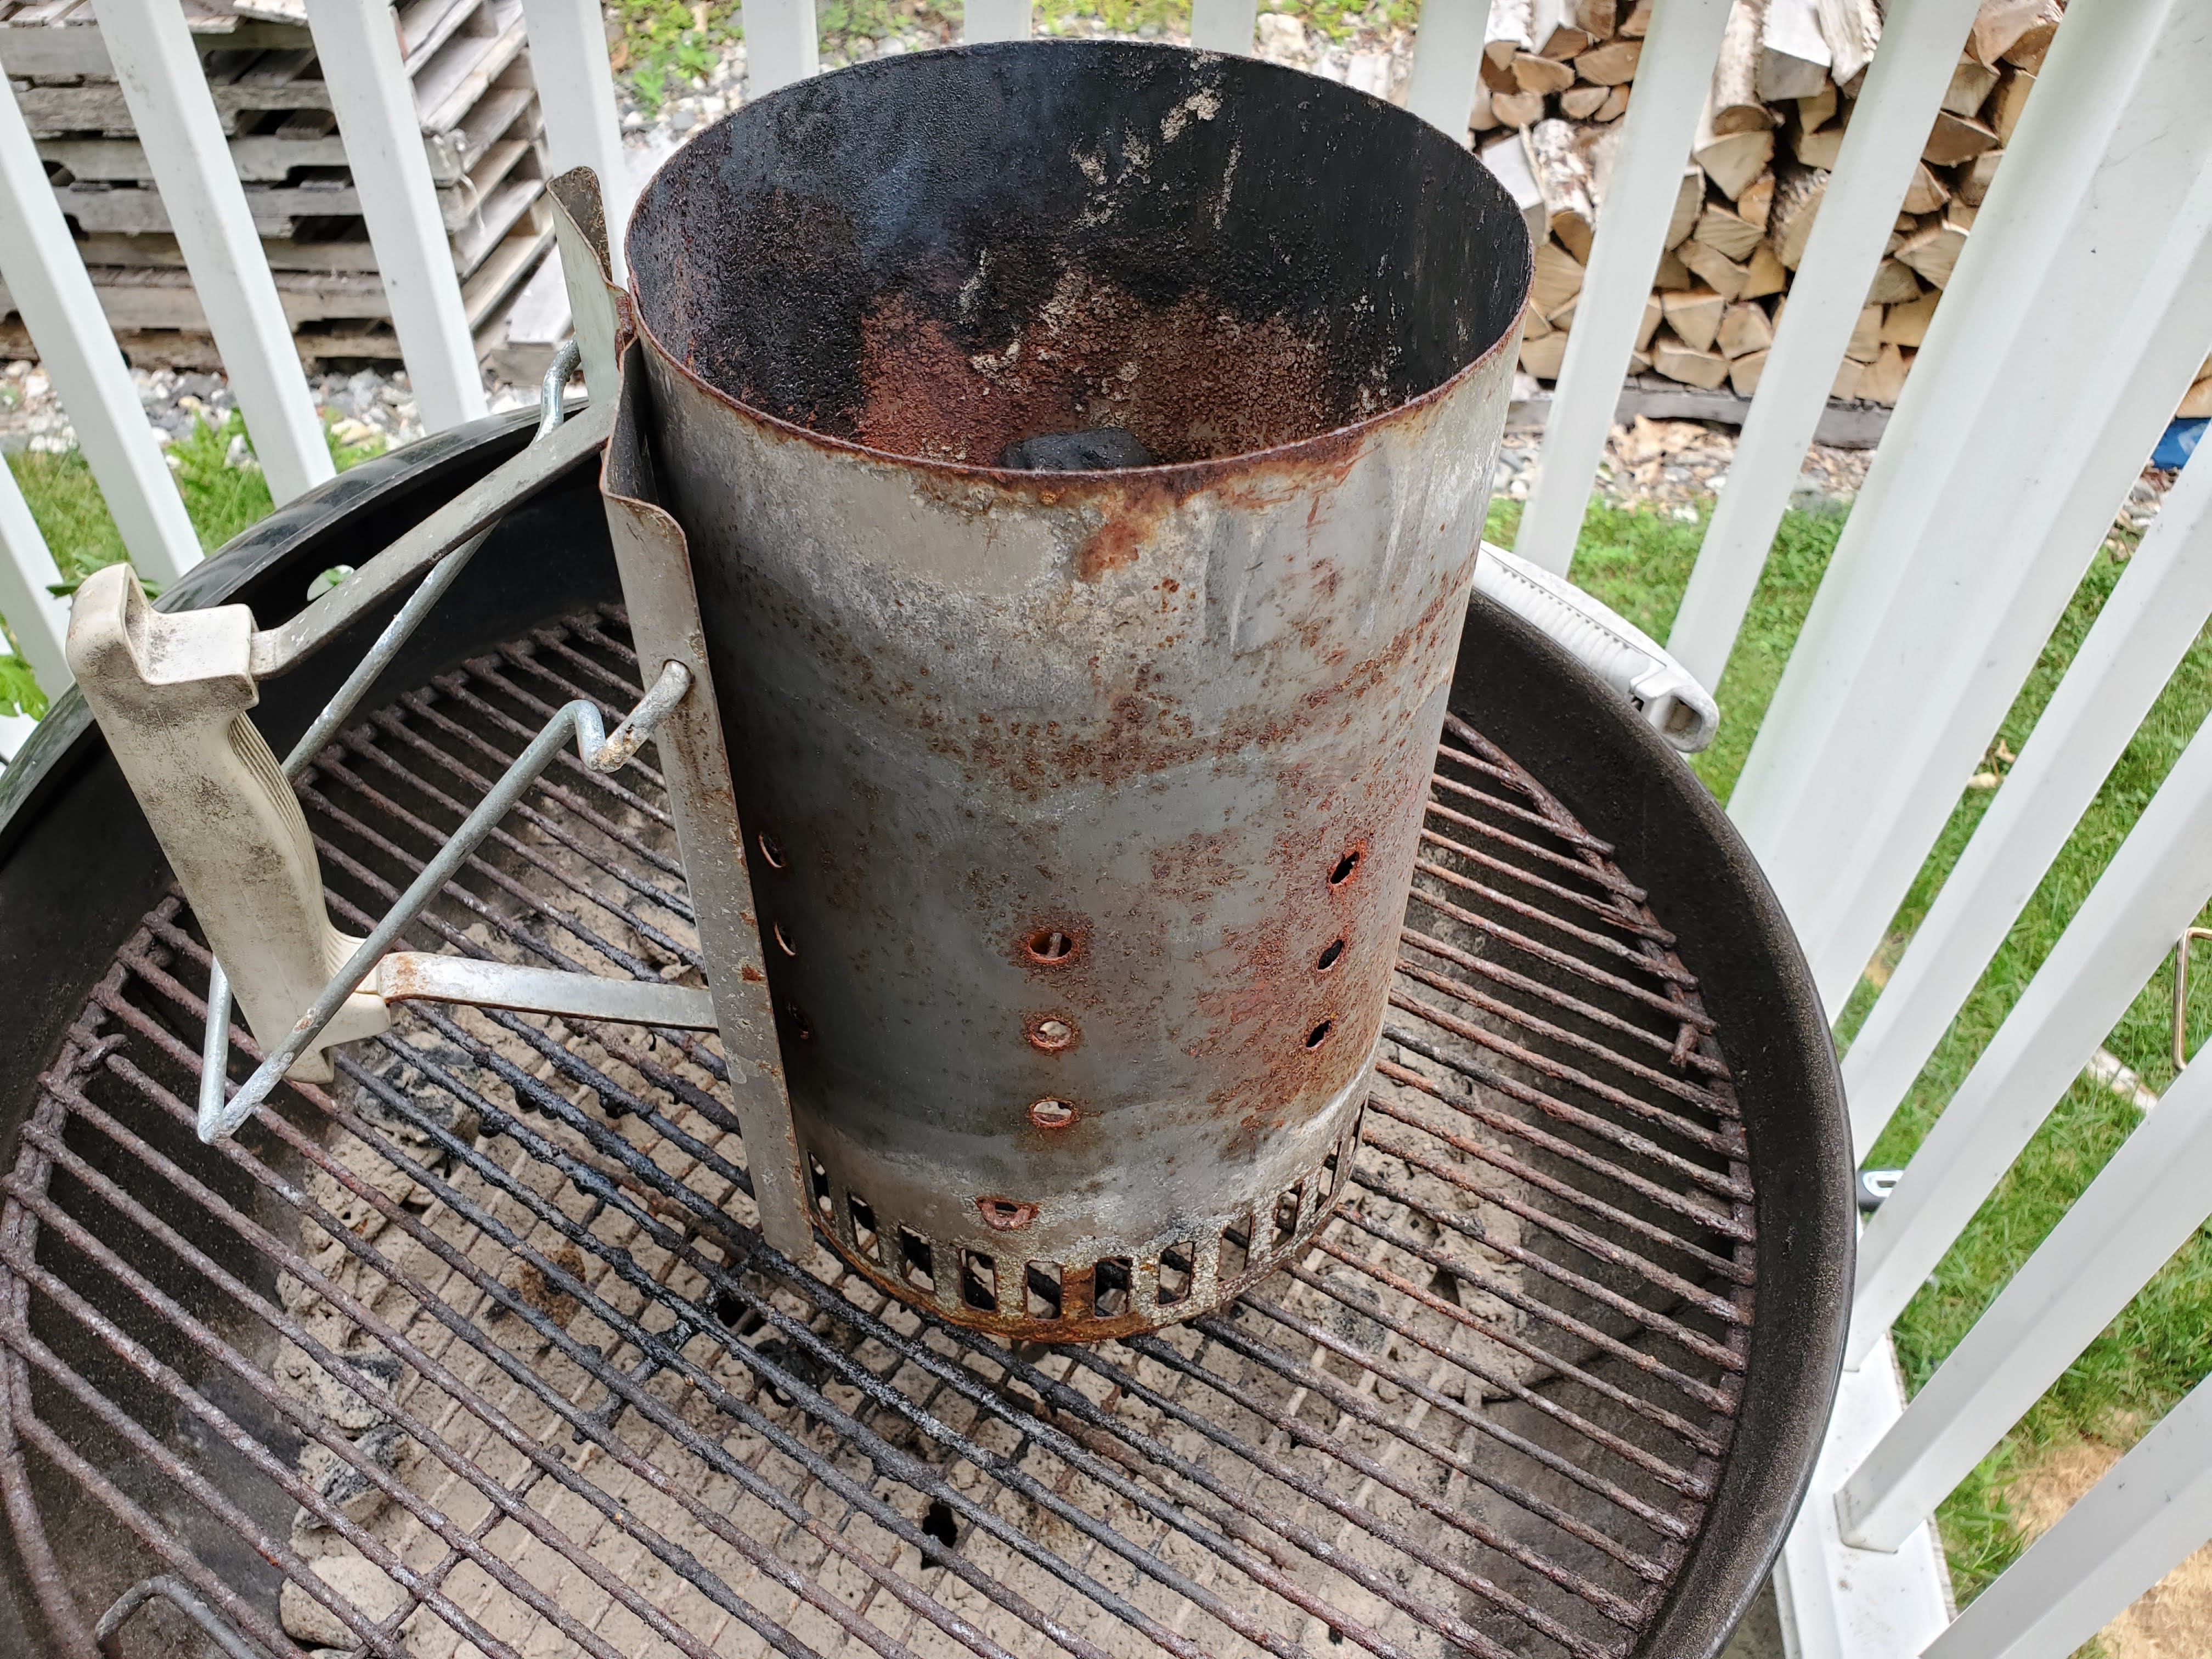
Anyway, time to light the fire. I’m using my chimney starter and a lightly-oiled paper towel to ignite a few coals, which will then light the fuse:

From here, time to get the meat on:

We’re doing two layers here. Could I have crowded them all on to one rack? Sure. But I want separation so the smoke has the ability to circulate, and I want the roasts centered so they get even heat from the fire. Now, we cover and wait. And maybe drink a beer.
This is the part of the program where you’ll start to get texts from the neighbors, and maybe even an unexpected visitor or two as meat-smoke starts curling through the area like the fog in Thriller.
So, how long do we cook? Well, until they’re done. We’re talking about an agricultural product here, so there are no hard-and-fast timelines. I’d say generally we’re looking at around six (6) hours, but start checking in on them around the five (5) hour mark. You may go as long as eight (8), so… plan accordingly.
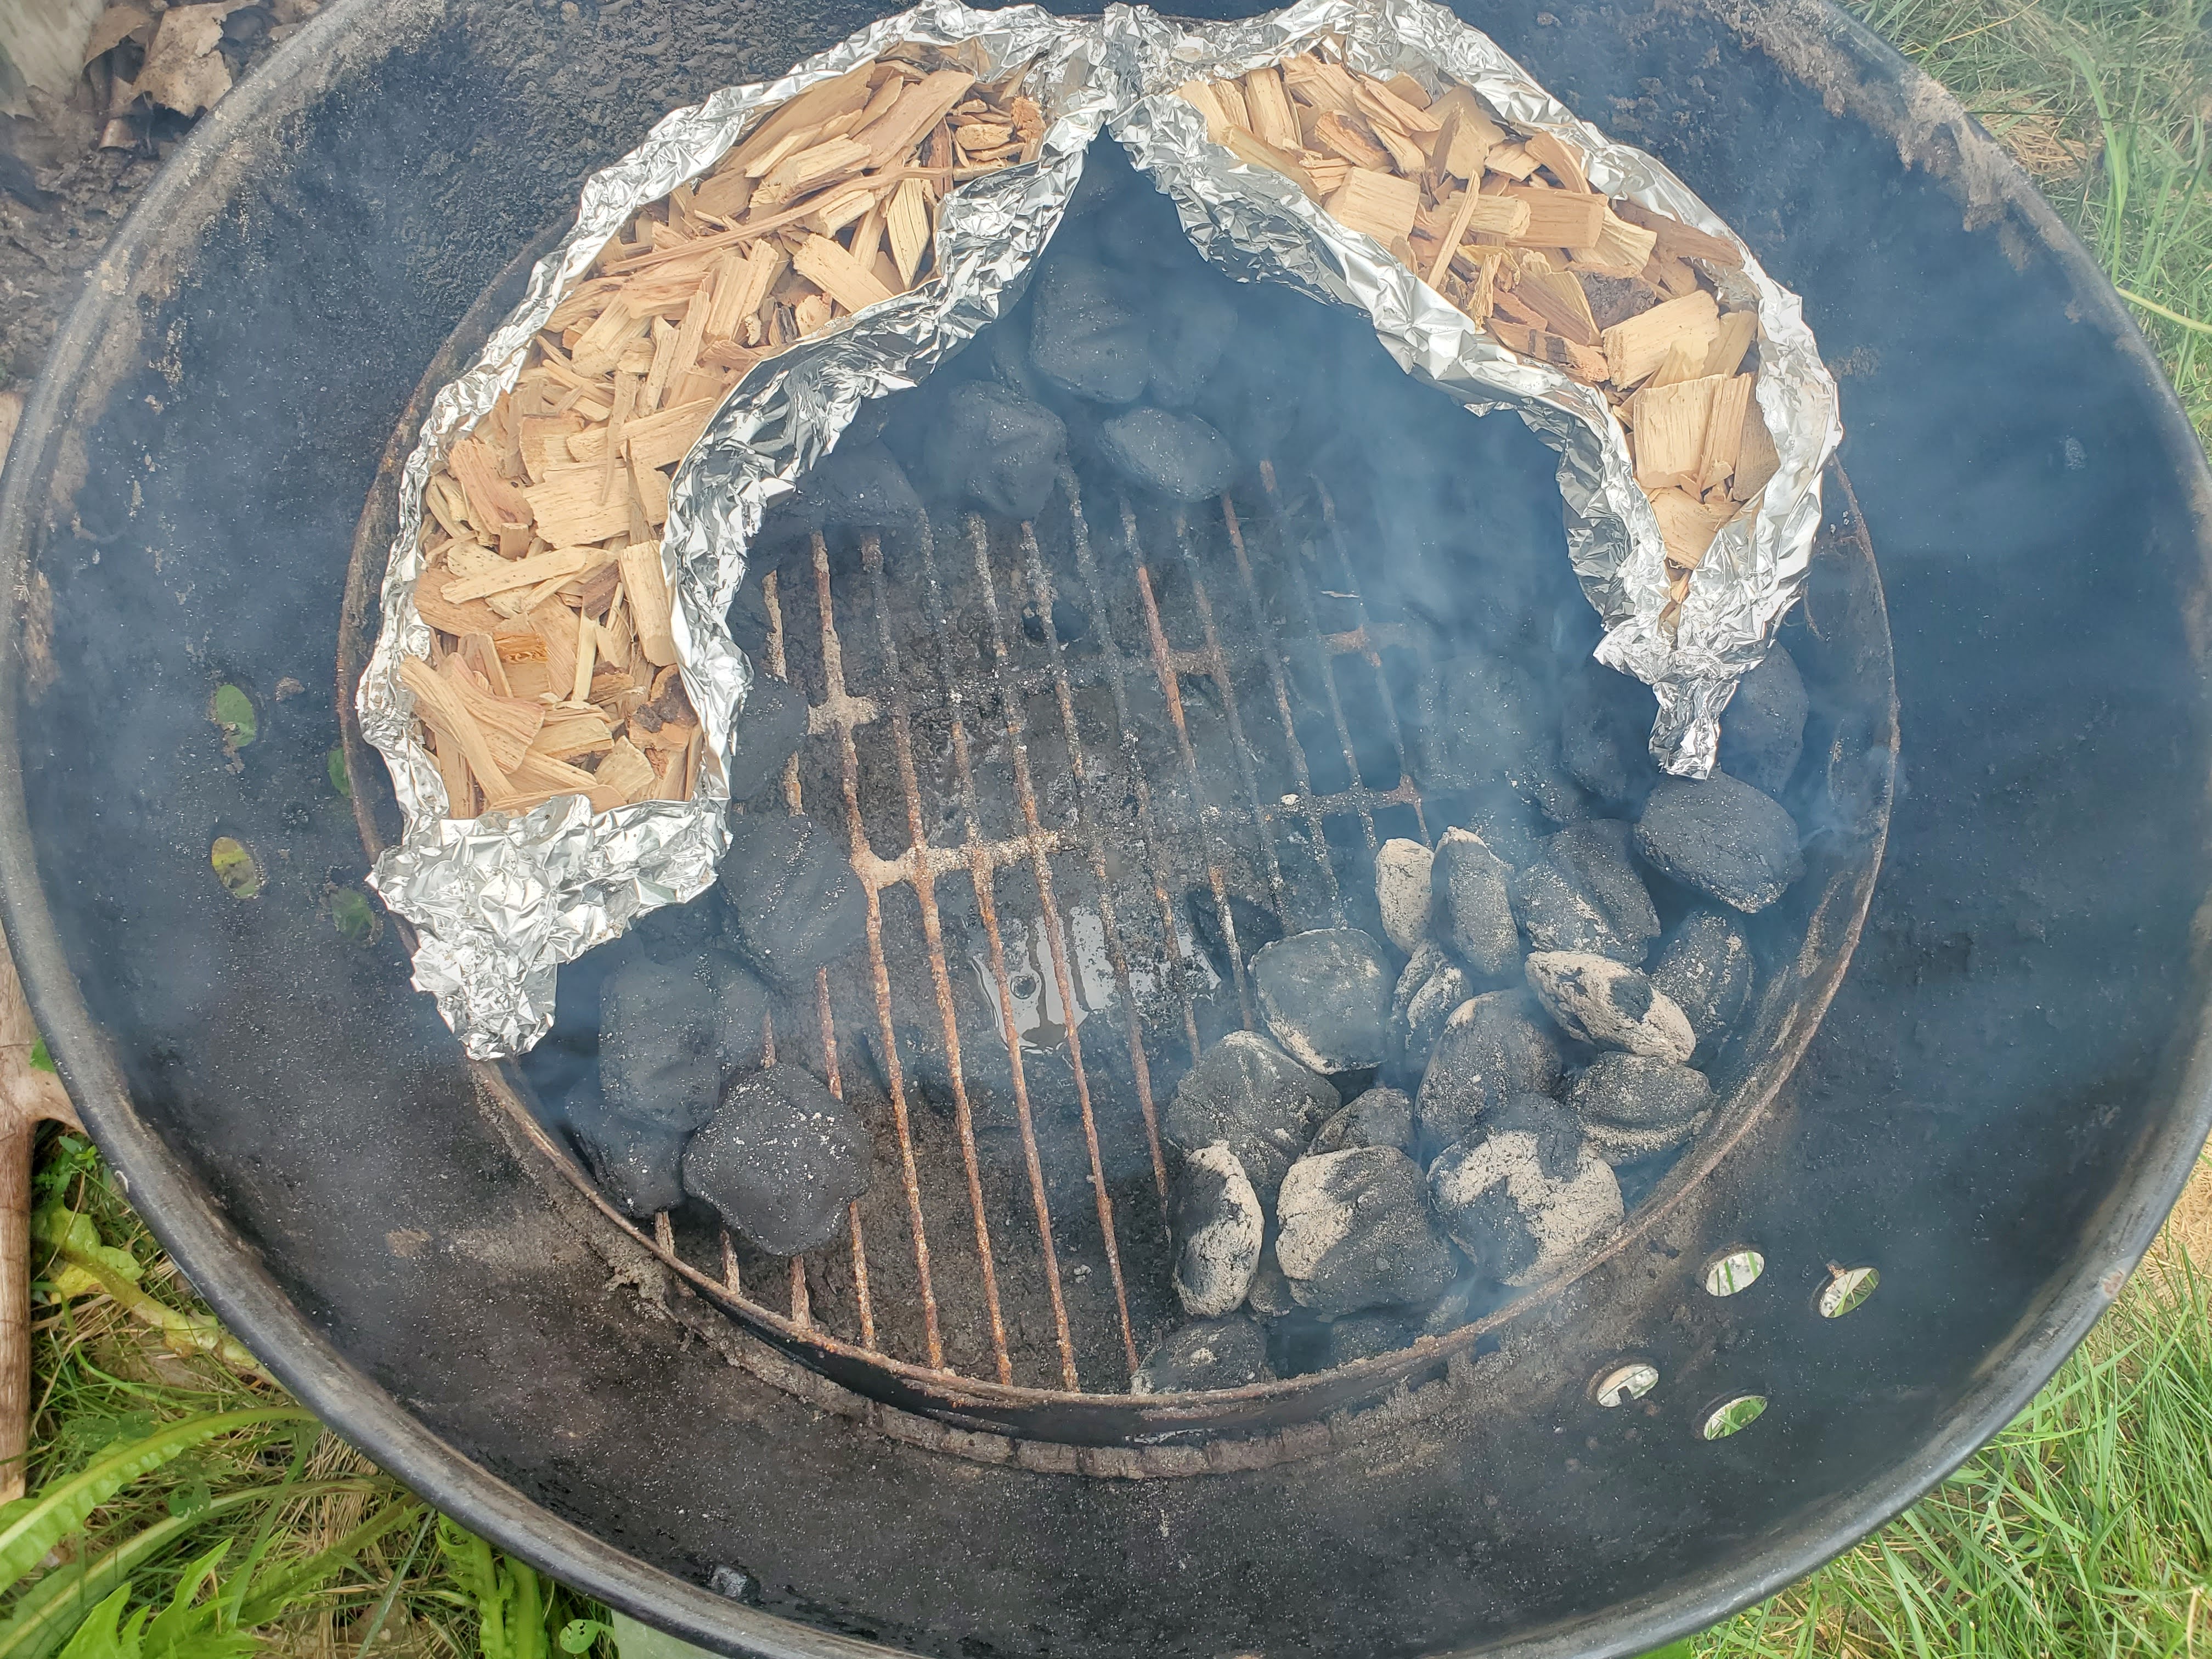
Halfway through, here’s how things look:
Nice and smokey already, but they have yet to undergo their real transformation (as we shall see). Similarly, here’s the firebox:
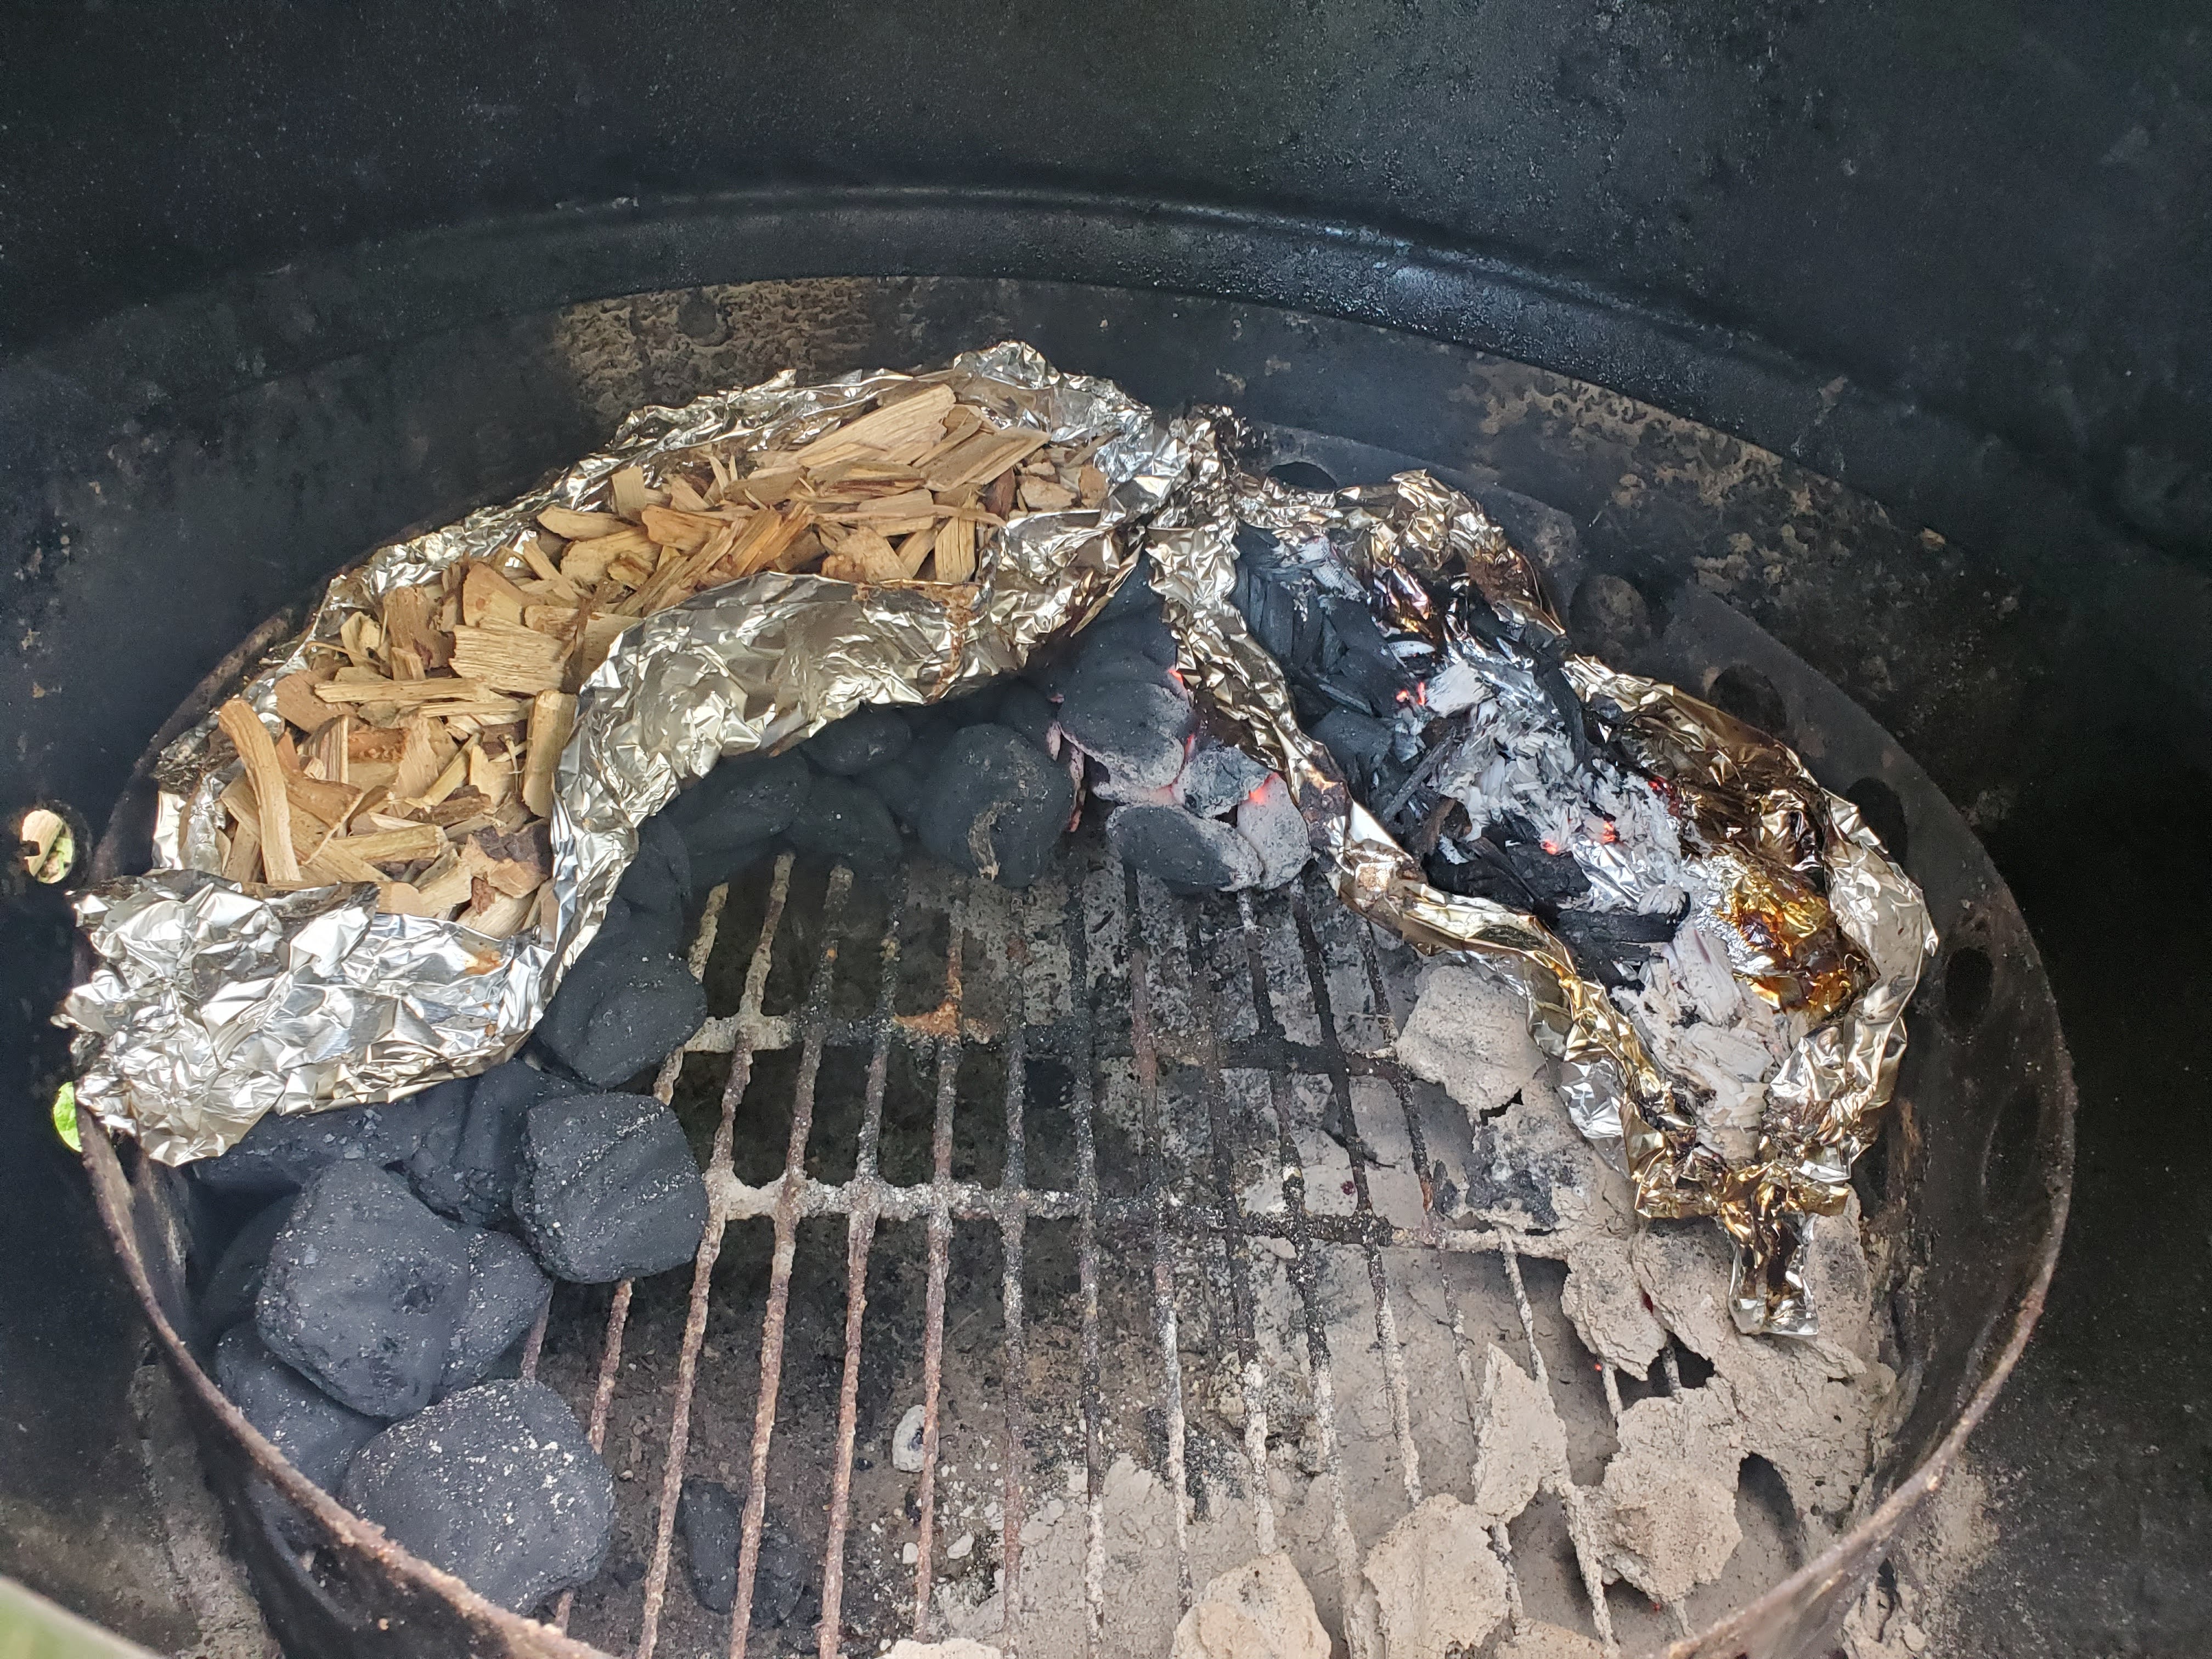
You can see the right side of the snake has burned down, and those wood chips have been converted to delicious hickory smoke. Nothing to do now but close everything back up and let it ride.
While we have a minute, let’s talk about hot-and-fast versus low-and-slow. Like rubs, this is a massive debate, and these are the two major schools of thought in the BBQ world.
The low-and-slow folks argue that the lower temp provides a more gentile and even cook, meaning the center of whatever you’re cooking will be done at the same time as the exterior, unlike, say, searing a steak. They also suggest more time in the smoke means better flavor and a better bark, and the longer process equates to a more thorough conversion of connective tissue to gelatin.
The hot-and-fast folks suggest longer cooking times mean more moisture loss from too much fat rendering out, the potential for a mushy bark without the higher temps needed to set the texture, and that a “shorter” cook doesn’t mean a “short” cook – six (6) hours, for instance, is still plenty of time for good smoke penetration, and for all of the good things to happen that need to happen.
Me? I do both. On a cut like this, I think it benefits from hot-and-fast. From a big pork shoulder that has a sugar rub which may burn? Low-and-slow, baby.
Anyway, here we are five (5) hours in:
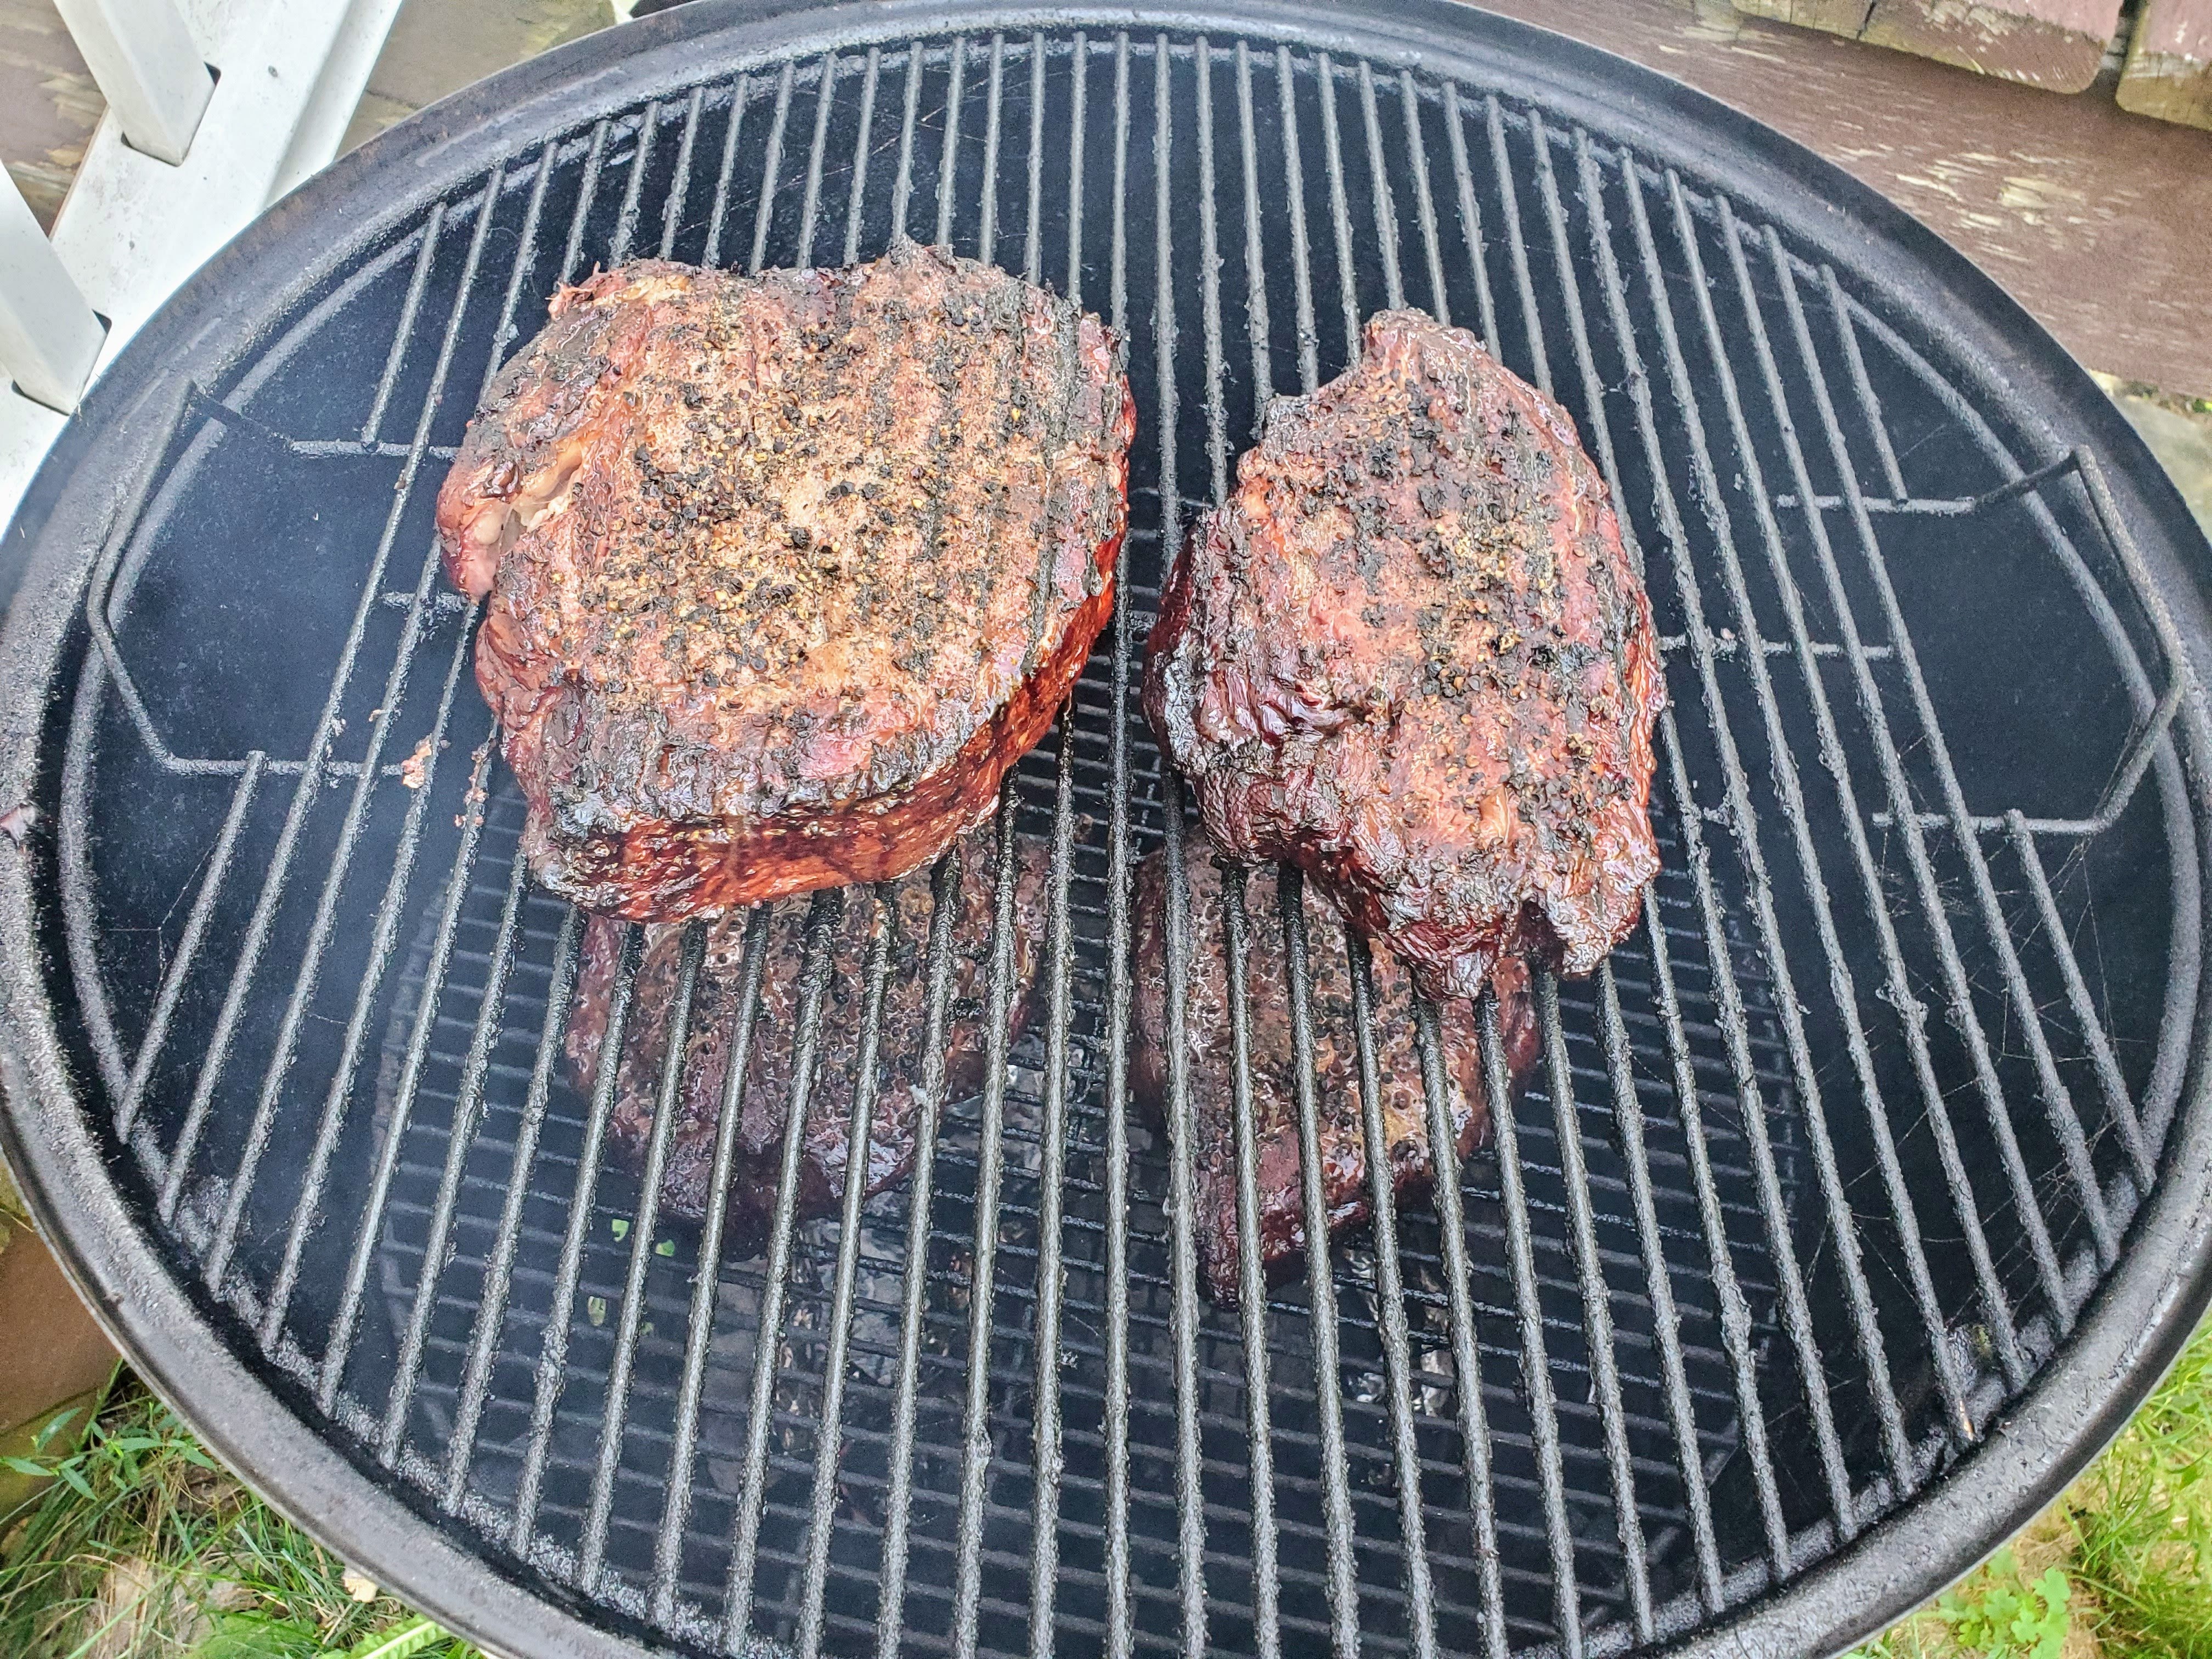
I used a probe thermometer to temp these, and they’re both only at about 155F, even this far into the cook. Why? Because we’re in the “stall.”
When smoking any big hunk of meat, there’s a phenomenon where the internal temp with hit somewhere in the 150F to 170F range, and just… stall. It won’t move, sometimes for hours, even though the beast or butt is still over heat. The issue is moisture is heating and evaporating from within the (in this case) roast, and as it does so, it’s takes energy with it, acting like kind of heat-sink. It’s a similar physical principal that powers air conditioners.
So, what do we do? Well, here’s yet another great BBQ debate: to wrap, or not to wrap. One of the popular ways to power through the stall is to grab your slab of meat and wrap it in foil or plain butcher paper, then get it back on the pit. This creates a micro-climate that traps the escaping moisture and starts a braise, which circumvents the evaporation problem.
Proponents of the wrap (or “Texas Crutch”) claim it speeds cooking, reduces moisture loss, and protects the meat from getting too much smoke. Also, from a competition point of view, wrapping will help retain whatever color you’re shooting for (like bright, candy-apple-red ribs).
Opponents of the wrap claim it ruins the bark by retaining too much moisture, and is fiddly to move the meat on and off the smoker.
Me? I do both. In this case, no wrap. But I have been known to tie up a full brisket or an unusually large pork butt in butcher paper, because in those cases we may be talking about a fourteen (14) hour cook or more, and the arguments about too much smoke and bad color, or a burned bark tend to make more sense with those kinds of times. That said, I NEVER wrap with foil. In my experience, that’s the kiss of death. The butcher paper still allows some moisture to escape, so you don’t end up with a mushy, paste-like bark.
Of note: once you get through the stall, the internal meat temp will climb rapidly, so don’t panic if (like me) you’re five hours in and just hitting “well done steak” territory. You don’t have another five to go; nowhere close.
Lastly: Do I rotate these around? No. But I probably should, in terms of moving the top to the bottom, and vice versa. The reality is I can’t be bothered, and I don’t want to have the lid off the smoker for the time it takes to play musical chairs. If I were doing two full brisket, or two big butts (Sir Mix-A-Lot style), I probably would switch them around, again due to the very long cook times compounding any potential temp differences.
Anyway, onward to the promised land!
At six and a half hours, three of the four are done:
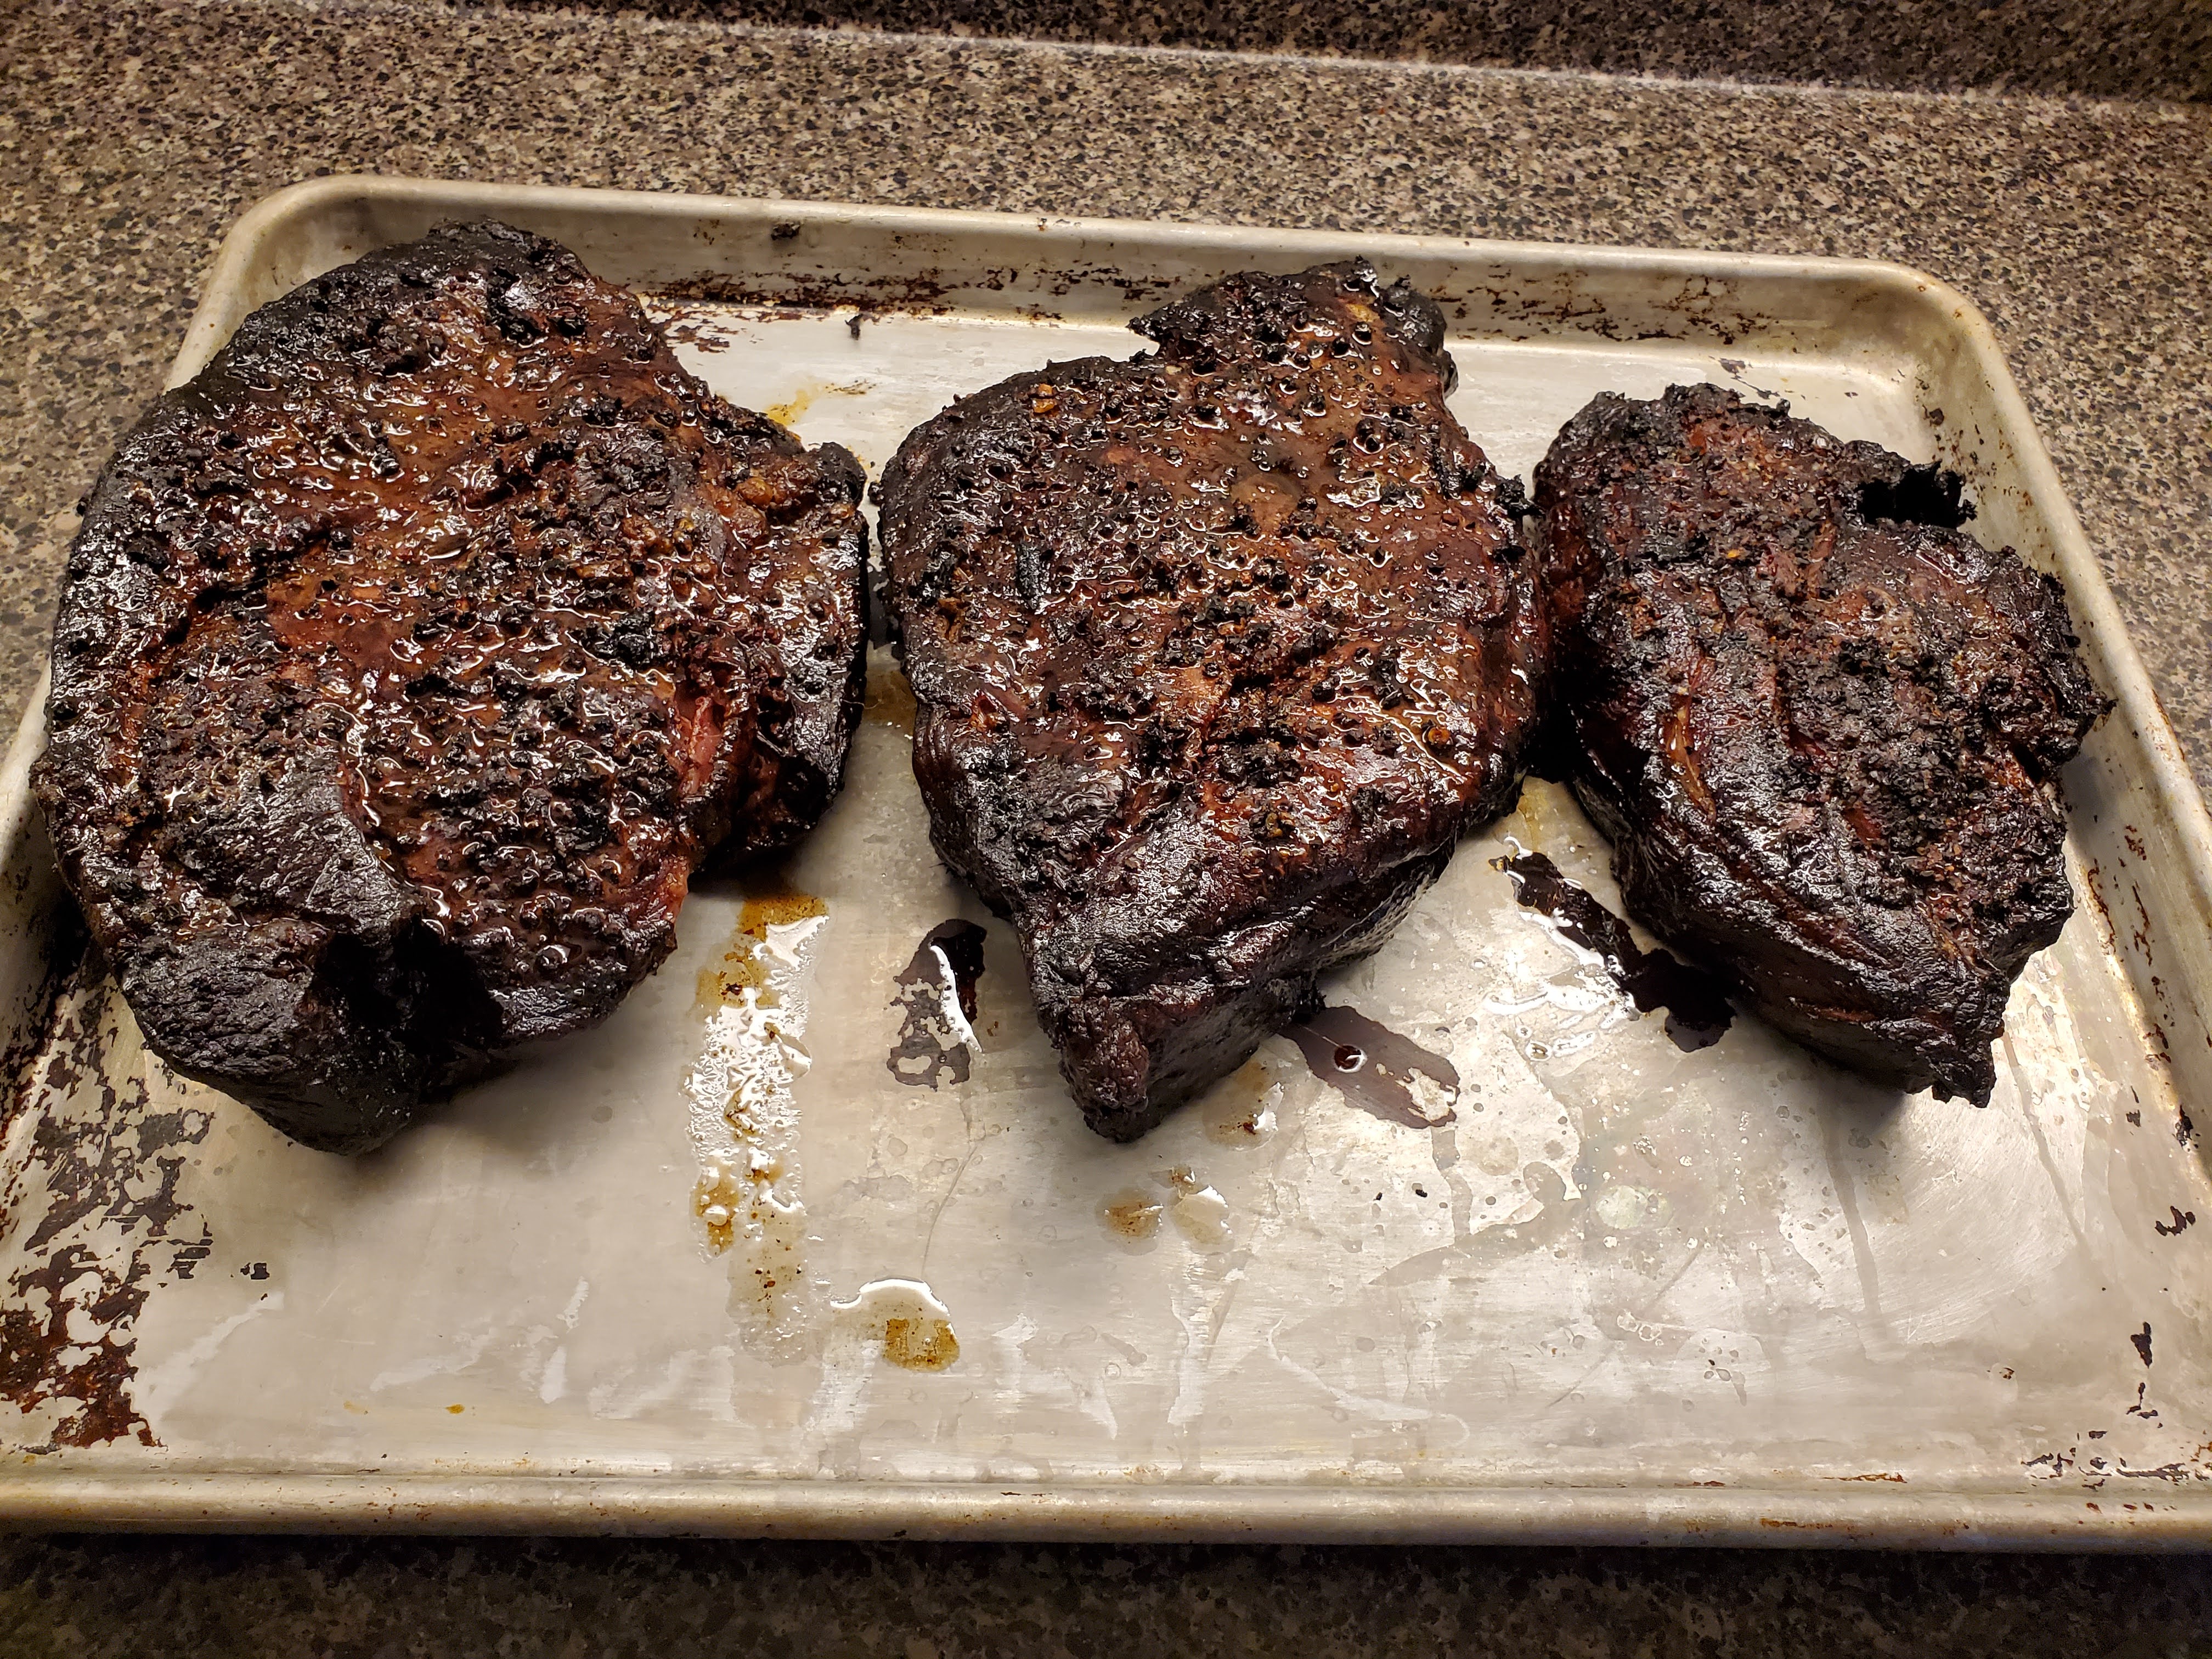
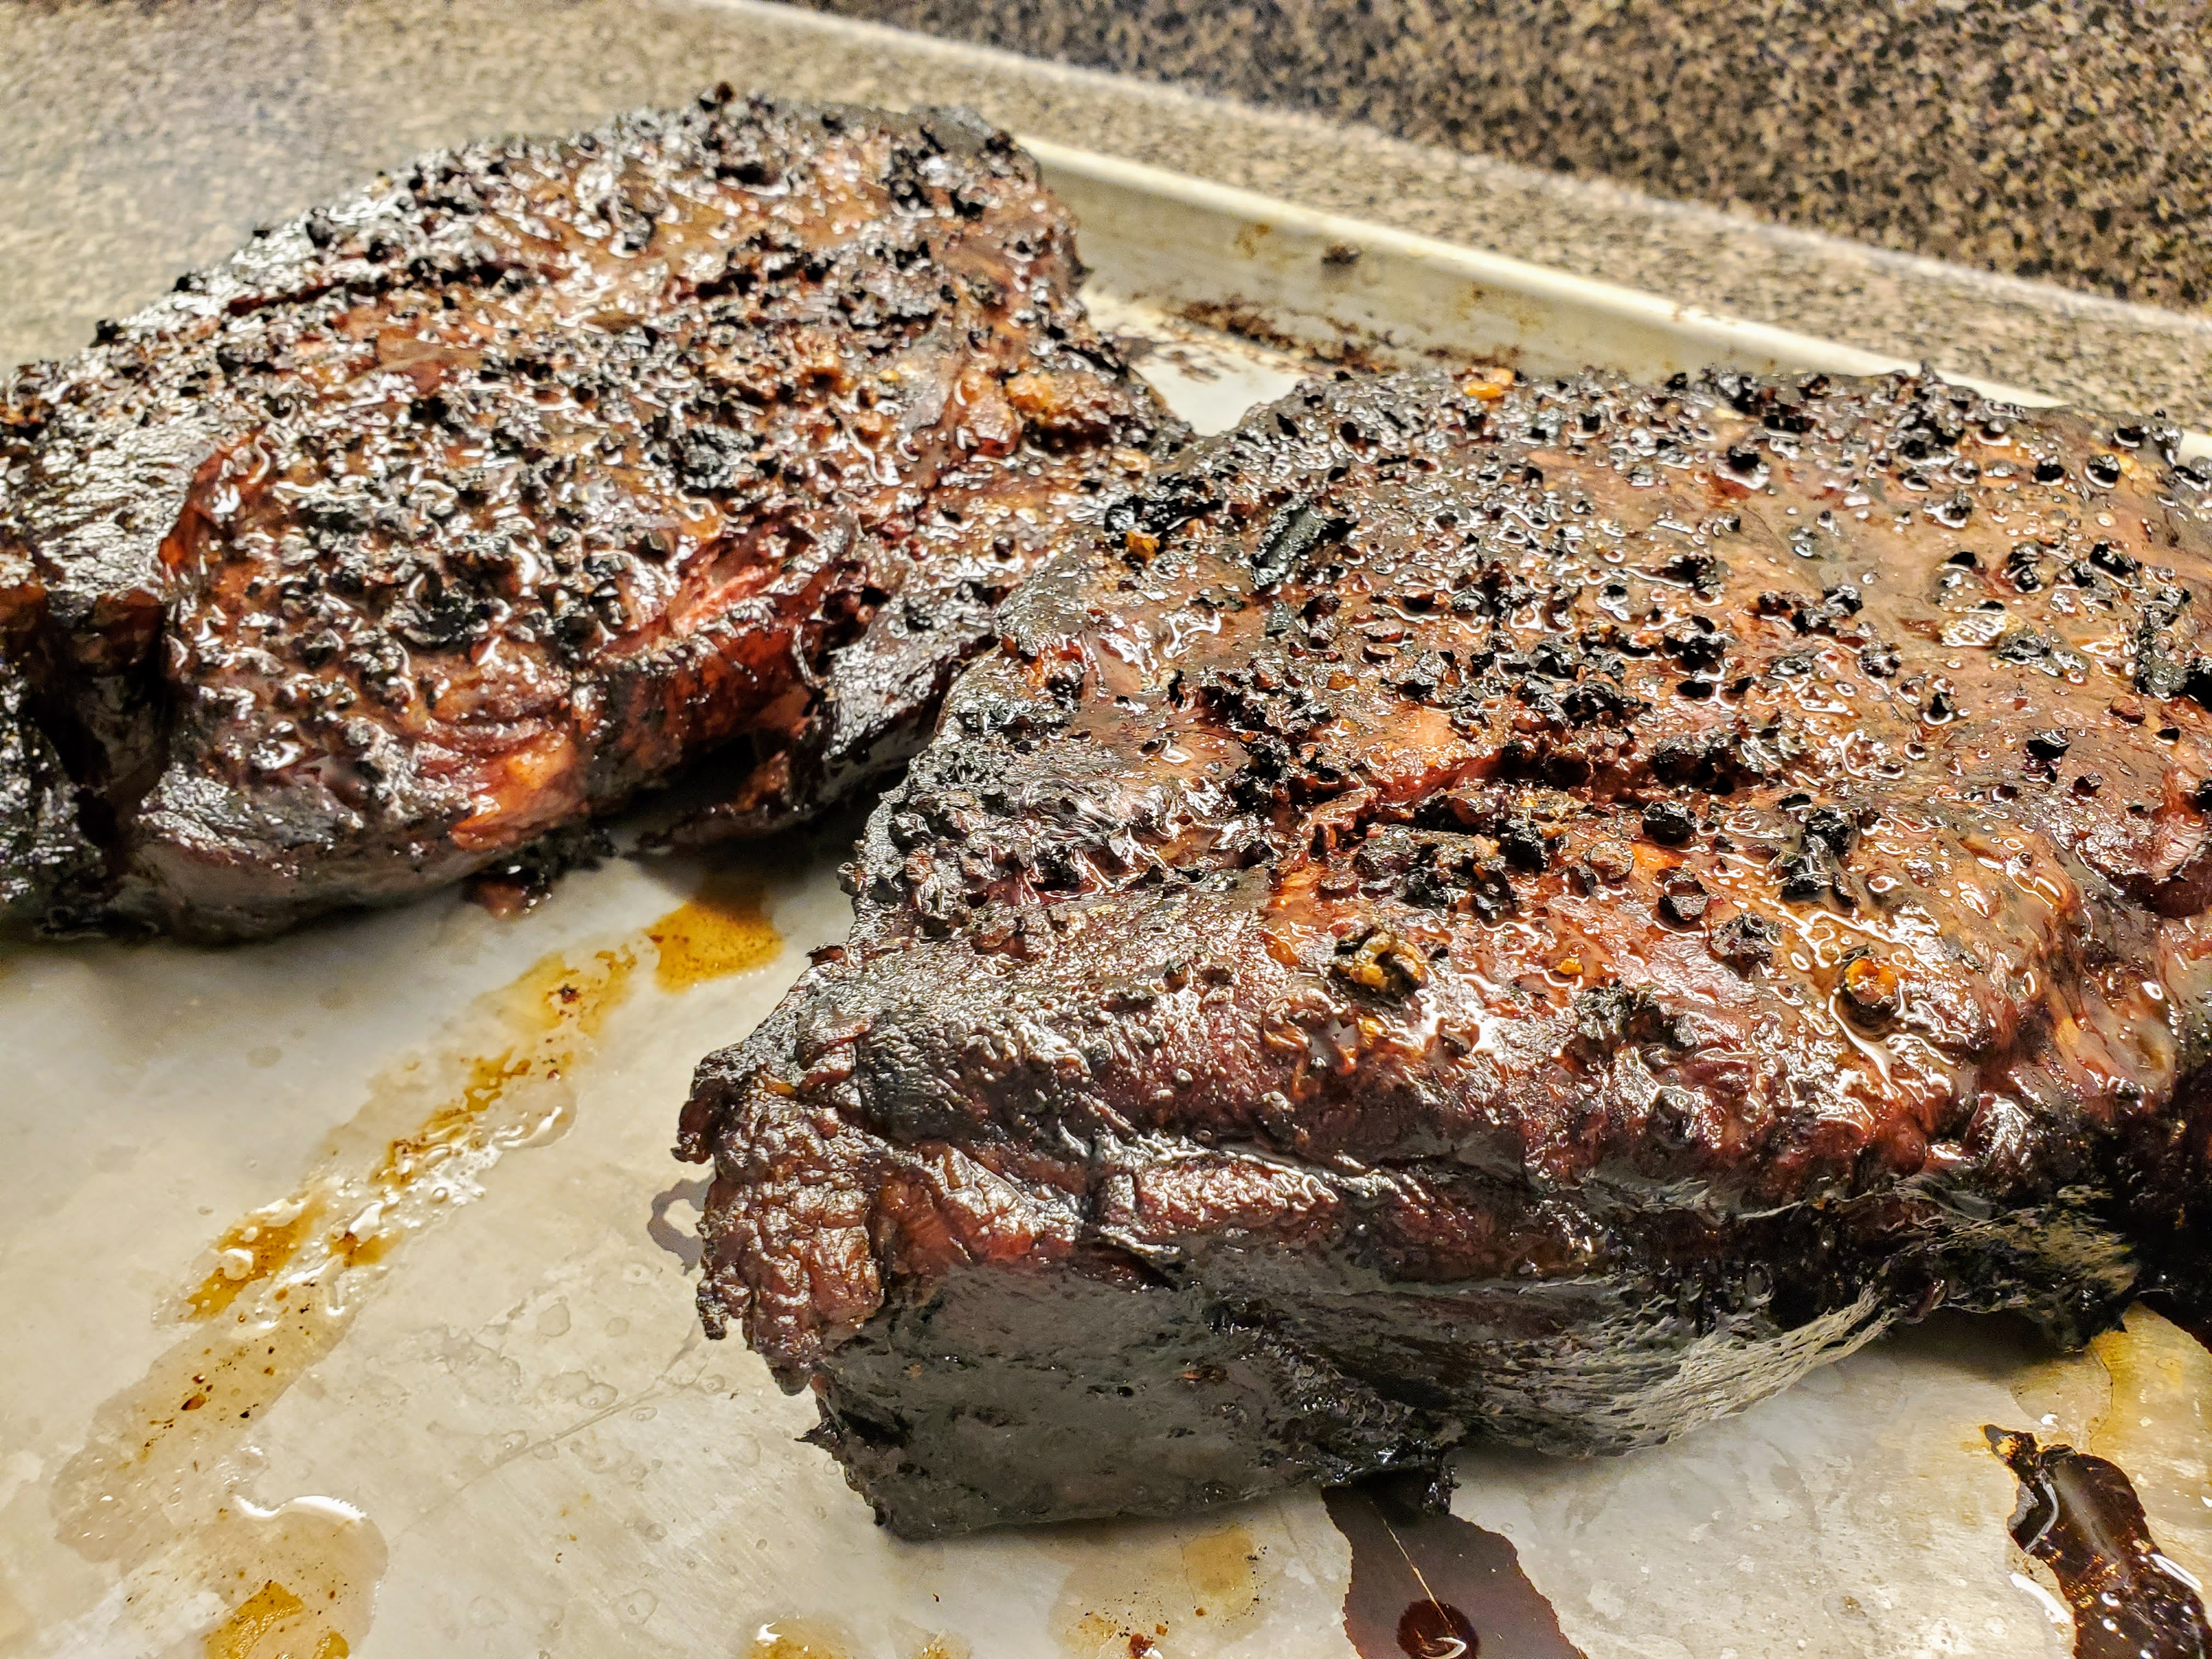
You can see our course-grind peppercorns have held their texture, though they’ve softened considerably and even soaked up some of the juices.
So, why are only three done, and the fourth is still in the stall? Because BBQ, that’s why.
Before we can dive into these, they have to rest. The reality is they actually aren’t quite done cooking. The internal thermal mass will carry these up into about 205F, and we want to give them time to hit that peak, then slide back down. We also want to give the muscle fibers a chance to relax, and bask in the delicious goodness that is the newly-gelatinized connective tissue. Think of it like cooling down after a long run.
I find the best place to rest these is in a cold oven with the door closed. I don’t like tight coverings here for the same reason I’m not a super-fan of the wraps: I don’t want my bark soggy.
So how long do we have to rest? I mean, we just cooked these for six and a half hours? Well, some would say you need to go another hour. I think that’s silly, and really you’re only looking at ten (10) to fifteen (15) minutes to allow the train to pull into the station, and also make these cool enough to handle without burning off your fingerprints.
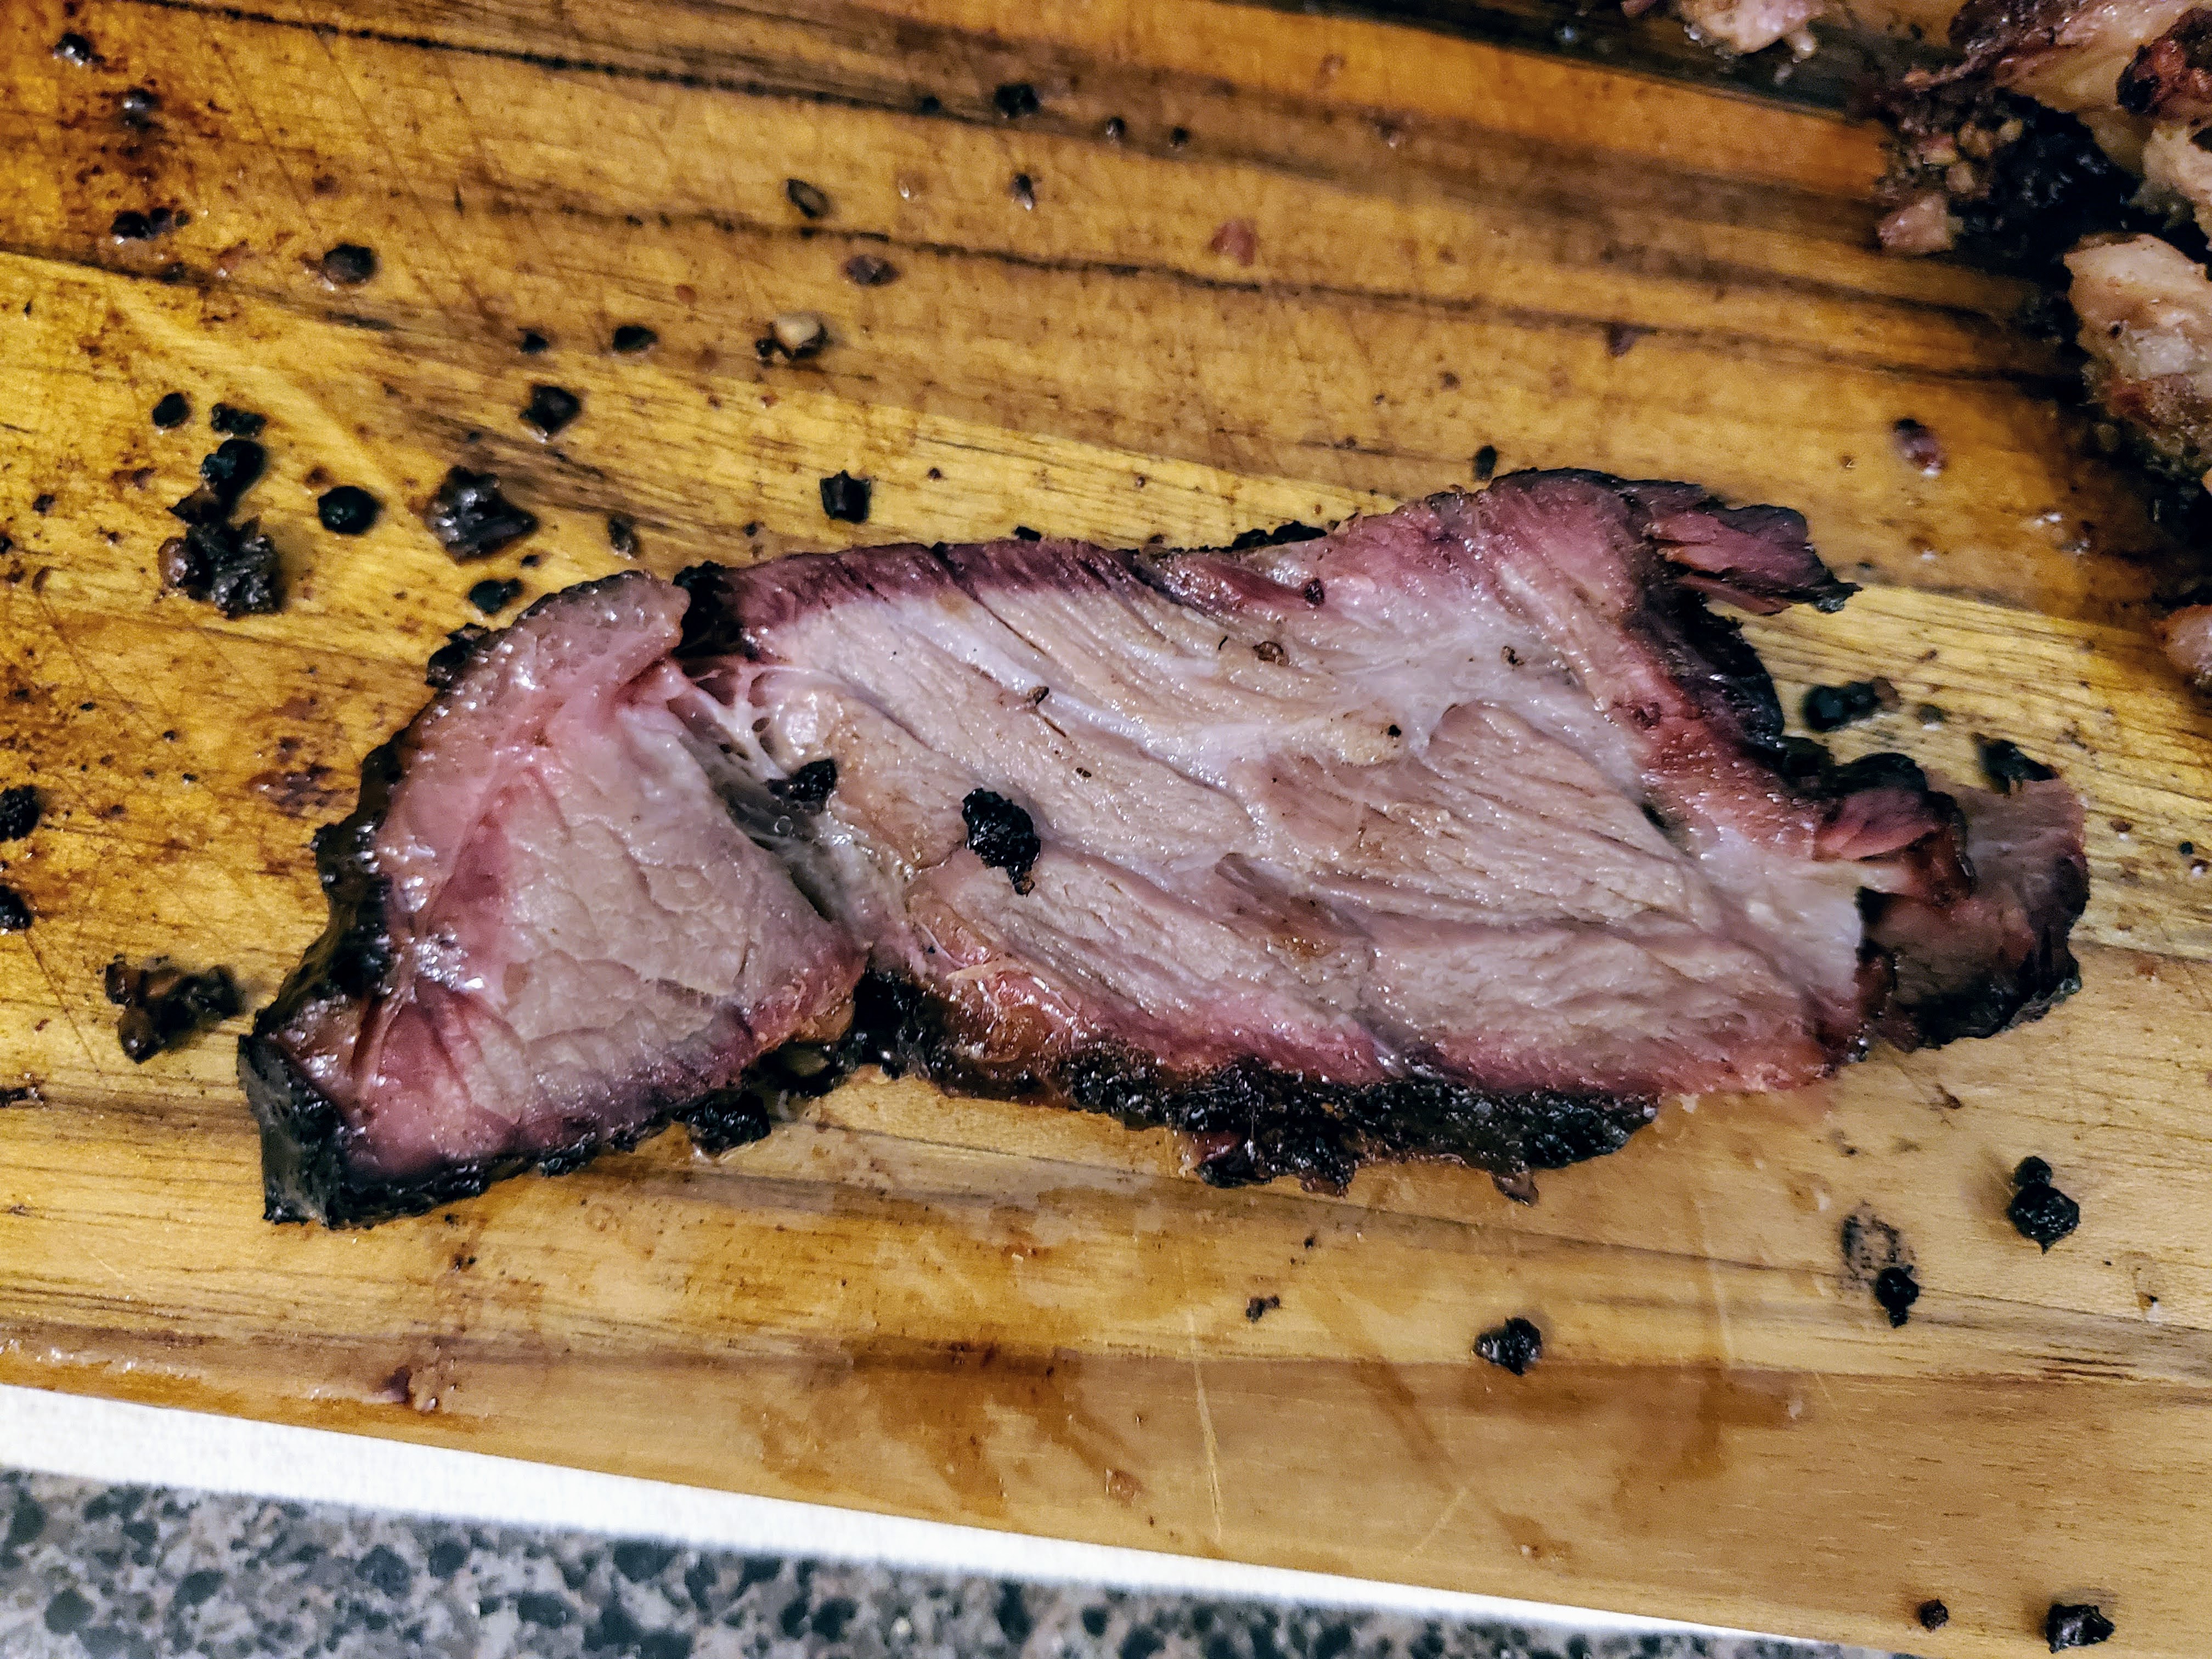
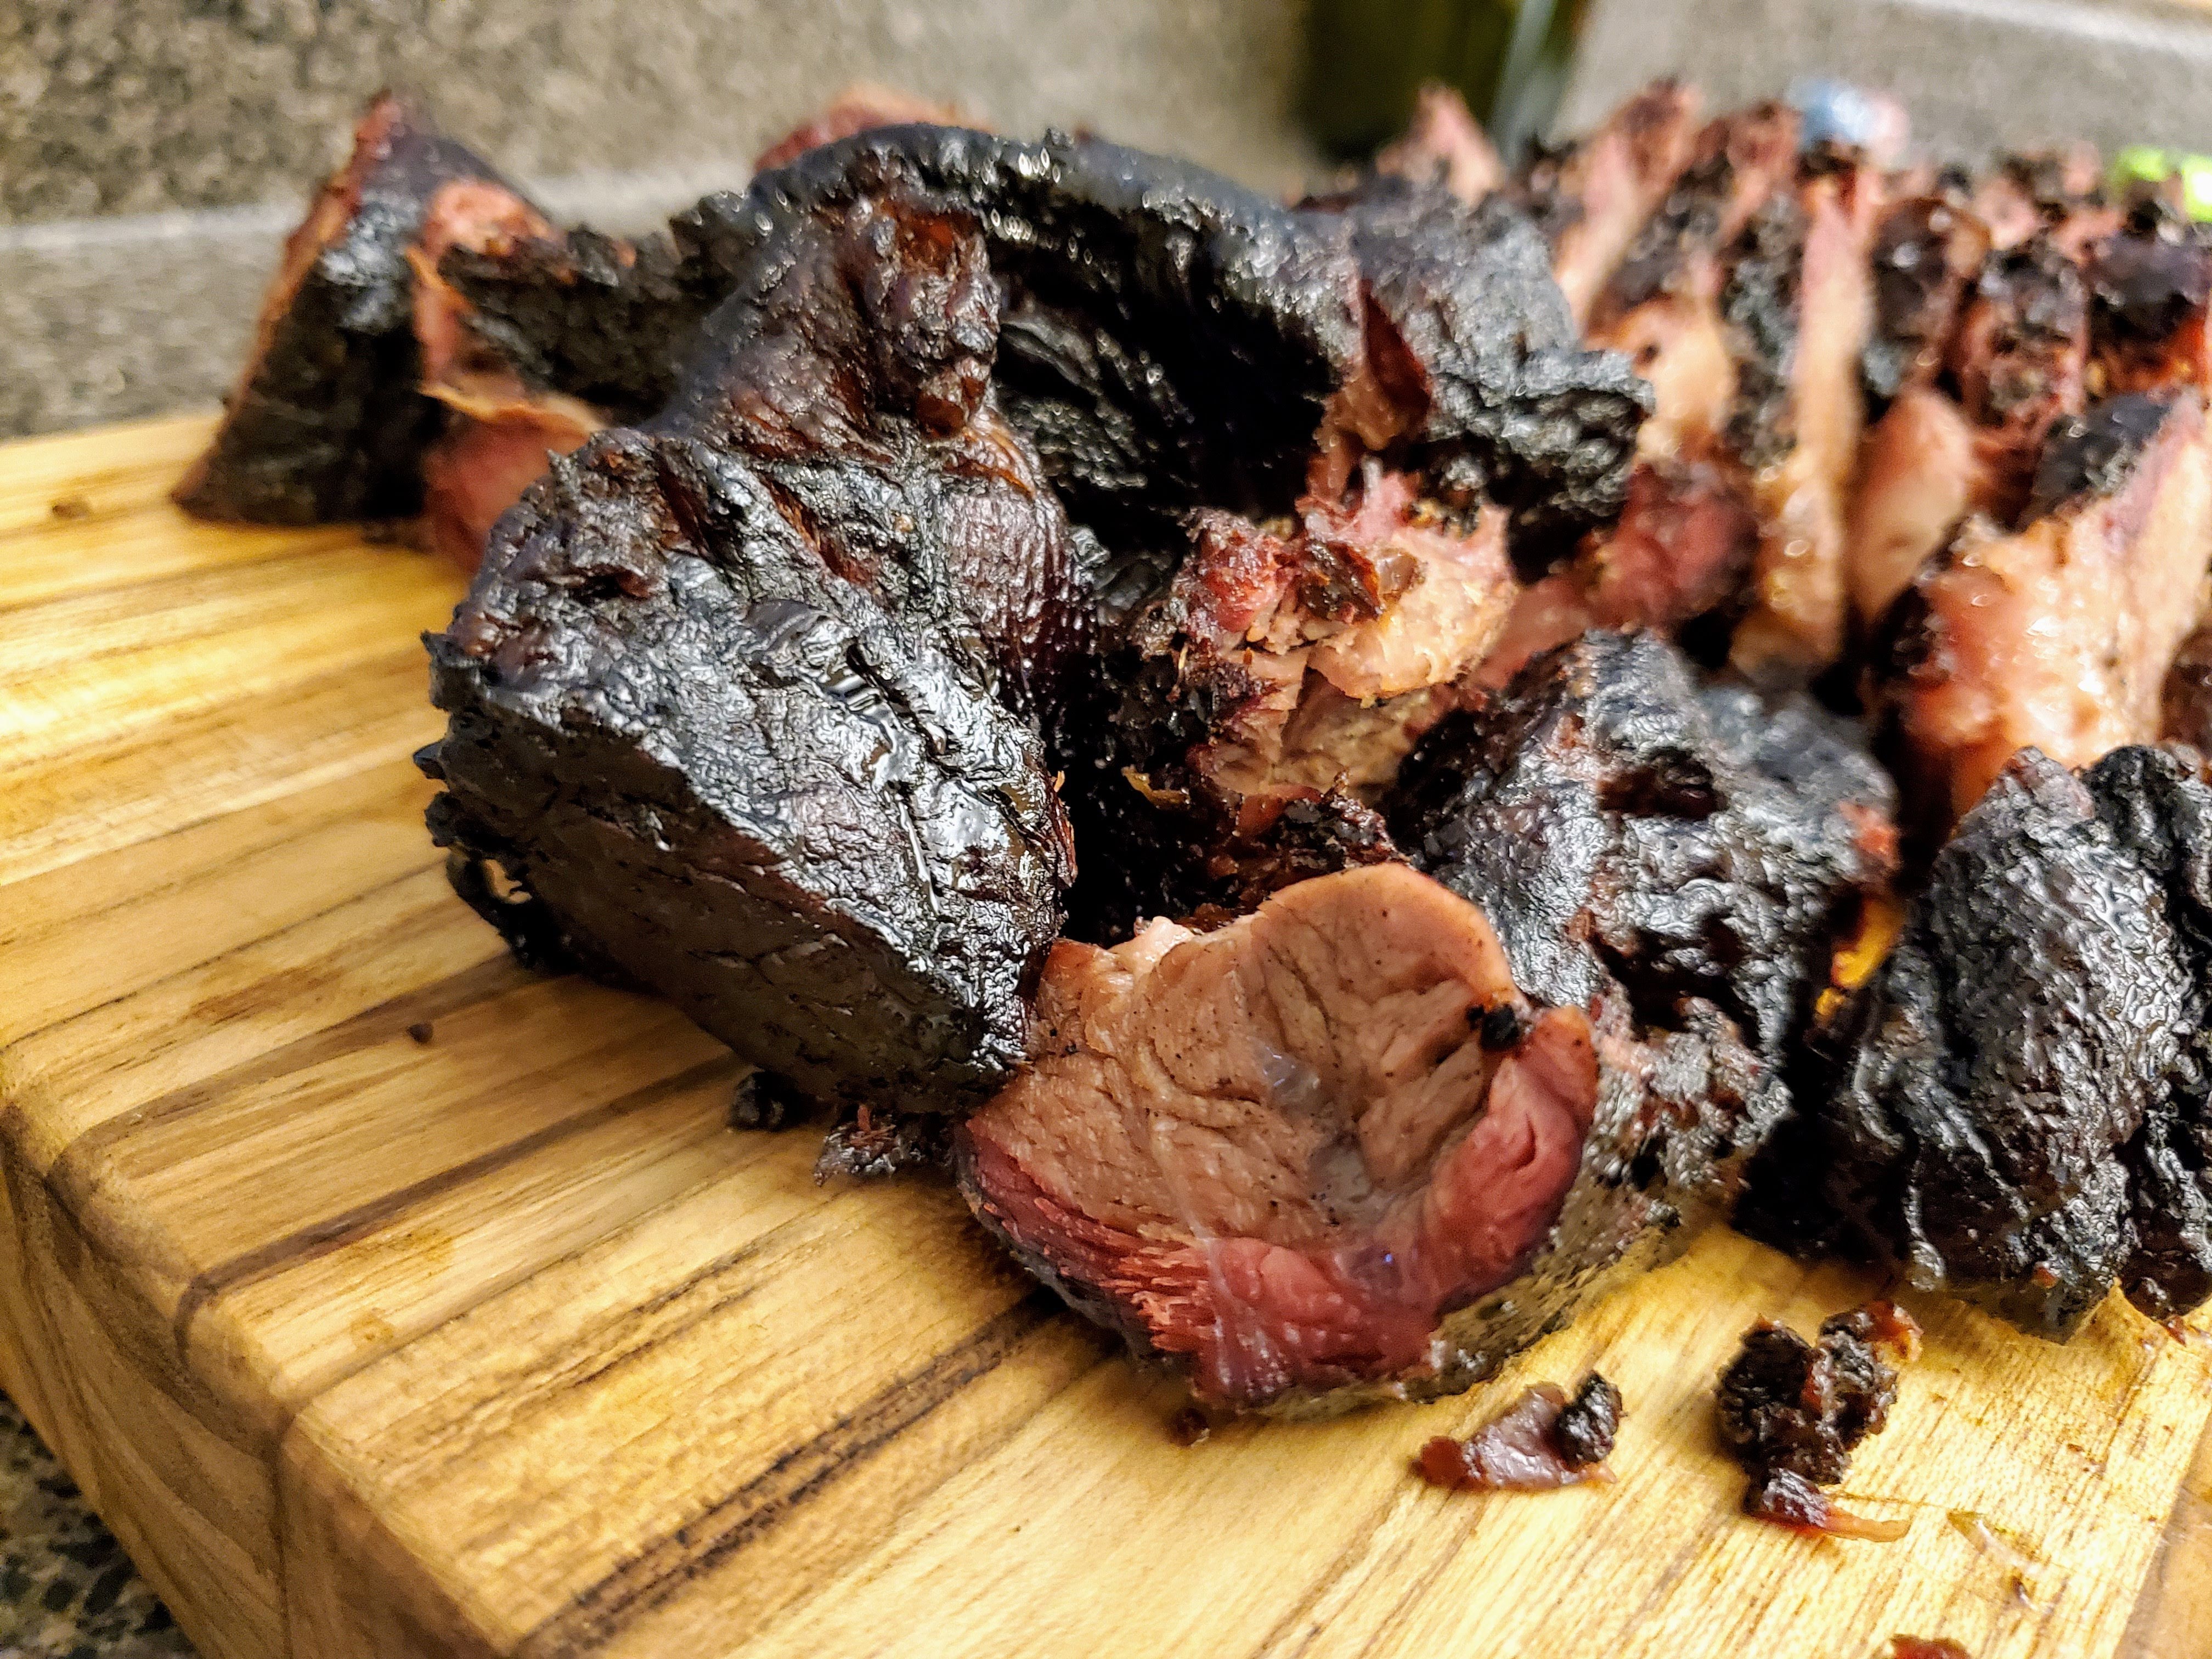
When, at long last, it comes time to serve, what’s the protocol for carving? Well, I always start with slices, using the thinnest, longest knife I have. Depending on your audience (particularly if it includes Mrs. 10Chickens), they may want a classic “chop” which is exactly what it sounds like, but is easily produced from slices or any stubborn parts of the roast that feel more firm than the buttery, floppy target texture. Also, you even get “fake” classic burnt-ends (upper left, and third pic below), which are hallowed brisket byproducts.

As for serving suggestions, on the actual night that I smoke these, we usually just eat it as-is with a nice green bean side or potato salad. It’s bliss in its simplicity. But, as for leftovers, I can’t say enough about a sandwich on slightly stale bread with creamy horseradish sauce, crisp red onion, and melted orange cheddar. But… that’s just me.
And so here we are. A $10.00 roast, salt, pepper, and woodsmoke. A house that smells like Doc Holiday’s daydreams, and something you literally can’t buy in any restaurant.
It may not be brisket, but it may be the next “brisket.” Get it while you can.


One thought on “Poor Man’s Brisket”