
#RecipeUpTop (details below):
- 1 whole chicken;
- 2 eggs;
- 2 tablespoons butter;
- Water (varies);
- Salt (varies);
- AP flour (varies);
Method: Add whole chicken to a large pot and cover with water. Add salt and boil for an hour, then remove to cool. When safe to handle, pull chicken by hand. In a large skillet, melt the butter with a cup of the remaining broth, then add flour and stir until it forms a soft ball, the consistency of play-doh. Move to a stand mixer or a bowl with a hand mixer, and allow to cool slightly before incorporating eggs (one at a time). Drop dumplings into simmering broth and cook for eight (8) to ten (10) minutes, then serve over pulled chicken.

Details
From time to time, and particularly after the holidays, we find ourselves here at the 10Chickens fort looking at bills and bank accounts and making a solemn resolution to tighten the belts and stick to a budget.
While there are a lot of areas that get the dreaded red pen of austerity, the first stop is usually the food spending, as the holidays tend to evoke a laisse faire attitude toward the more extravagant items at the market.
And so, again we find ourselves in the cold-weather doldrums of the new year, with resolutions about fitness and financial responsibility. And, we’re really, really tired.
The solution? Chicken and dumplings.
While this may seem like an odd foundation for a home spending plan, let me explain. I’ve previously talked about our bulk-chicken-buying plan, but certain… events… from this year put a stop to that once grocers started enacting item limits.
No worry. The plan still works, but we’ll do it one at a time.
As previously discussed, I’m not sure there’s a better value in the modern mega-mart than whole chickens. Take this one, for instance:
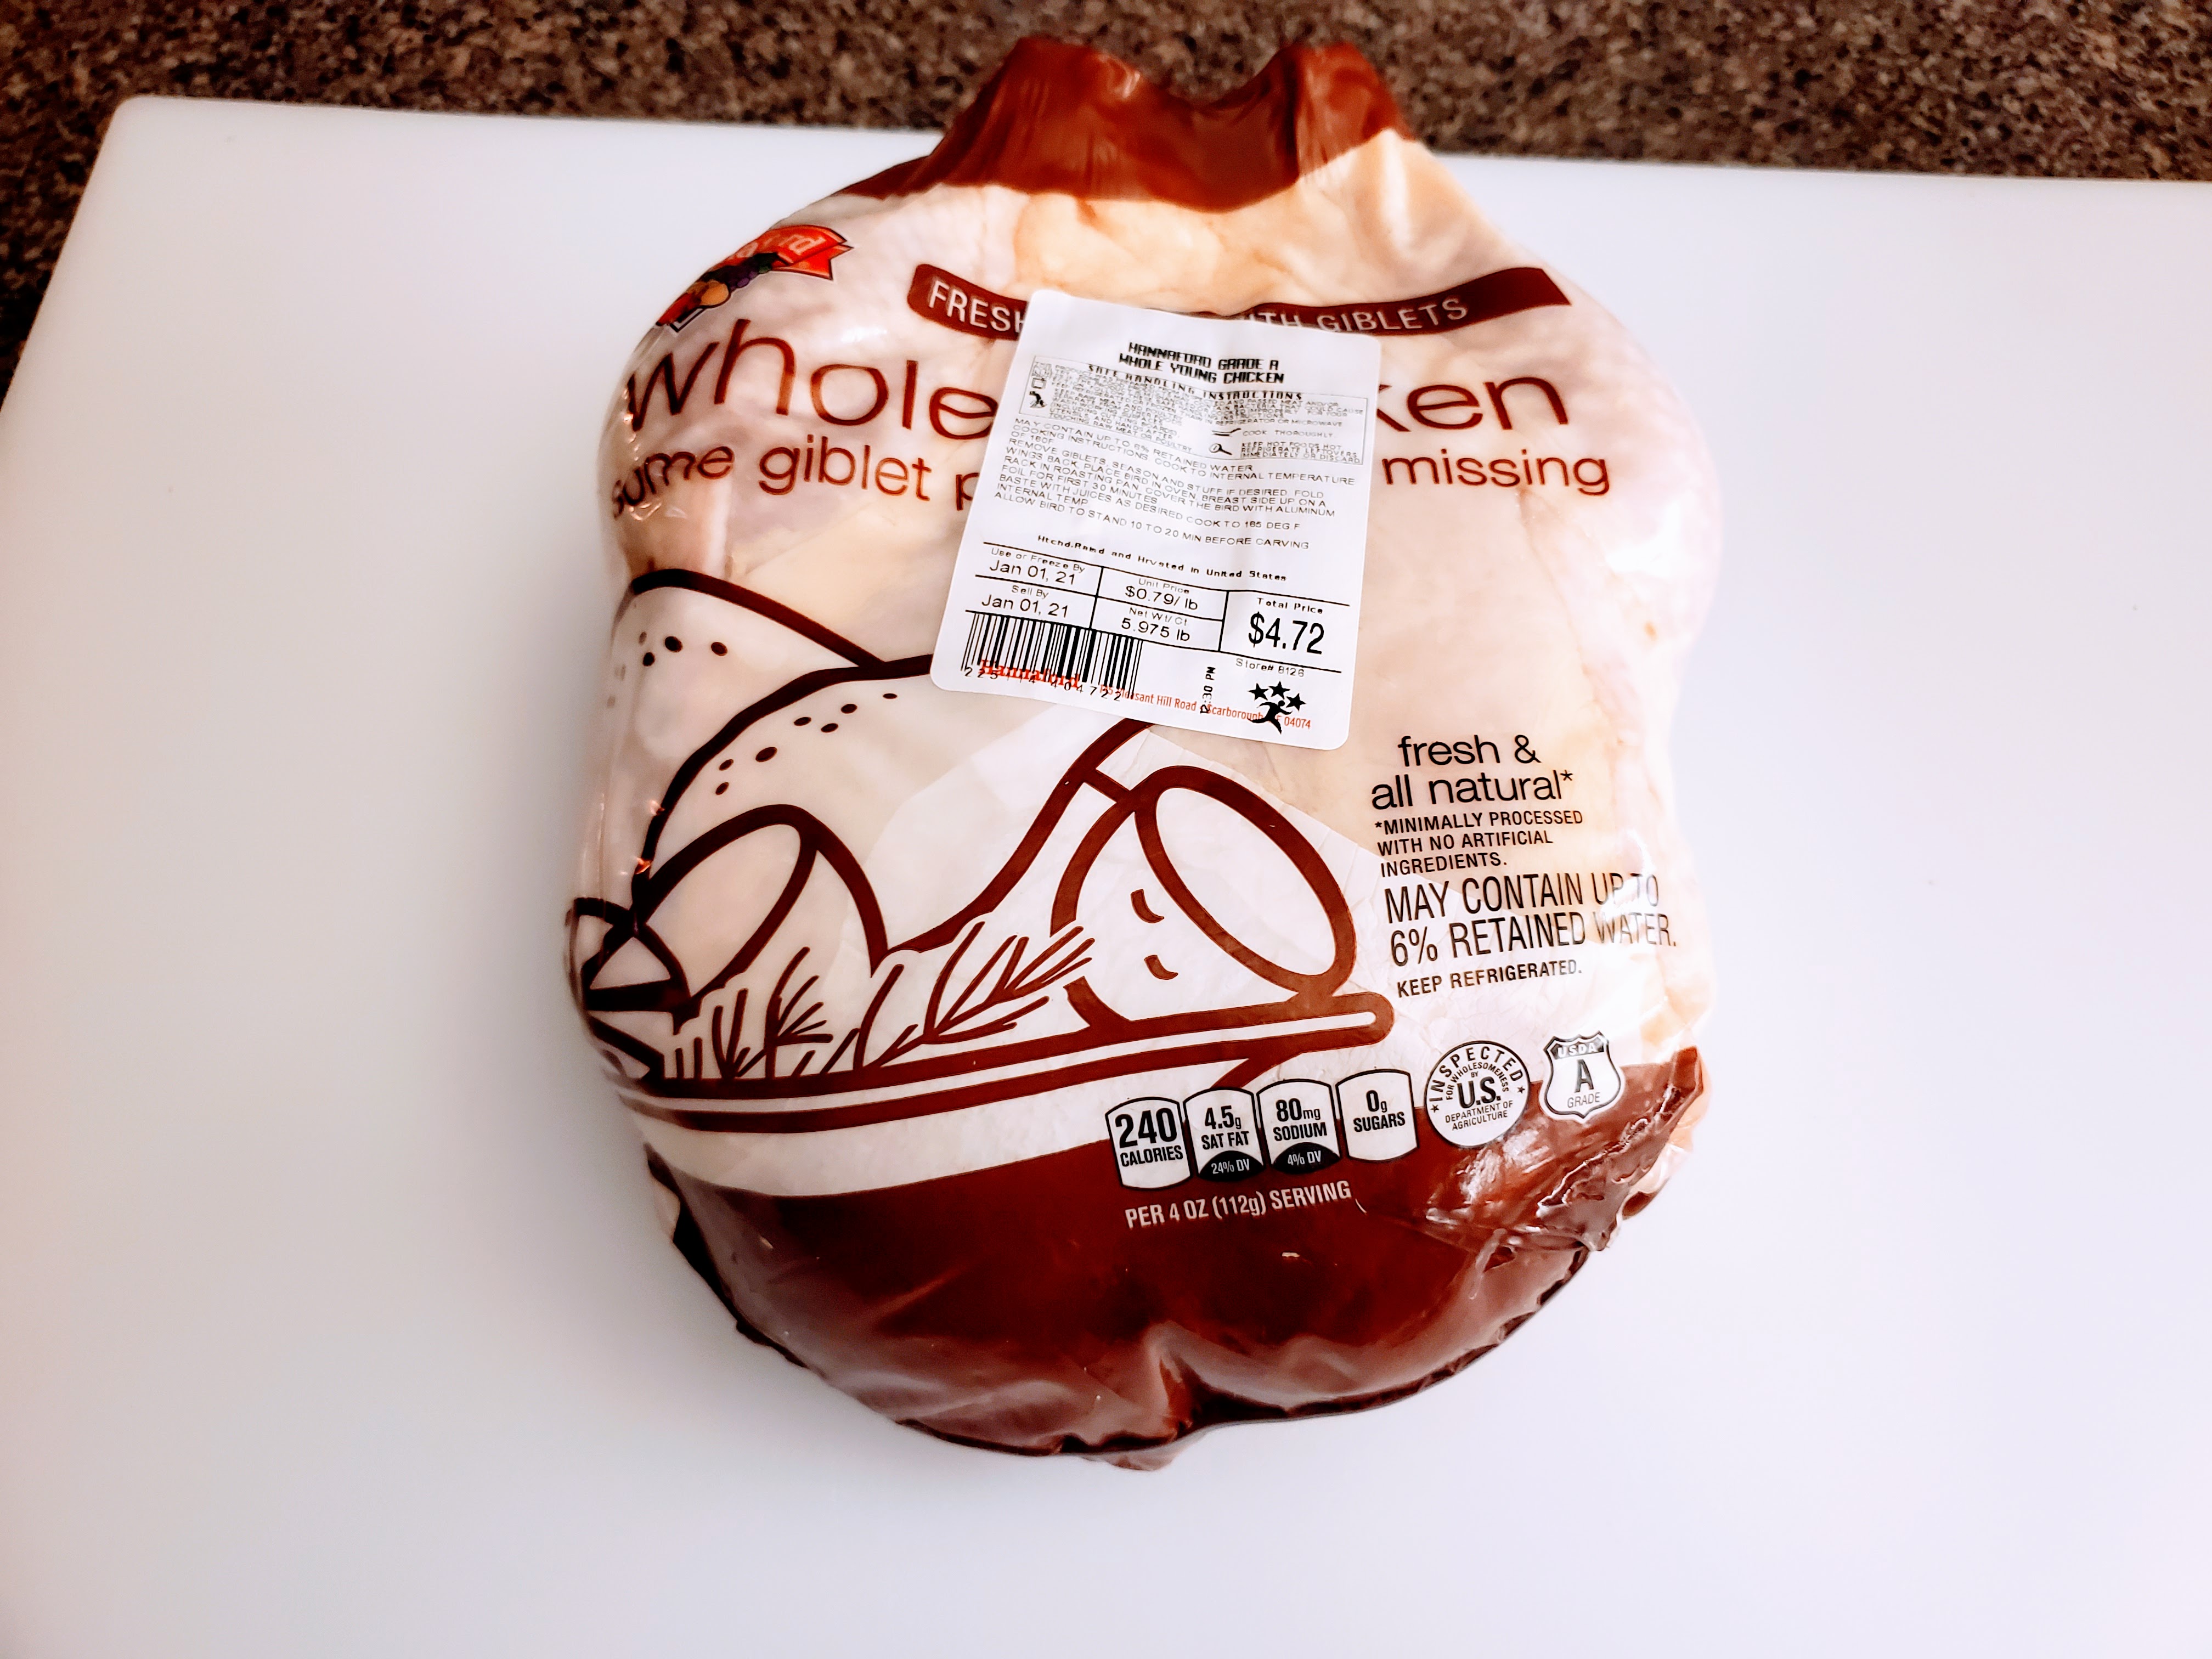
Less than $5.00. Yet, with minimal additions, this is going to produce ten (10) to fifteen (15) plates of delicious, homemade food. For $5.00. Seriously.
Unlike my bulk buying plan, which (in fairness) involves a lot of butchering and some practice and technique (not to mention freezer space), this method lets physics do the heavy lifting, all while extracting 90% of the same benefits.
Step one: get it in a pot and cover it with water.

Yes, I’m adding bay leaves, and no, I didn’t mention that at the top because IT’S NOT NECESSARY. I have them already, and I like them, so in they go. But, traditionally, this is a dish made with just chicken, water, and salt, so don’t worry about it.
Speaking of: add the salt. How much? Well, it depends. How big is the chicken? How much water is in the pot? What’s your personal preference? The good news is there’s a LOT of room for adjustment here, so go with a healthy sprinkle. We just want to get a little seasoning into the chicken. We’ll test and adjust the broth later.
NOTE: were this regular chicken stock, we would NOT be adding salt, as discussed in our prior post. Here, again, we want some even seasoning in the meat.
Anyway, boil this for an hour, adding more water if needed. (You can also do this in a pressure cooker in about twenty [20] minutes).
Step two: yank the chicken and set it in a bowl to cool. This thing is going to be HOT, and it’s probably going to fall apart a bit, which is fine. I use a wire spider to get the parts out in as few pieces as possible, but don’t fret.
Once your chicken is out of the broth, give it a taste and adjust for salt. You don’t want it to be salty, but it’s going to need some seasoning. Go slow, taste often, and if you over-salt, you can add some water.
When the chicken is cool enough to handle, dive in with your hands and start picking every morsel of meat you can possibly pry loose. I like to pull the skin off first, and set it aside for some grateful pups, then move the picked meat to a separate bowl:
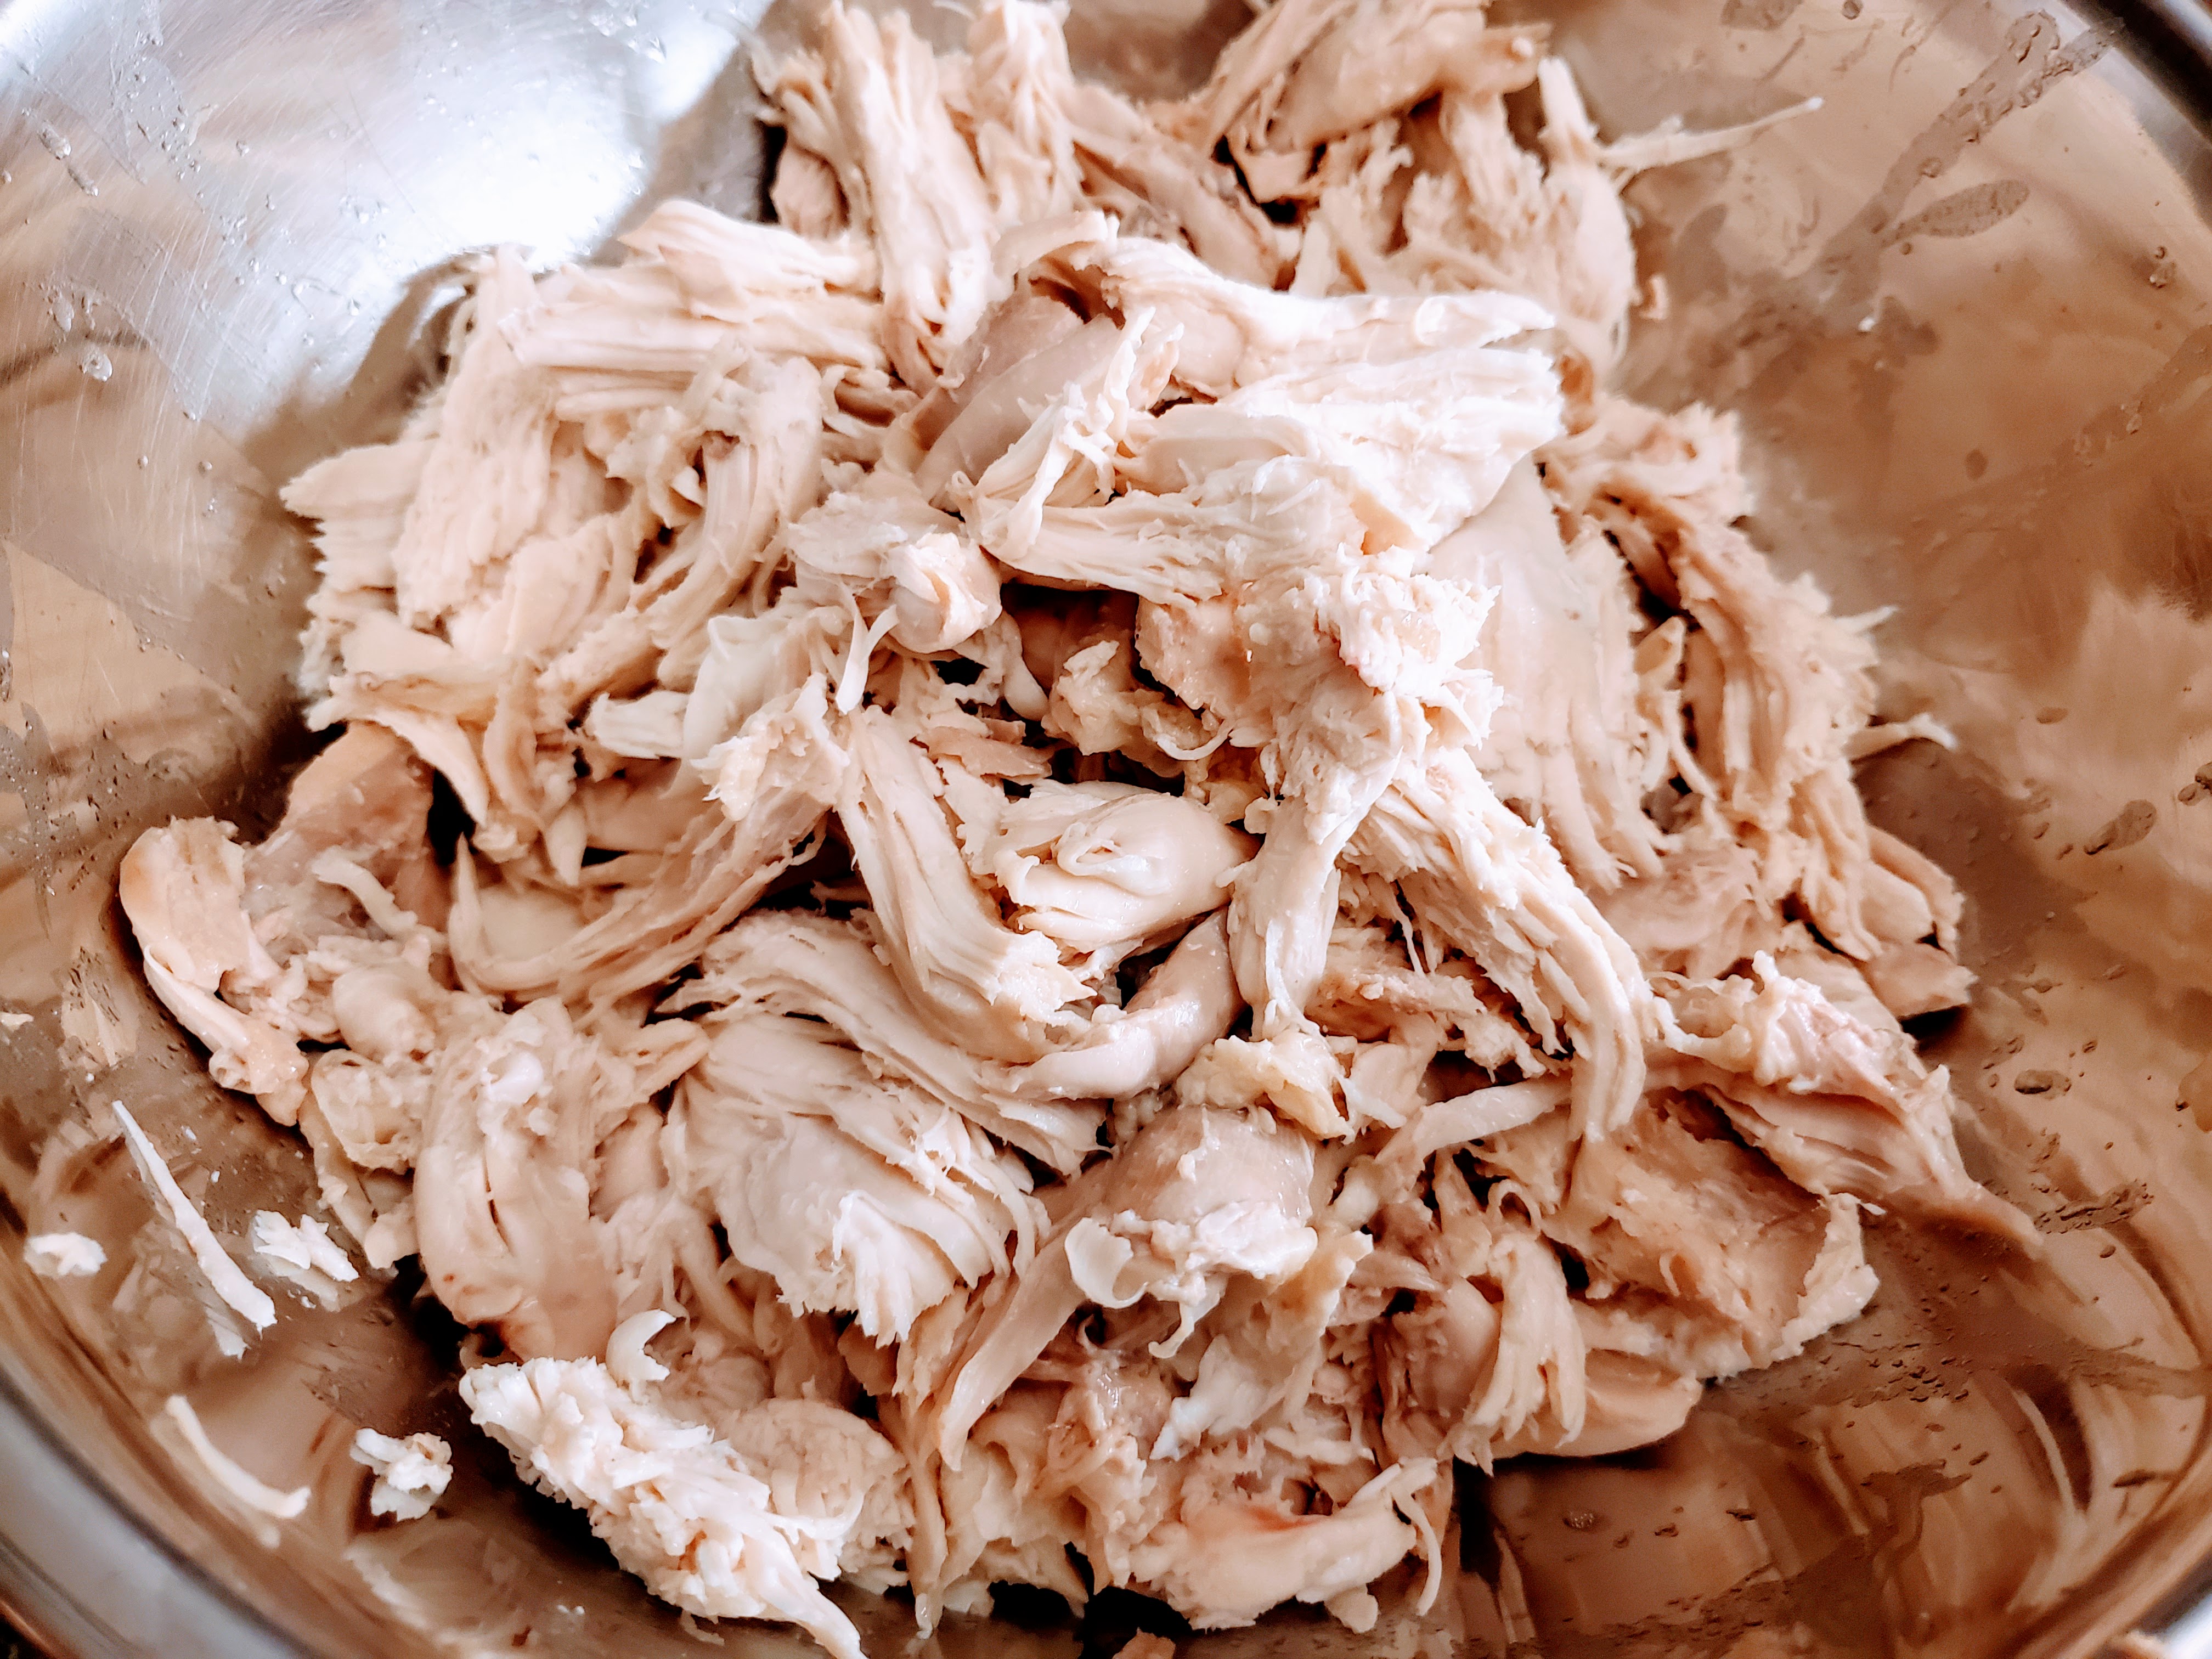
There it is. This shredded chicken is, of course, going to form the backbone of this particular meal, but we’re only going to use about 10% of it. The rest is going to be re-purposed into chicken salad, chicken taco bowls, shredded chicken nachos, lemon-chicken pasta, chicken pot pie, the list goes on. We’re also going to have a sizeable portion of seasoned broth left for homemade chicken ramen, chicken noodle soup, chicken and rice soup, and any manner of bean soups. But I digress. Onward to dumplings.
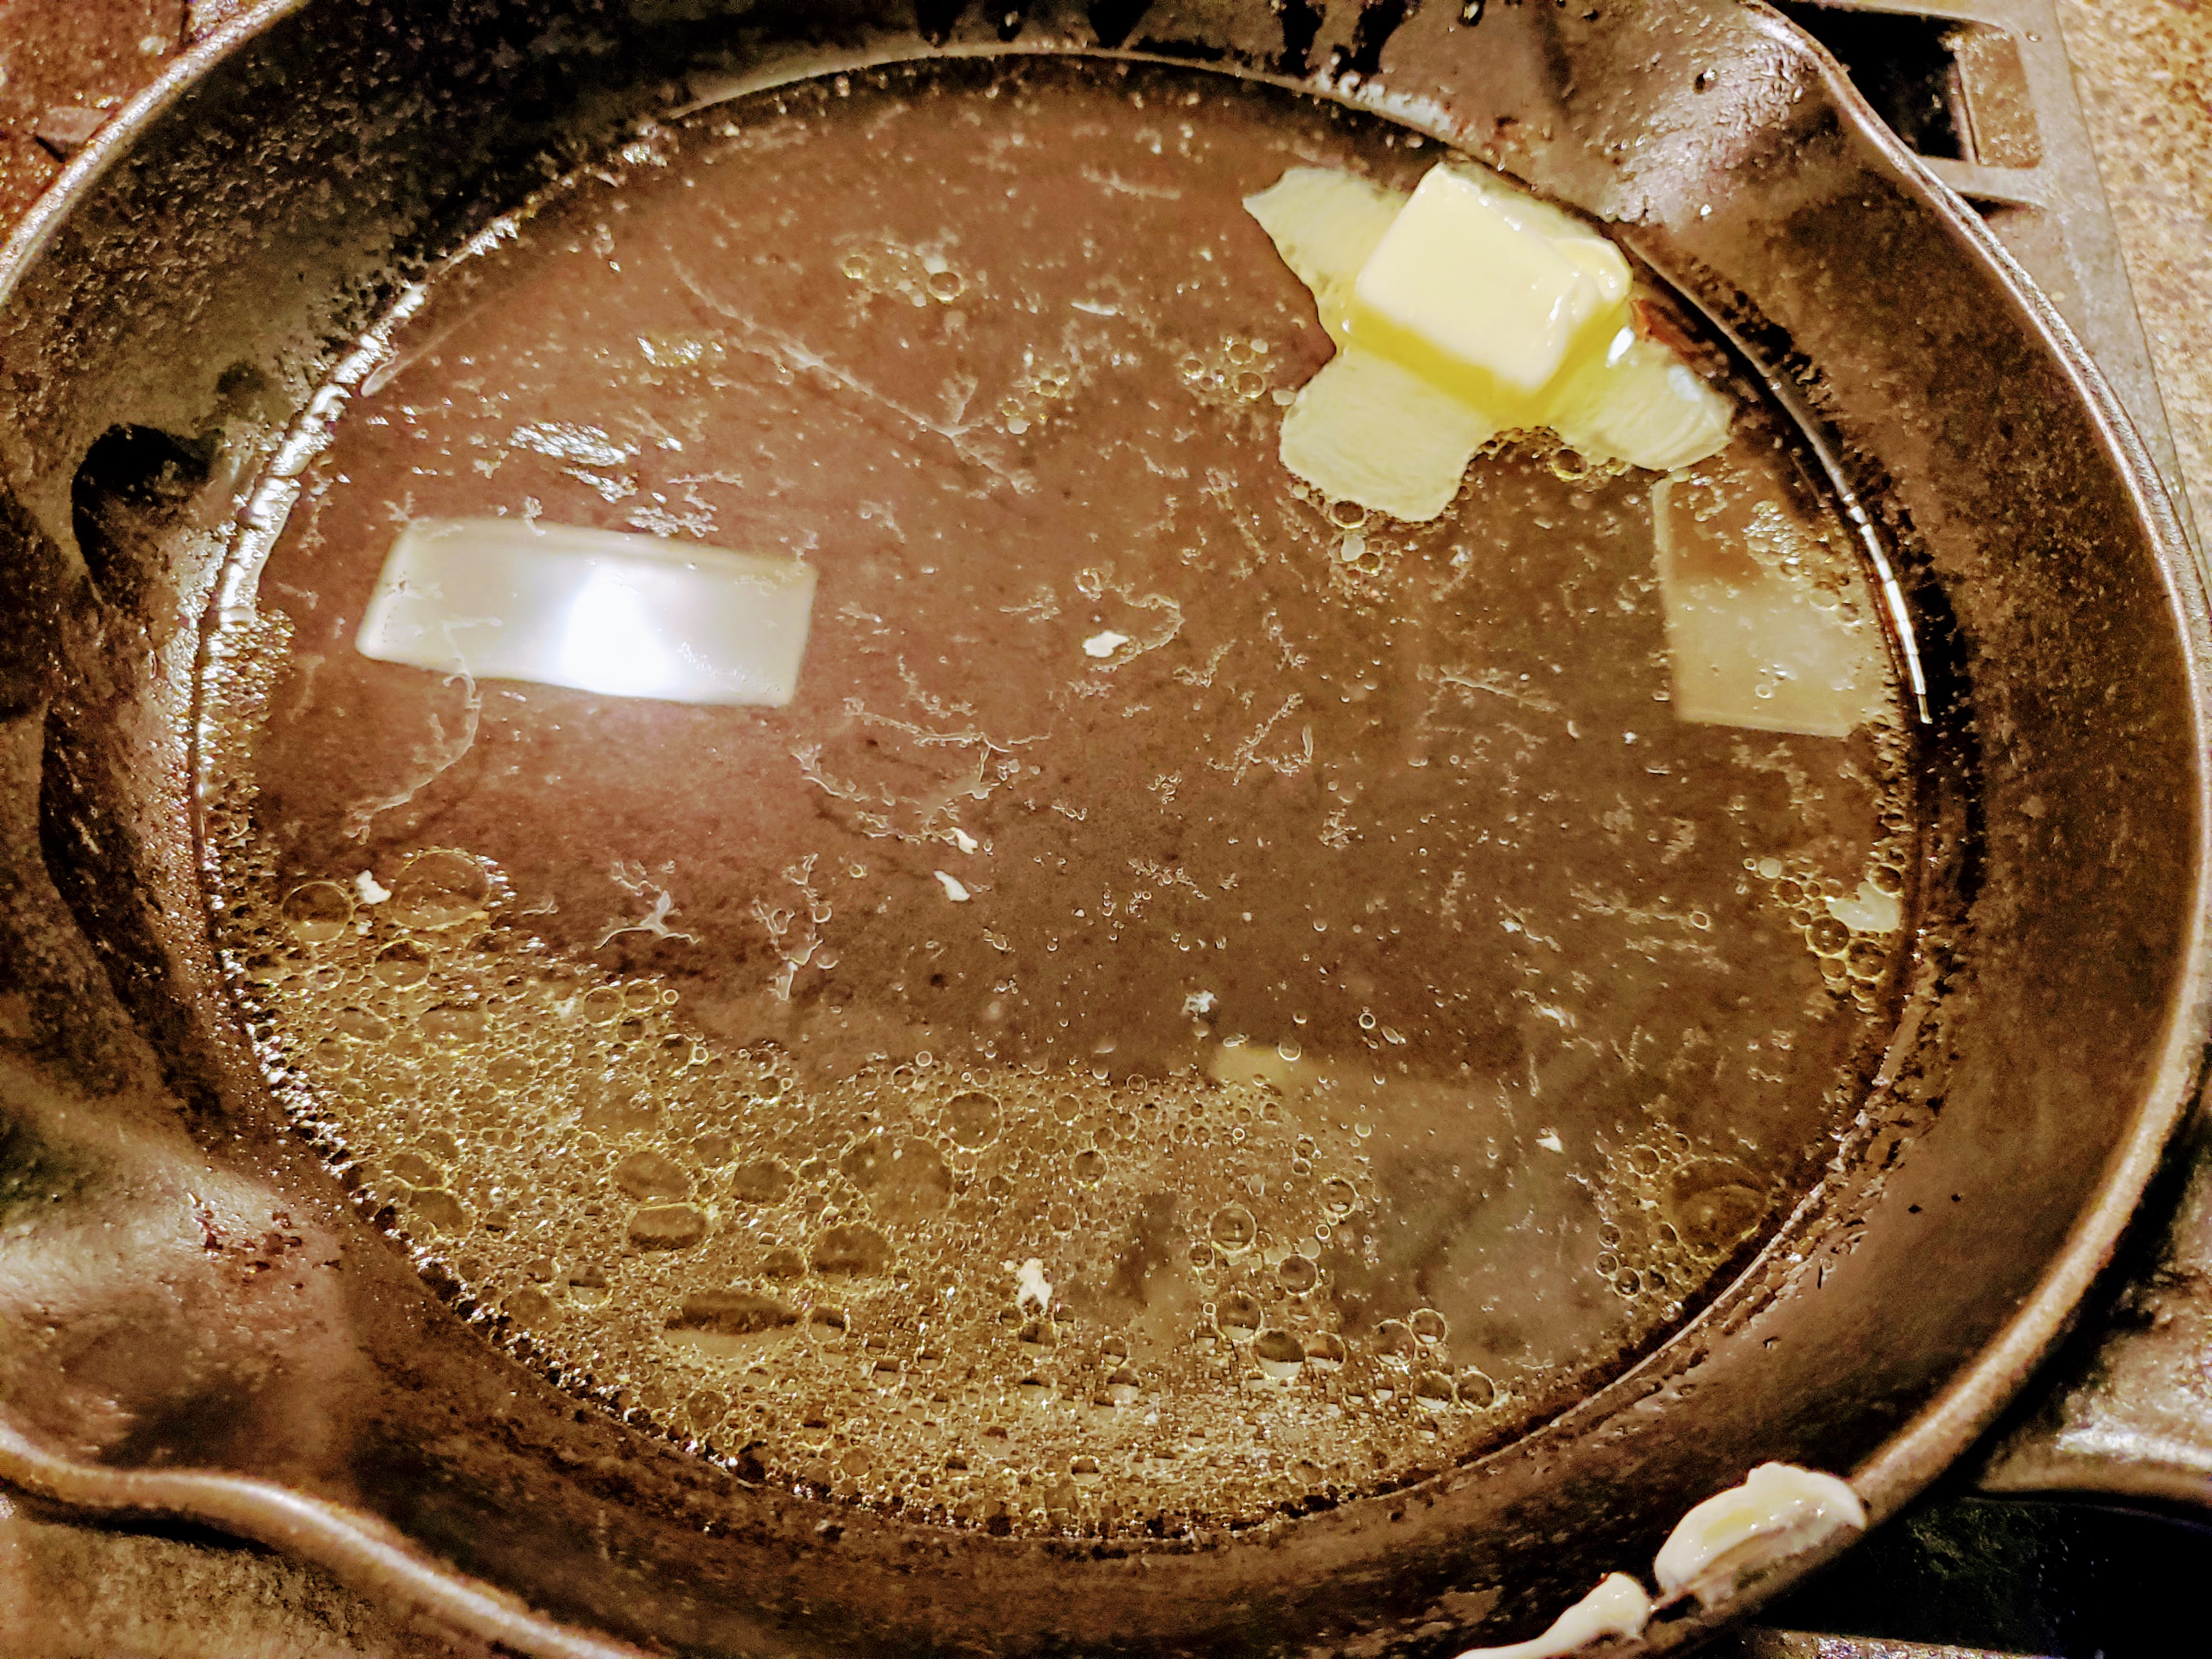
Step three: add about a cup (I just do two ladle-fulls) of the broth to a high-sided skillet, and add two (2) tablespoons of butter. Bring to a simmer, and whisk together:
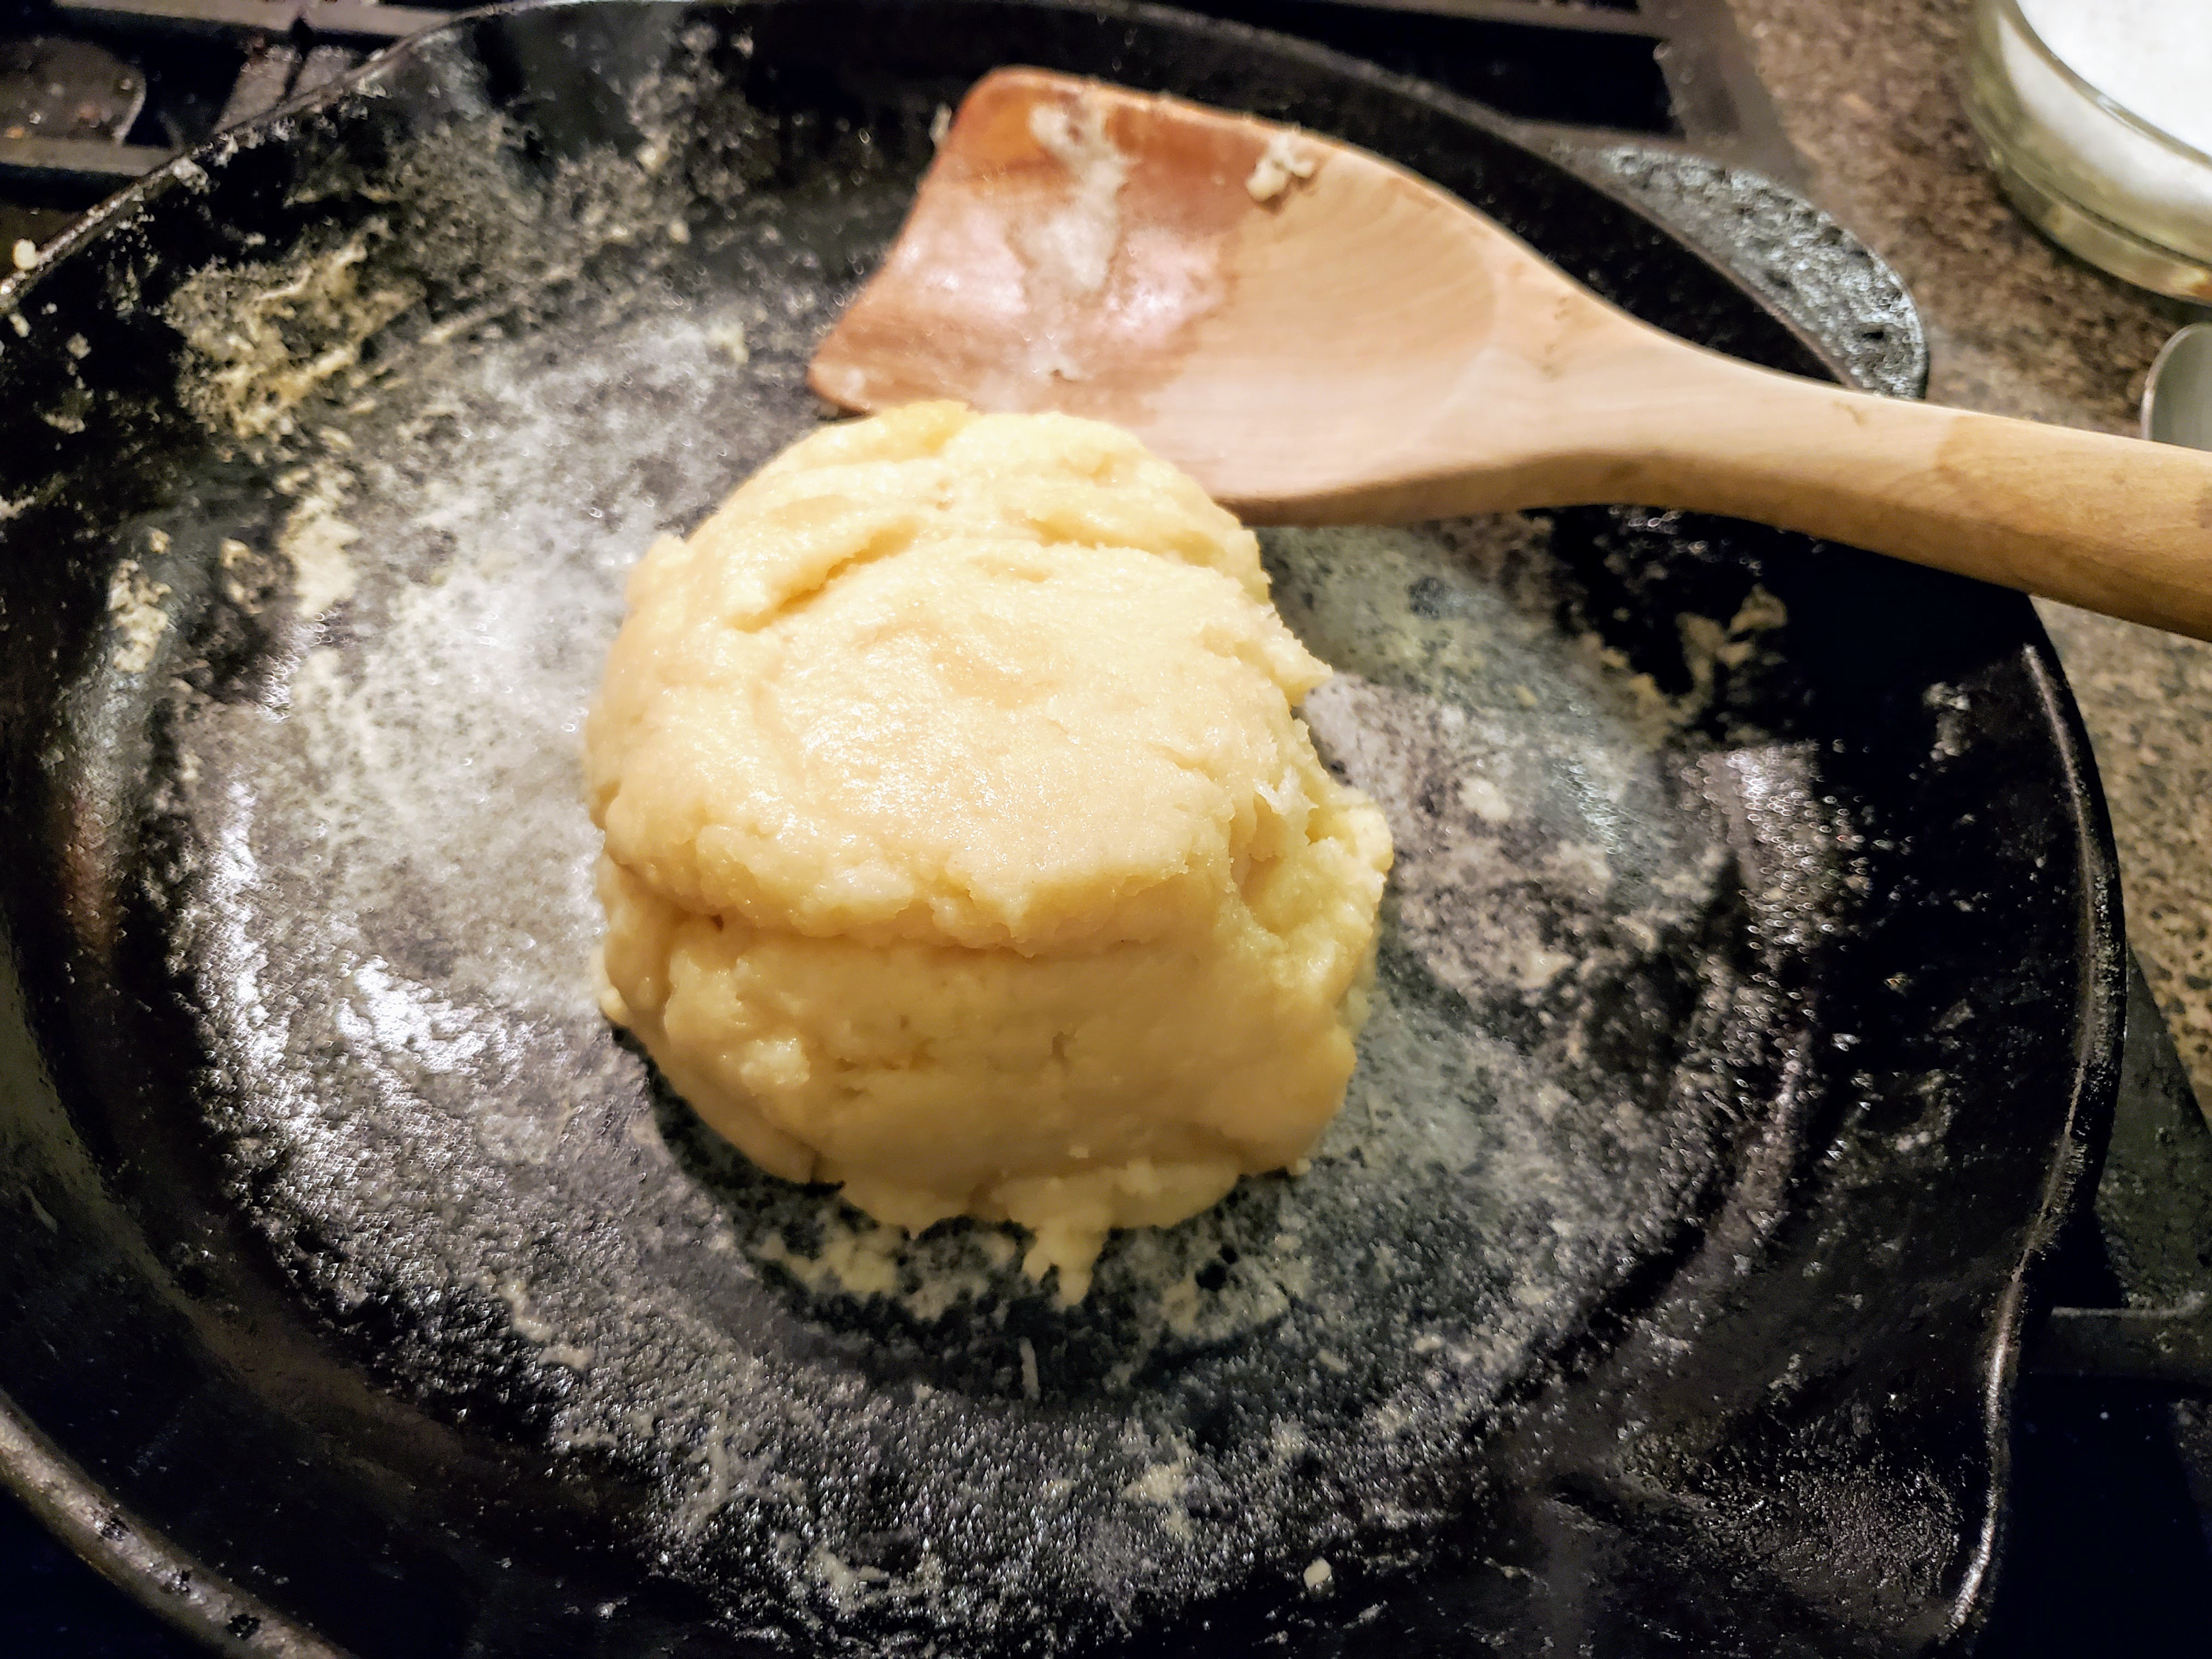
From here, add the flour. How much? Well, again that all depends. The goal is to end up with something like this consistency:

The great news is you can always add more flour and more broth (a little at a time) to get where you want to go, so I don’t bother measuring. Further, we’re going to cook this paste a bit over MEDIUM heat (you don’t want the bottom of the pan to brown), which will drive out some of the moisture as well. The end goal is a ball that is kind of like fragile play-doh:
Move this to the bowl of a stand mixer, or to a metal mixing bowl if you’re planning on using a hand beater, and LET IT COOL. The next step is going to be adding eggs, and you don’t want the dough to cook them.
I like to break this ball up a little bit to let some of the steam (and thus heat) escape.
When your dough is still warm, but not scalding, fire up the mixer and add two (2) eggs ONE AT A TIME. Make sure each egg is fully incorporated before adding the next.
NOTE: due to past personal error, I’d suggest cracking the eggs into a small bowl or cup before adding them to the dough to make sure you don’t end up with shell fragments in the dough. They’re impossible to remove.
Anyway, the end texture should be some thing like very thick cake frosting:
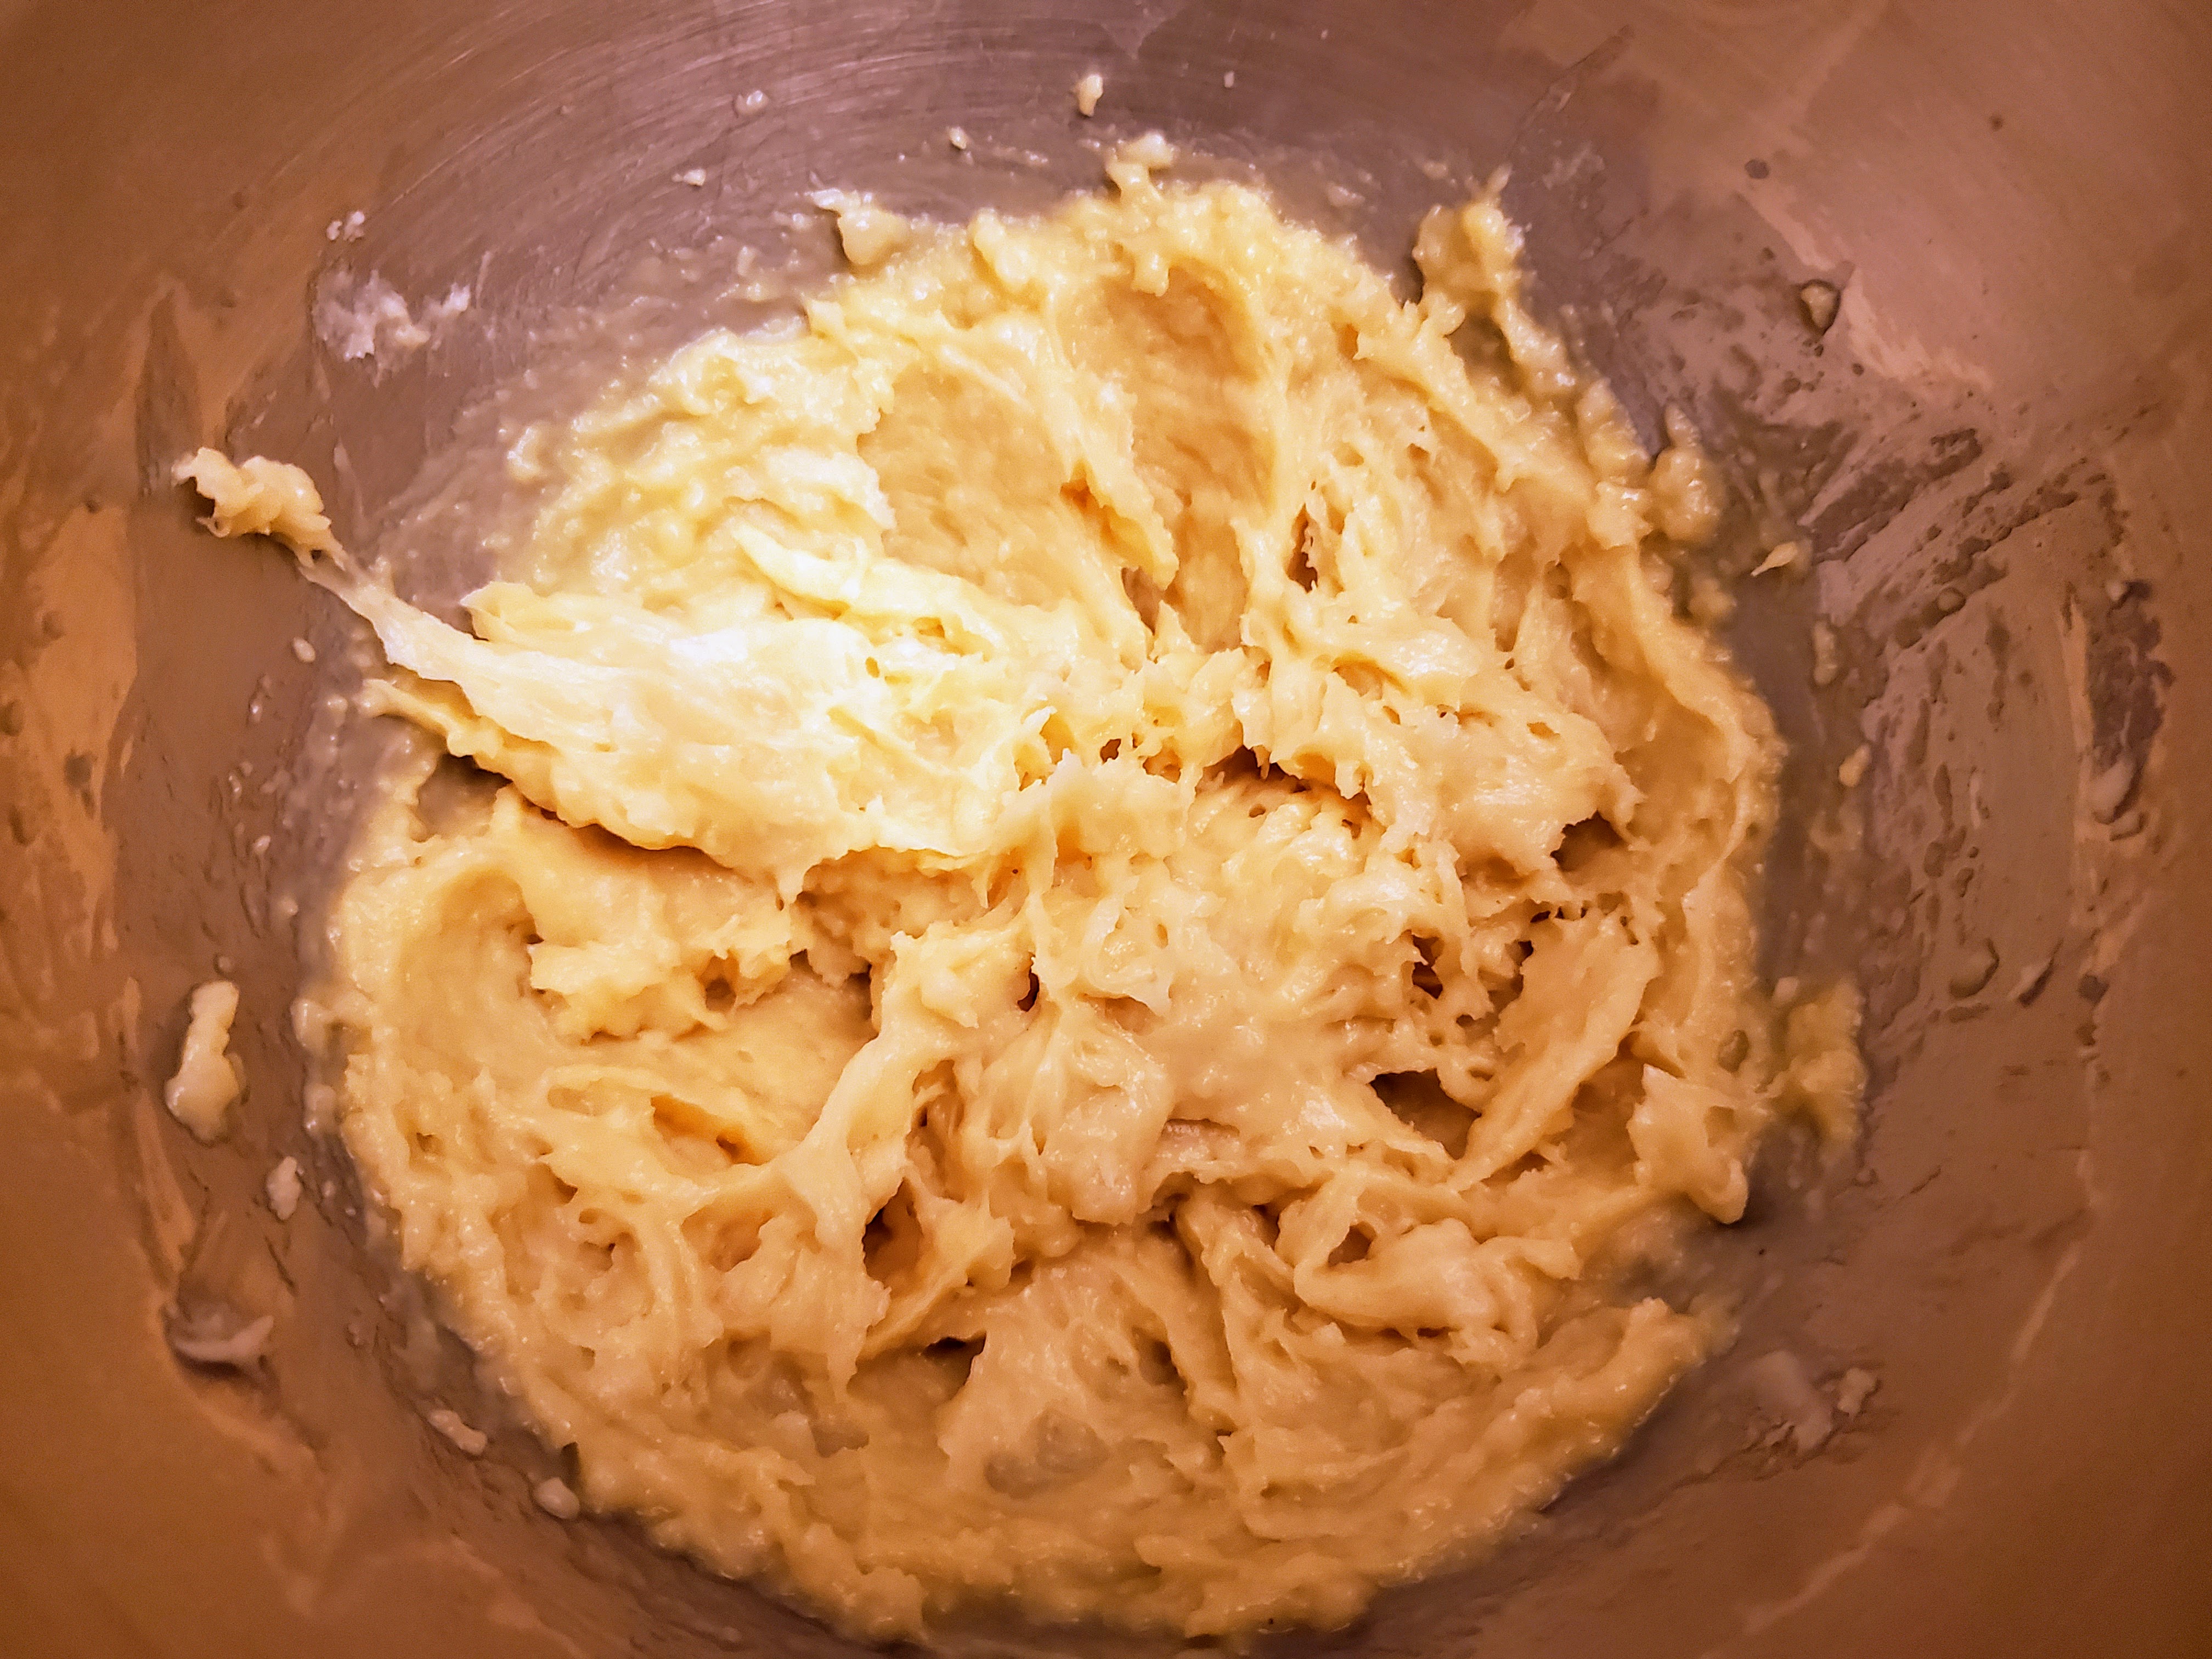
From here, you can spoon this directly into simmering broth, or put it in a piping bag and cut smaller dumplings that way. Be warned: it’s really, really sticky, and can be a bit of a pain to work with, but it’s worth it. Also, these dumplings will roughly double in size once they cook, so plan accordingly.
Simmer in the broth for eight (8) to ten (10) minutes. In the meantime, get some of your chicken into serving bowls:

Serve the broth and dumplings over the chicken, and garnish as preferred. Me? I like a LOT of cracked black pepper (like, an mentally unstable amount) and Tabasco sauce. Maybe some green onions if I have some around.
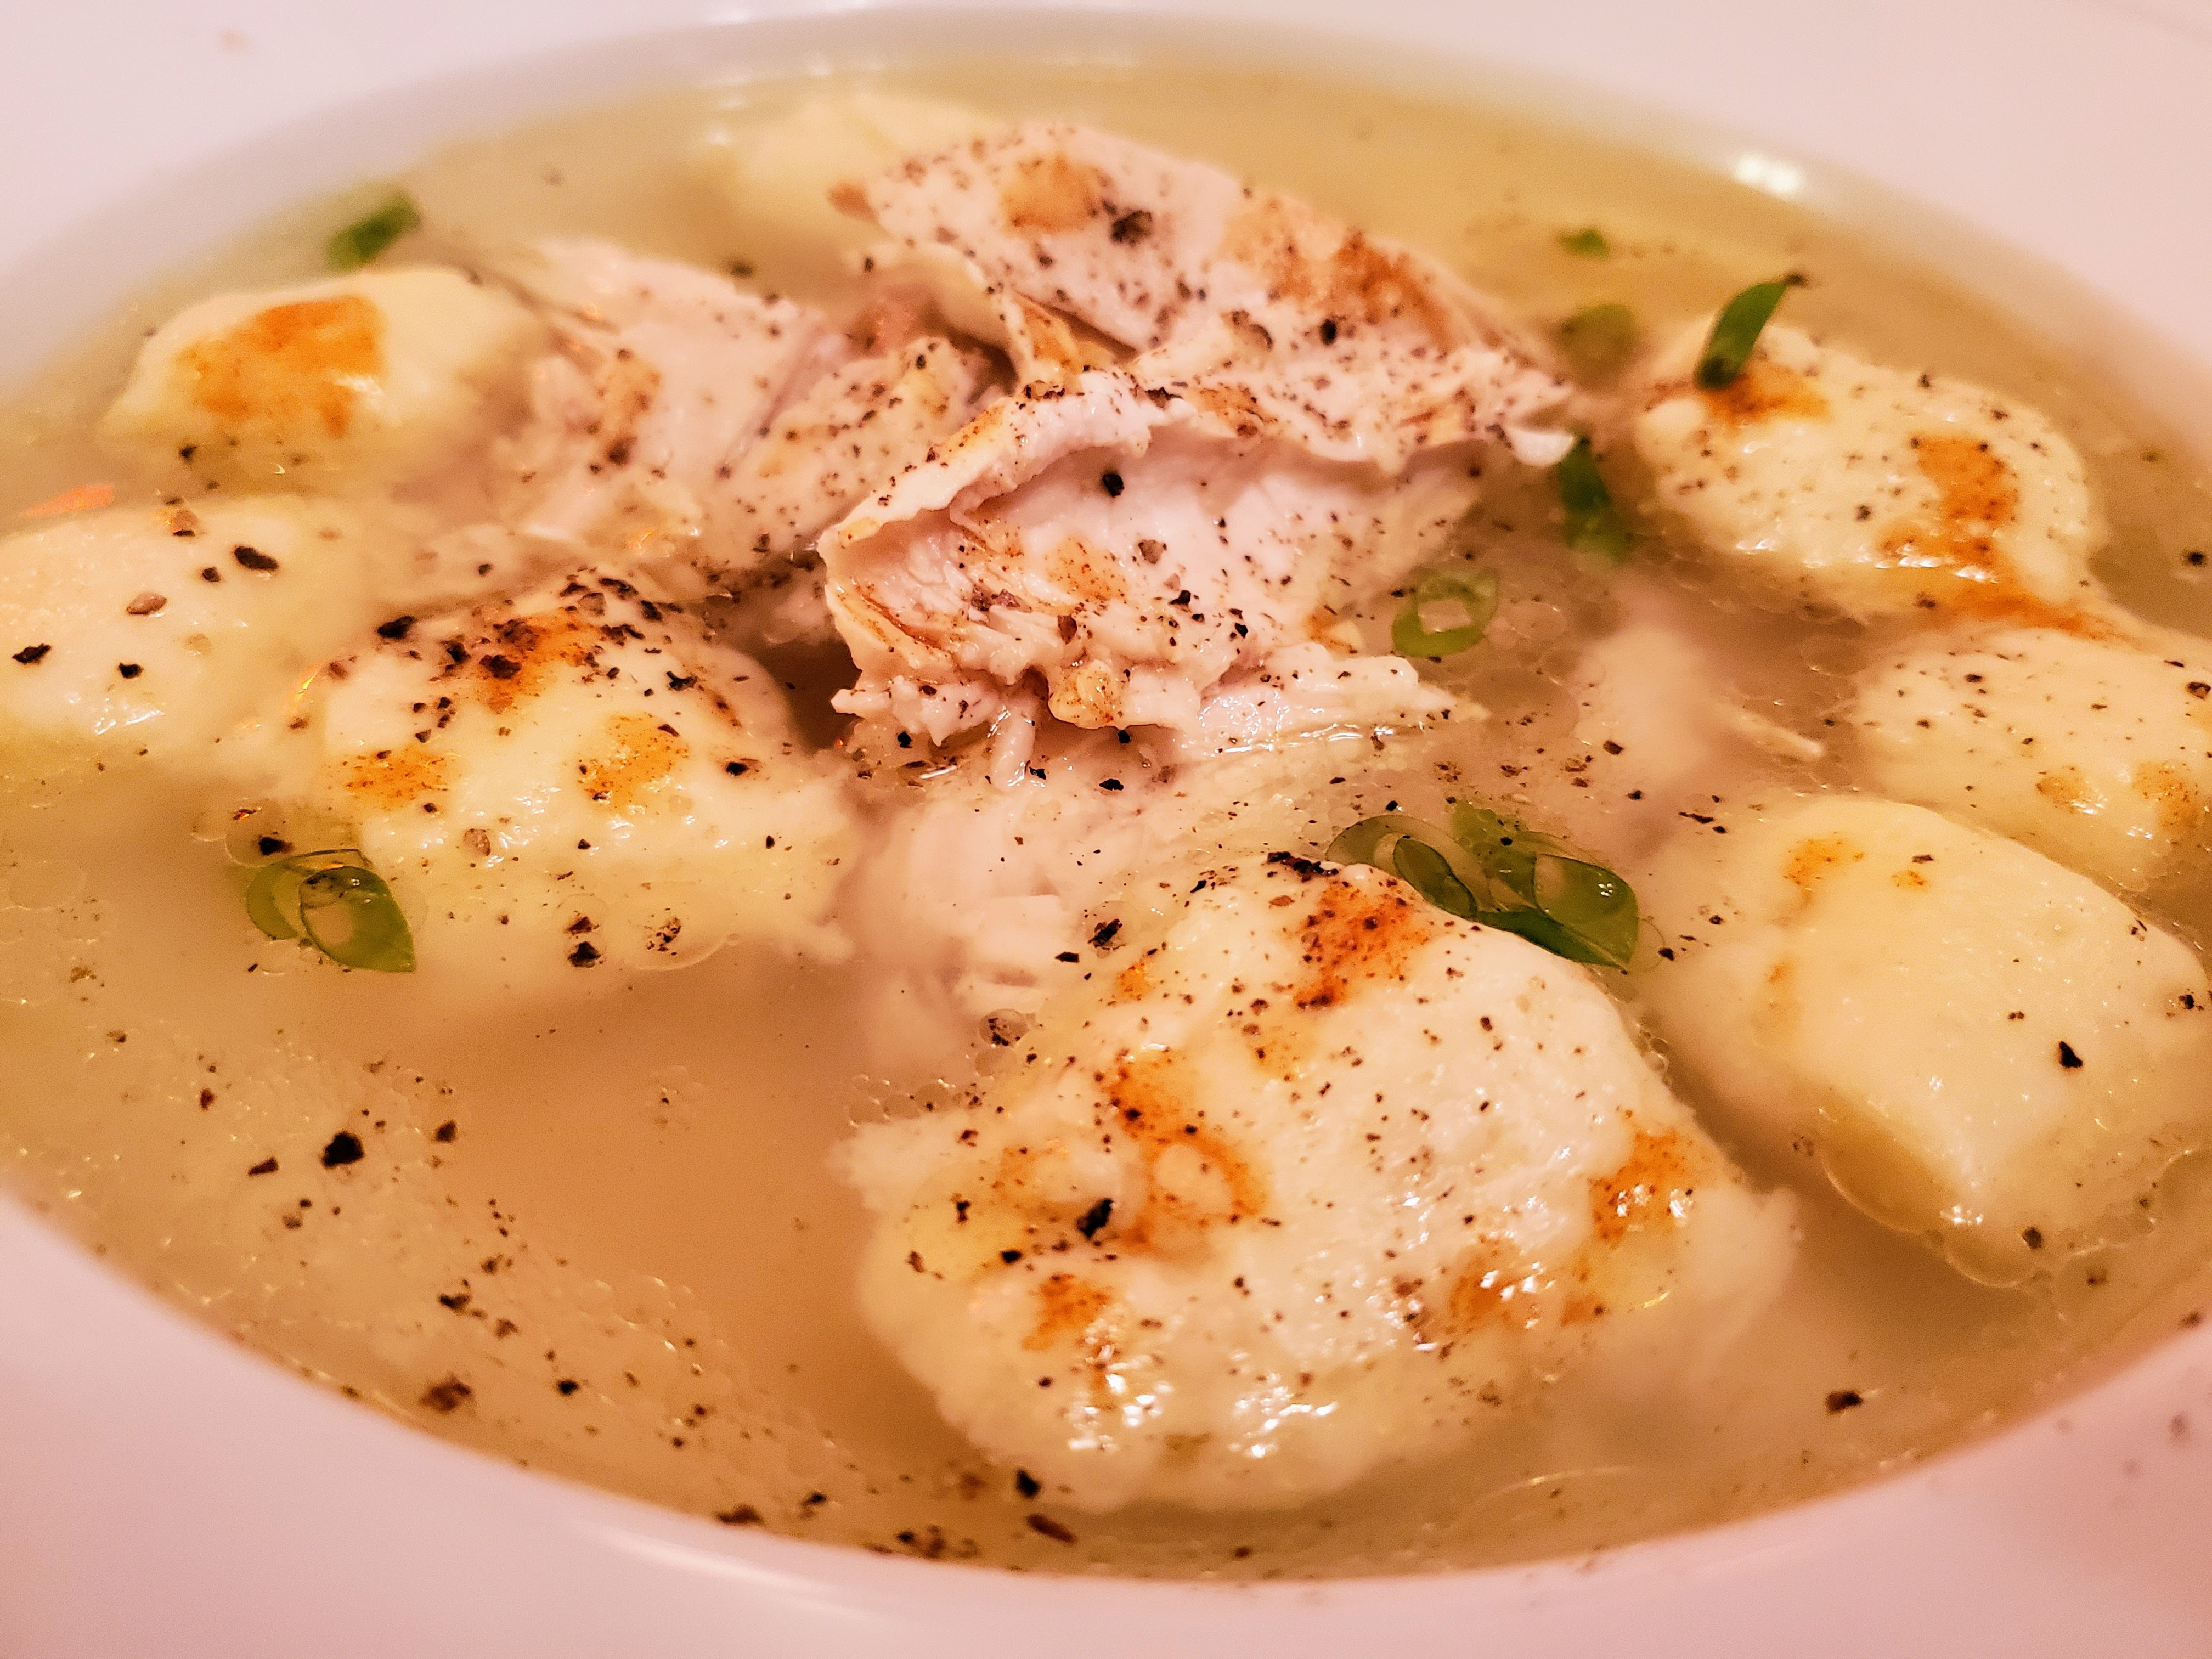
You may notice this isn’t the thick-and-creamy roadside diner gut-bomb dish you may have first envisioned at the mention of “chicken and dumplings.” Well, I frankly don’t like it that way. This dish is light, but hearty, with plenty of unctuous body in the broth from the rendering of the whole chicken, and the dumplings are fluffy pillows of chickeny-goodness. Plus, Mrs. 10Chickens is a Georgia girl, and says this is exactly what she grew up with, so that’s good enough for me.
Serve it up, enjoy it, and form your plans for the remaining bounty of your $5.00 investment.

I loved this post! I have never made dumplings and have a whole chicken in the freezer, so I want to give it a try. Do dumplings reheat well?
LikeLike
Thank you! These dumplings DO reheat well, but they don’t freeze. If they’re in the fridge in broth, they’ll keep for a few days before they disintegrate.
LikeLike