
No #RecipeUpTop today. Like our prior BBQ posts, this one is all about technique and intuition. But, we do have a grocery list:
- Pork Ribs – Spare or St. Louis Cut (I’ll explain this later);
- Brown sugar;
- Kosher salt;
- White or apple cider vinegar;
- Grenadine (trust me);
- Worcestershire;
- Cayenne pepper;
- Corn starch;
- Your favorite BBQ spices (cumin, paprika, chili powder, celery seed, and oregano are my go-to);

The Details
The 4th of July is on the horizon, and while there’s certainly nothing wrong with some hotdogs or a char-grilled chicken, there really is no challenge to the king of BBQ meats: the pork rib.
And, really, more specifically the spare rib, cut down into a “St. Louis” rack. What does that all mean? When do I get my baby back, baby back, baby back?
Well, when you’re dealing with pork rib racks, you’re generally talking about two cuts: spares, or (sigh, yes) baby backs. And, like anything butcher-adjacent, the world is full of confusing additional names and local vocabulary: short ribs; country ribs; flanken ribs; the list goes on. Even growing up, when my mom would say she was cooking “spare ribs” for dinner, that usually meant some sort of boneless cut (that was likely not even spare rib at all) braised in the oven and served over mashed potatoes
So, with the two racks, why is spare so much better than baby back? Well, there’s nothing inherently wrong with the latter, but they’re just kind of a ripoff. They’re overall smaller, with less meat, and typically more expensive. They have a shorter cook time (hence why a certain casual family restaurant built an empire slinging them off a line with fajitas and burgers), and some will argue that means they’re easier to handle. But, when it comes to the world of BBQ, a little extra time is almost always a good thing.
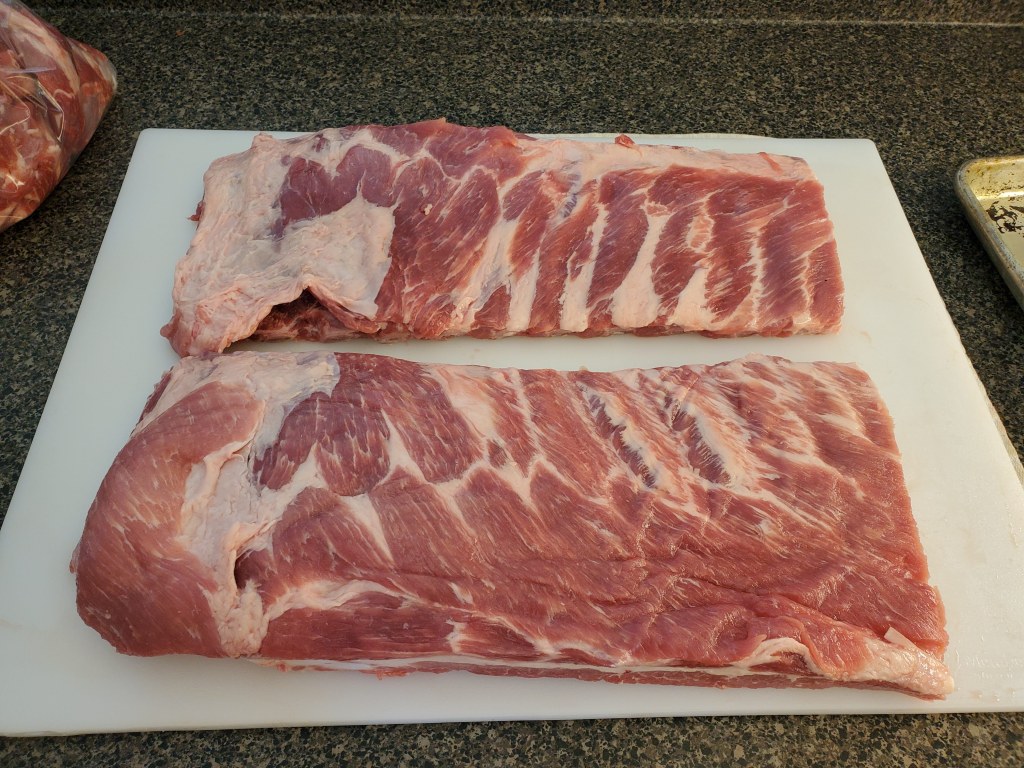
So, spares it is. Usually you can find these still sealed in their vacuum packs from the processor, with two racks to a package, which is my preference. Unfurled, they look like this:

Not exactly square and uniform, eh? You’ll notice that there seem to be bones where there shouldn’t be (at the top of the rack) and no bones where there should be (like the little flap on the bottom left). That’s the difference between a full rack of spares, and a St. Louis cut, which involves trimming the above to look like the below:
With a sharp knife, it’s a straightforward process that guides itself, and leaves you with a LOT of extra porky scraps that are perfect for grinding into sausage, adding to collard greens or chili or white bean soup, or just smoking along with the ribs for a mid-cook snack. The point is, you can pay someone to cut these down to St. Louis if you want, but you’ll pay more and miss all that extra goodness.
Oh, and why not just cook the whole thing intact? Well, some people do, and I have in the past. The problem is the parts we’ve trimmed off tend to cook a lot faster than the actual “rib” ribs, and thus the end product suffers as a whole. So, rack ’em up.
So, probably a good time to talk about the overall process here. I’ve been cooking ribs for a long time, and I’ve tried just about every trend and fad out there (many to my eternal shame – we don’t talk about the “boiling years”). The result of all that smoking is the following method: Season, smoke, glaze. That’s it. There’s no mopping, no water bath, no *shudder* boiling. No wrapping, no grilling, none of that. It’s all a waste and works against you by making you feel like you’re being productive, when really you’re just spending a lot of time fussing and letting the smoke and heat out of the pit. Keep it simple.
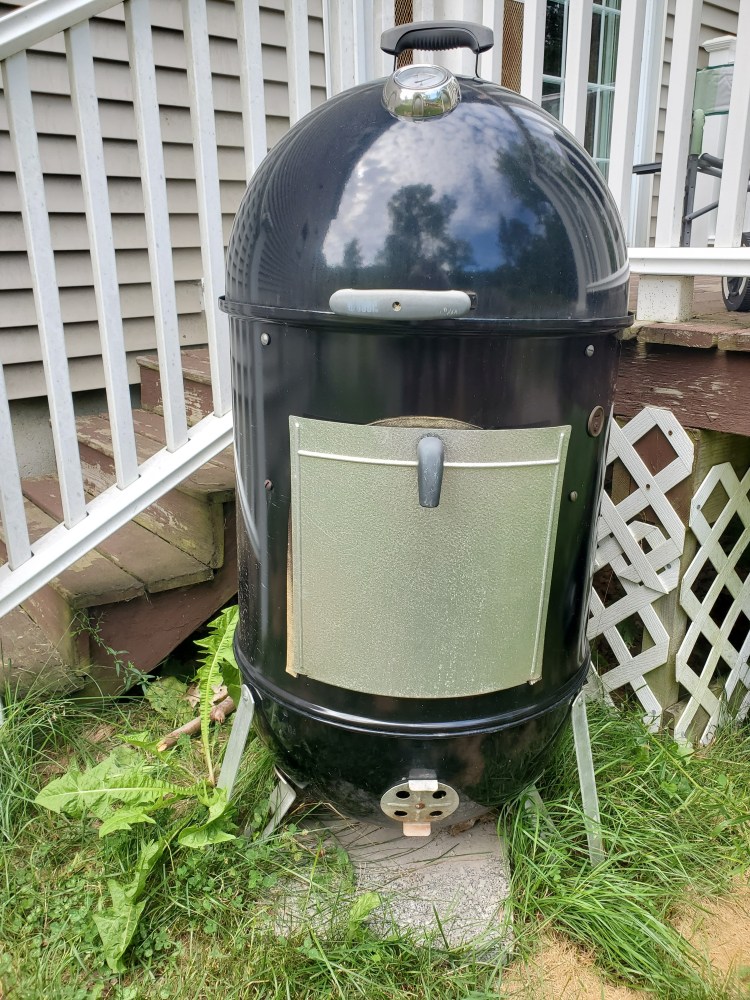
Lastly, we’re cooking these over coals with wood chunks, and I’ll go into that in a little more detail, but don’t feel like you need to have my specific setup. The goal is going to be 225F to 250F of dry heat, with some wood smoke. If you can get that done in a cardboard box with a hot plate and some wood chips, great. If you want to do it over a Santa Maria rig with red oak coals, also fine. You just need that heat, plus the smoke, and whatever gets you there is a-okay.
The Meat
After we have our ribs trimmed to St. Louis racks, we have to pull the membrane off the bottom. If you flip the ribs, you’ll see a little film that almost looks like silverskin. Some cooks leave this on, but it’s not going to break down in the cook, and it’s not edible, so I suspect these are the same people who eat the stickers on fruit just to prove a point. Anyway, it’s easy enough to remove if you use some paper towel to get a grip and peel it off. Don’t worry about getting every last bit, just the majority.
Once that’s done, sprinkle your ribs with salt BUT GO EASY. These are going to shrink up considerably during the cooking process, and all of that salt will condense and get overwhelming really quickly. Let the salt sink in while we make our rub. Why aren’t we including the salt right in with the rub? Well, because we don’t want to shackle our saltiness to our other flavors. In other words, we may decide we want to apply a second round of rub. If it has salt, everything will be too salty after that second application, and it’s also the reason I avoid pre-packaged rub mixes. So, salt separately and then focus on your rub.
It’s best to think of the rib rub as seasoned brown sugar. It’s a dirty secret that nobody will tell you, but it’s the truth. If you’ve ever watched a BBQ cooking show and heard someone describe their rib rub as having “a little bit of brown sugar, a little white sugar, just for some sweetness” they’re lying to your face.
Get your brown sugar in a bowl, and start adding your other spices. Mix it every so often, and taste it (remembering there’s no salt), until you’re happy with the product. That’s it.
From here, rub it on:

Resist the urge to go bananas with the amount here; you don’t want a nasty paste on your final product, which can happen if you treat these like you’re applying stucco. As a general rule, you should still be able to see the meat through the rub coat once it has time to soak up the liquid on the surface of the ribs. Plus, as the cook progresses, you can always add a little more if you’re regretting a light touch.
The Heat
As I said, my preferred method for spare ribs is dry heat, wood smoke (always fruit wood), and time (about five hours). Why? Well, I always try to imagine the perfect end-product, and then work backwards from there.
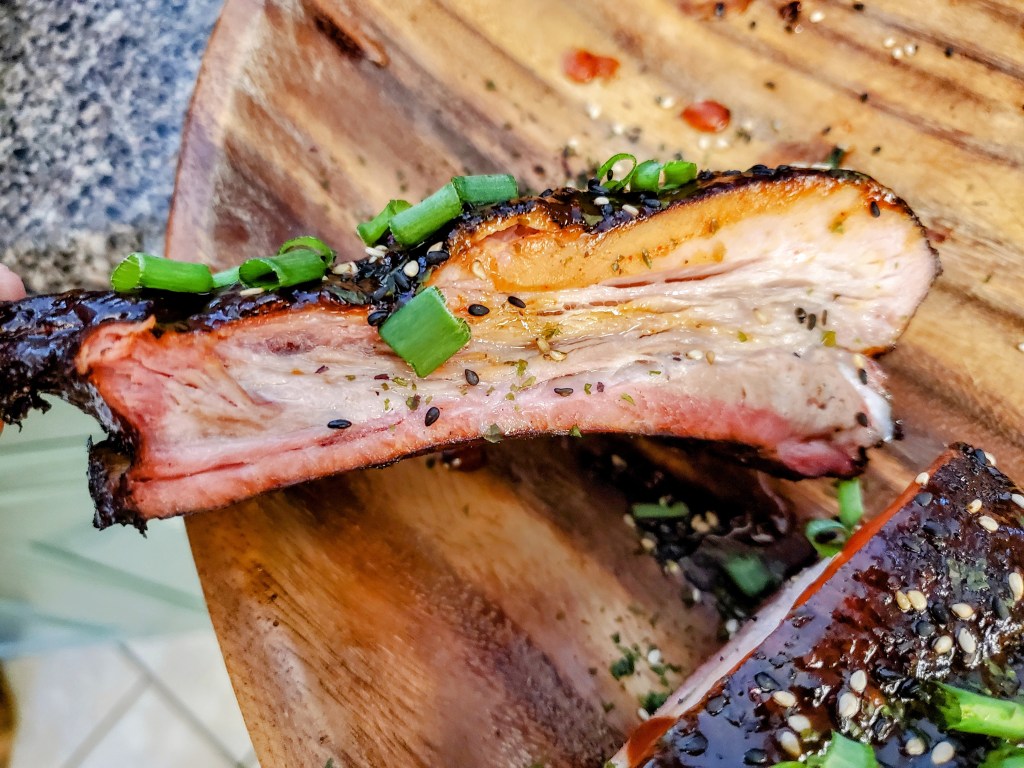
In this case, I’m looking for a rib that’s cooked evenly (hence the St. Louis procedure), is tender but has a little structure, and has a nice bark with good smoke penetration.
I’ve found cooking with a water pan and/or wrapping the ribs partway through the cook destroys the bark, and has a tendency to overcook things into a mush. We’re not looking for pulled pork here. Additionally, I like the extra flavor from fat rendering from the ribs, hitting the coals, and smoking back up. It’s irreplaceable, and the primary reason I don’t use a water pan or diffuser for this application.
So, let’s get things lit:

I like to use a “snake” or “fuse” method, where one end of this semi-circle is lit, and it slowly burns around, lighting the next coals in line. Wood chunks go right on top of this, and it provides even heat, consistent smoke, and a long burn-time. Remember: small, hot fire, with a lot of convection (air movement) is our goal.
Ribs on, thermometer set to sound the claxon if the temp hits more than 275F or lower than 200F, but that’s it. Otherwise, I’m not even going to look at these until four (4) hours in.
Well, okay, maybe once:

That’s what we want to see. Meat shrinking a bit as the fat and connective tissue renders; our rub forming a consistent but not charred bark, while also dissolving a bit so we don’t end up with that wet paste we were talking about. Anyway, stop looking and get the lid back on. We have other work to do.
Time to Eat?
Not quite. There are a ton of different styles of rib cookery, from a “dry” version that just applies a little extra rub at the end, to fully wet-and-sloppy drenched with sauce (looking at you Georgia), and everything in between. Me? I like a set glaze, and I’ll serve with some classic sauces on the side for folks who swing that way.
Why a glaze? Well, I think it provides the right balance between finger-licking goodness without needing to hose yourself off up to your elbows afterwards. Also, it adds a little late-cook punch up front to brighten all of those deep, smoky, meaty flavors we’ve been developing. And, well, it LOOKS incredible, in a way that will make your guests hover around while you portion them out.
So, how do we make the glaze? We’ve been down this road before. Instead of lemon and pepper, this is going to be a tangy “cherry” kinda thing, which will have a gorgeous bright red color, and a little kick from some cayenne.
Into a small saucepot with your cider vinegar (or white, if you’re using it), some brown sugar, a dash of Worcestershire and cayenne, a sprinkle of some leftover rub, and enough grenadine to make everything nice and red. How much of each thing? Well, it completely depends. I like to eyeball everything, bring it to a simmer, and taste it. From there, you can pretty quickly figure out if it needs salt, vinegar, or sweetness (from either more grenadine or more rub). Once you have the flavor balance where you want, thicken with a cornstarch slurry like we did with the lemon chicken glaze.
Then, to the ribs. Slather it on every fifteen (15) minutes or so, with one final application just before they come off.

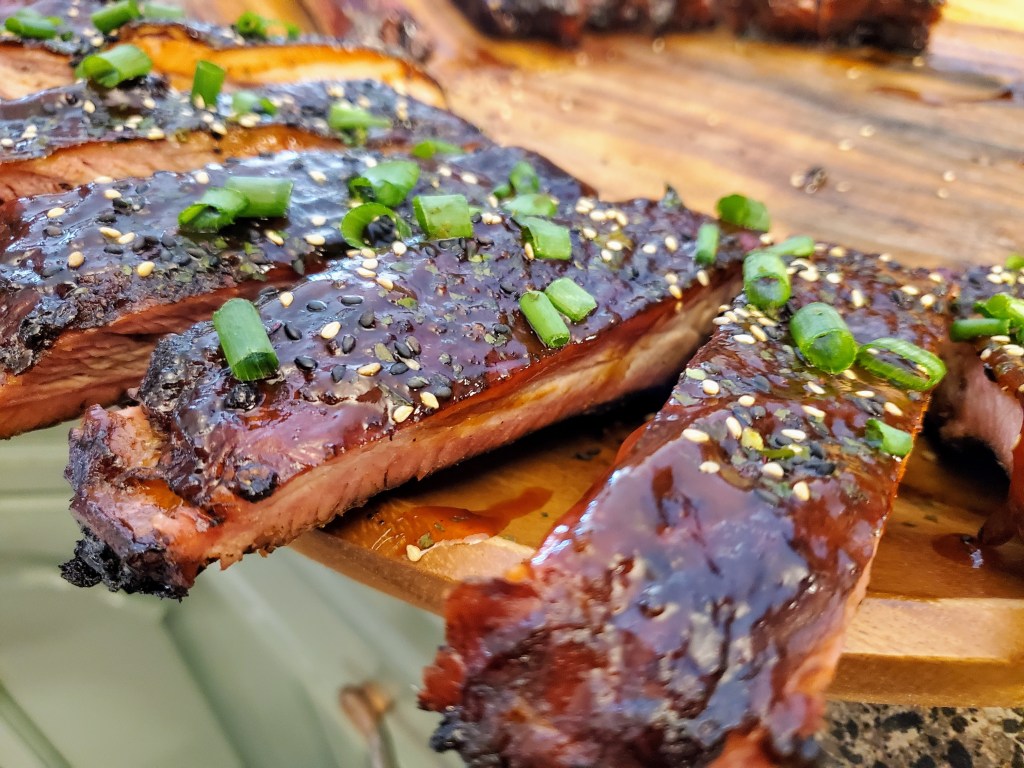
There you have it: a glistening, sweet, smoky, meaty hunk of joy. Oh, right, we did two racks, didn’t we? Why not make the second a little different.
Whip up our secret gochujang wing sauce from our coal-roasted wing post, and use that on your second rack. Garnish with some sesame seeds and green onion, and watch eyeballs pop out of sockets
And that’s it. Simple technique, the right cut, low-key smoking, and a bit of a twist at the end for some style points. Happy pork of July.

One thought on “Ribs to Spare”