
#RecipeUpTop (details to follow):
- 5 large eggs (4 for pasta, one for egg wash) ;
- 3 medium sweet potatoes;
- 300 grams all-purpose flour;
- 4 tablespoons butter (total);
- 1/4 cup whole milk (optional);
- Fresh sage (to taste);
- Salt (to taste);
- Black pepper (to taste);
- Freshly ground nutmeg (optional);
Method: Beat the eggs with six (6) grams salt, and combine with all of the flour. Knead on a floured surface until a pasta dough forms, then let rest for thirty (30) minutes. Meanwhile, peal, chop, and steam the sweat potatoes. Evacuate to a mixing bowl, and (while hot) add 2 tablespoons butter, and mix to combine. Season to taste with salt, pepper, and nutmeg. If desired, add milk to desired consistency. Let the mixture cool.
Roll out the pasta via your preferred method into a long rectangle. Stuff with the sweet potato mixture, egg wash the edges, seal, and cut into large ravioli. To cook: boil in water until they float, approximately two to three minutes. Finish in a saucepan with brown butter, and top with sage.
The Details
Wednesday is pasta night here, and while that frequently means a classic like spaghetti and meatballs (coming soon!), we try to keep some variety alive, even over the aggressive objections of two children.
One of the quick favorites is this sweet potato-stuffed ravioli, that’s deceptively simple to make, is dirt cheap, and is a crowd pleaser even with the little chickens. Lastly, it makes an enormous amount of food, which freezes exceptionally well. That means half the time I make this, I’m just pulling frozen ravioli from the deep chest in the garage, and it doesn’t get easier than that.
Finally, an editorial note. I’m keeping the technique for the pasta in one block, and the steps for the filling in a second, for sake of clarity. In reality, there’s considerable downtime in both operations, and really once you’ve made this a time or two, you can do everything at once, in a special HYPERSPEED procedure I’ll include at the end. The reality is, you can bang this out from nothing to dinner-on-the-table in about an hour, maybe less, and still have some standing-around time to have a glass of wine and make a salad.
Okay, step one: sweet potato filling. You want to do this first, regardless, because you need it to cool before stuffing the ravioli. Also, it’s blindingly simple, so here we go. Peel and chop three sweet potatoes:

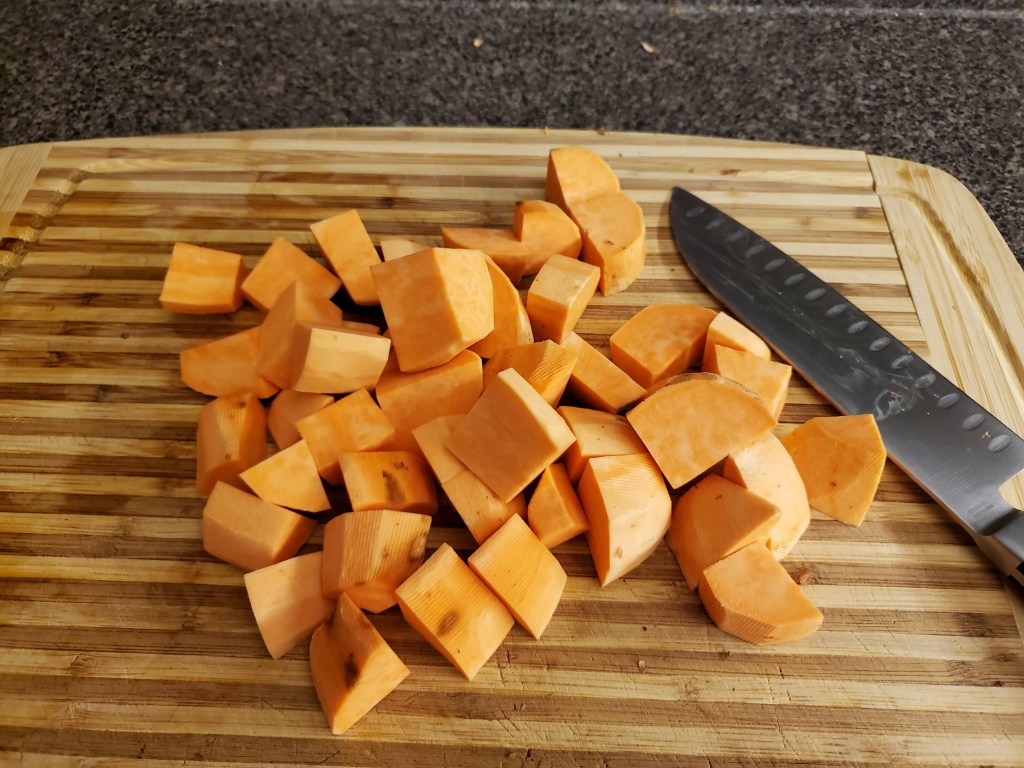
You don’t need these to be atomized; they’re going into the steamer, so a rough chop is fine. Speaking of the steamer, I use an old iron lotus, but you can even get by with a boil here if you really need to:

Steam until fork tender, then move to a medium mixing bowl and mash together with two (2) tablespoons of butter, then see where you’re at:
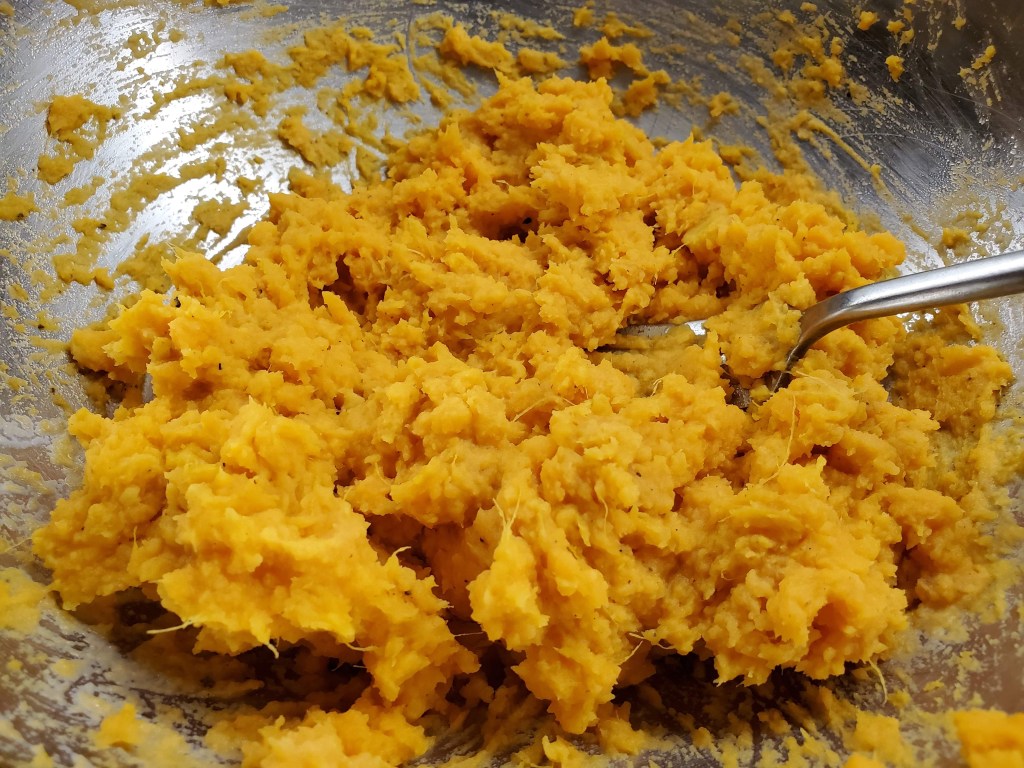
You don’t want the consistency of the filling to be runny gloop, but you also don’t want it to be dry and stiff. So, see where you are, and maybe add a little milk or cream to thin it out.
Bigger issue is seasoning. Add salt and black pepper to taste, and I strongly encourage freshly ground nutmeg. No, it doesn’t taste like Christmas or eggnog. Fresh nutmeg is one of those few things in life that is actually indescribable, and you need to just track some down and grate it to understand. I was a skeptic for a long time about this, but trust me, it’s like learning there’s a new color that you’ve never seen before. It’s that bizarre. Also, fresh whole nutmeg is cheap and lasts forever, so just buy some. If you don’t have any, you can skip it, but seriously get some for next time.
When your sweet potato mash filling is done, it should look like this:
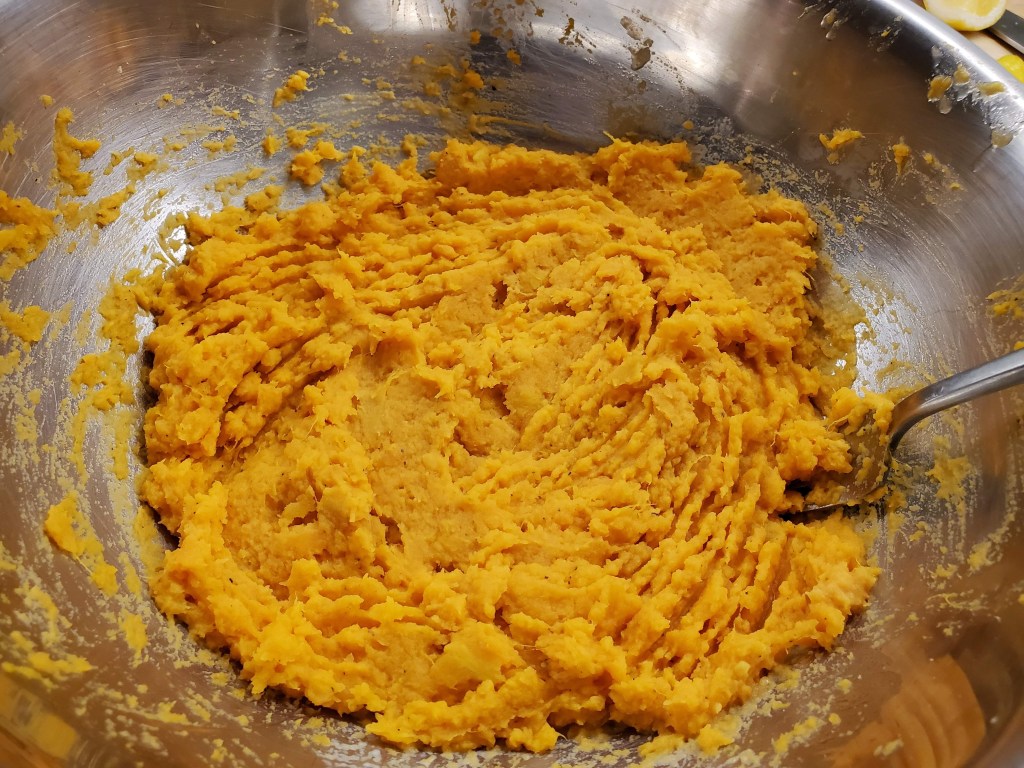
Taste it and see if it needs anything. You don’t want it to be too aggressive in any one direction, but it should be buttery and salty and all the great things sweet potato can be.
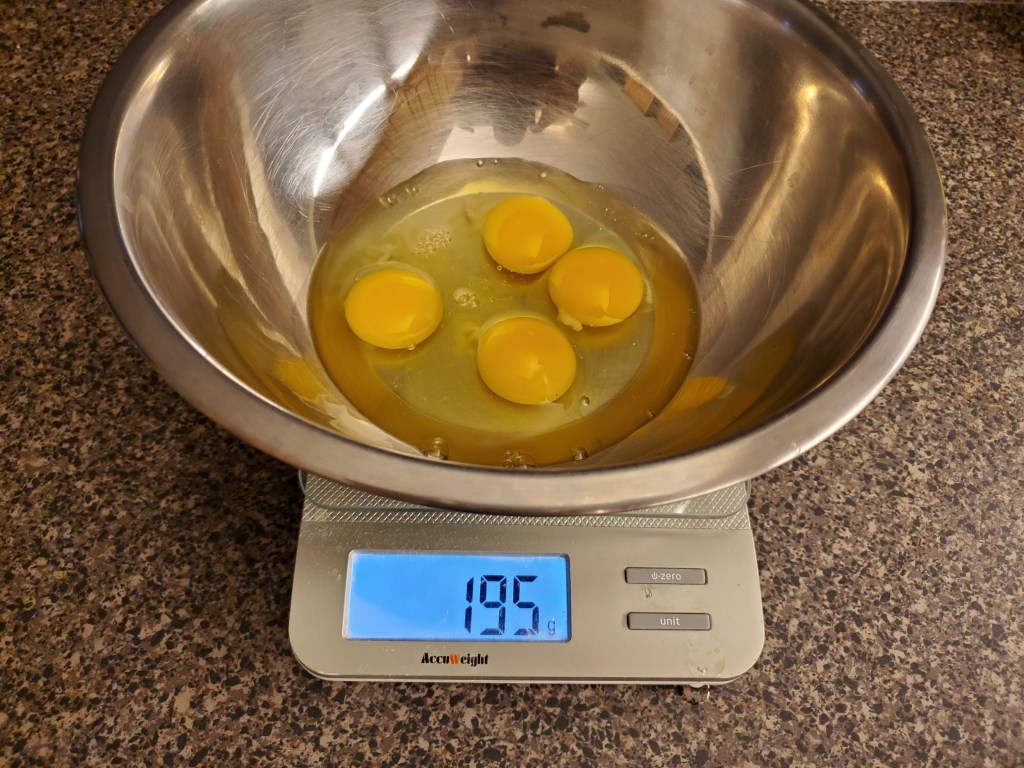
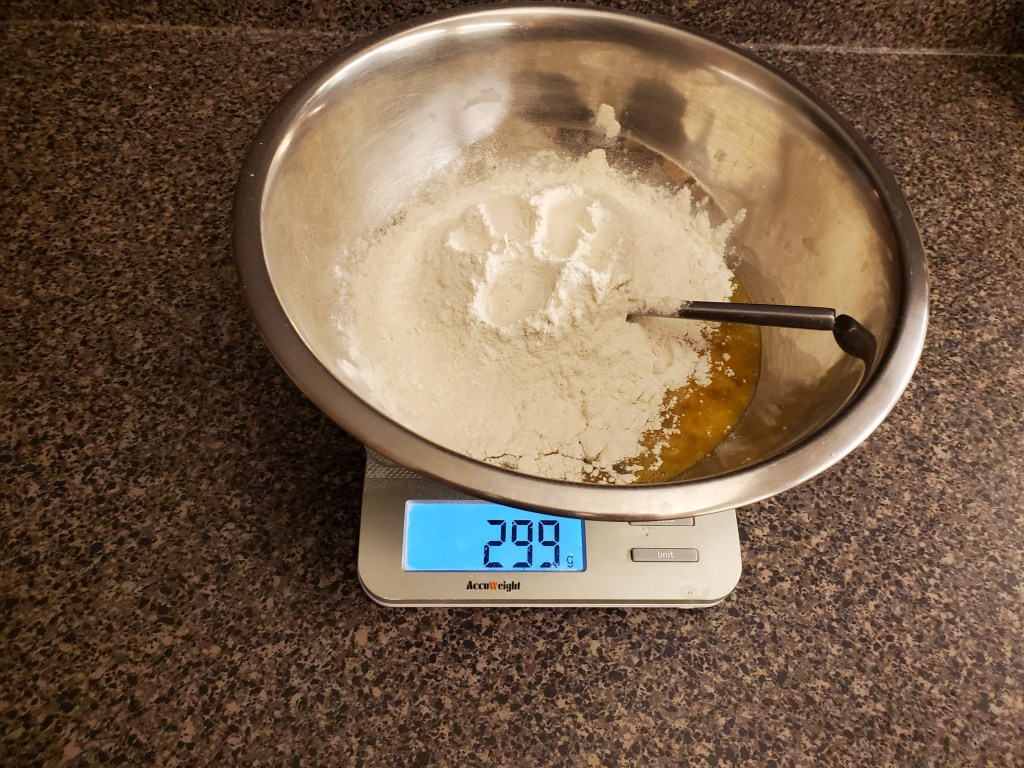
And now the pasta: get a medium mixing bowl and put it on your kitchen scale, and zero it out. Crack in four (4) large eggs and note the weight. They should be pretty darn close to 200 grams, but not always, and that’s why we weigh:
So here’s a sneaky secret: the ratio of perfect pasta dough is 2:3 eggs to flour, and the right amount of pasta is usually one egg per person (maybe two, if pasta is the main course). So, if you have six people total for dinner, crack six eggs and weigh them, then multiply that number by 1.5 to get your flour weight. Neat, right?
Anyway, we’re using four eggs, and you can see they’re almost at 200g, which makes our math easy. If your four eggs turn up with a vastly different weight, go ahead and use the formula (egg weight x 1.5 = flour weight). But before we get to flour, I like to beat the eggs with a fork and add some salt. How much? well, about a gram per egg, so four grams here. You only want enough salt in the pasta dough to keep it from tasting dead.
Once the eggs are beaten and salted, add the 300g of flour:
So, flour in, I like to use the fork to start the process of mixing the egg into the flour. Make no mistake, this will end with your hands on that dough, but for now I find the fork helps mitigate some of the mess of the sloppiest part, and what’s more, instead of a lot of eggs sticking to your hands and throwing off the ratio, only a small amount of egg sticks to the fork, so technically there’s a good reason for this.
I use the fork to get things incorporated in the bowl until it looks about like this:

At this point, flour a counter top or other work surface, and dump out your dough. Get in there with your hands and work it until you get a kind of pasta-ingot like this:

From here, knead. I’m not going to describe how, because frankly it’s not shiatsu massage. It’s pasta. Smoosh it around until it looks like this:

Frankly, there are few things in cooking I find as satisfying as feeling a pasta dough come together from that shaggy, flaky mess into the elastic sphere above. There is something magical in that process, and no that doesn’t make me a serial killer. It really is objectively wonderful.
At this point, throw the original bowl upside-down over your pasta ball and let it sit on the counter for half an hour. What’s happening here is the gluten structures are forming and relaxing as the flour hydrates with the water from the egg. Suffice it to say, the whole thing just needs time to become itself. Like it’s at pasta college.
In the interim, let’s talk pasta rollers. You need one. You *technically* can do this with a rolling pin, but I’ve never seen it done in person, and frankly I’d pay admission to watch it. So, about rollers. For years I used a bolt-on-the-counter hand-crank model that worked just fine. It had annoying quirks and hated my knuckles, but it was cheap and did the job just fine. Then I spent the money on an attachment for my stand mixer and, well:

Okay, it doesn’t look quite that ridiculous, but consider that photo representative of how much it changed my pasta-making life. So, if you’re new to making pasta, please use the cheap hand-crank model until you know it’s something you love enough to do often. If, however, you make fresh pasta a lot and are curious about the automated side of this, buy it now. I’ve had mine for two (2) years now, and use it weekly.
Here is where I’m going to send you away. There are a ton of videos about rolling out pasta that can explain the process infinitely better than my writing. It’s just a very visual thing, like origami, so please go track down a few and watch them. At some point, I will make a video myself and we can all laugh, but for now, listen to the experts.
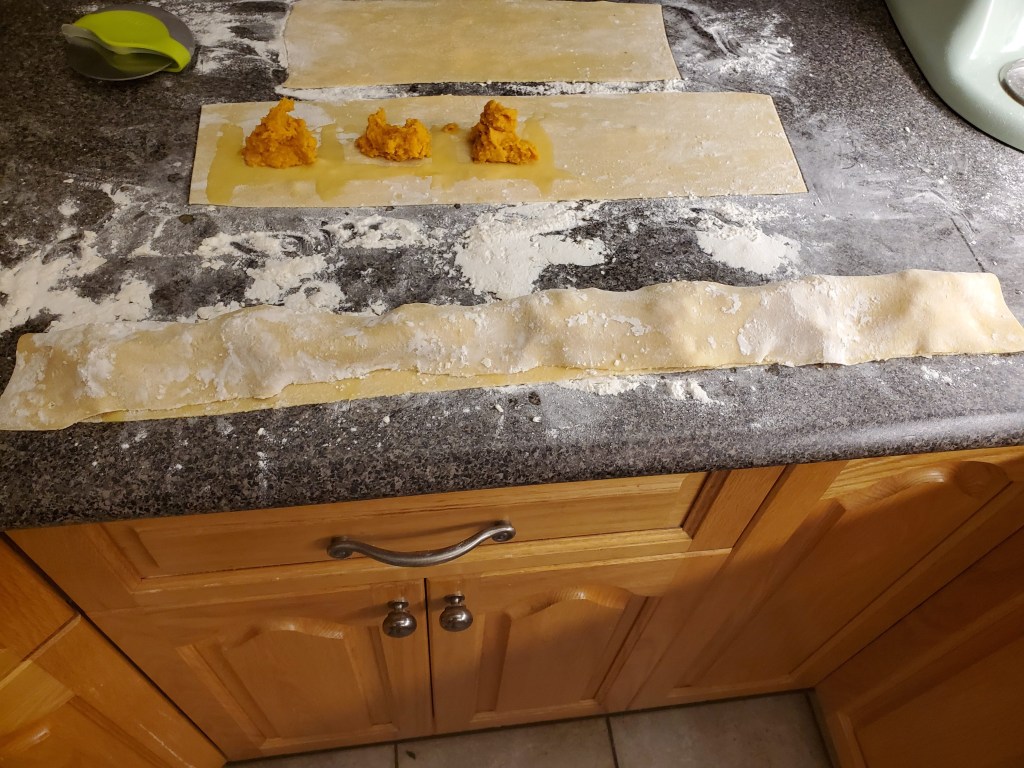
Back? Okay, my dough is rolled out, too:

Whey are they all different lengths? Well, because I’m bad at this. But they’re all the same thickness which is what matters here. I use a pizza cutter to square up the ends:

Fill it with dollops of your filling, about midway into the sheet:

Yes, these are big chonker ravioli. A serving is going to be two (2) to four (4). If you want something a little more dainty, go ahead and cut the pasta sheets in half the long way, but be warned: smaller ravioli have more problems (and I think in this application, taste worse. There’s a real magic here of the filling-to-pasta ratio). Don’t be persuaded by the ghost of Chef Boyardee.
Beat up an egg, and brush around the filling like so:

You want to get the egg wash as close to the filling as possible, because that’s where the seal is most important. Also, for years I didn’t use an egg wash, and would rupture about 25% of my ravioli on cooking. Since employing the wash, I can’t recall the last blowout, so govern yourself accordingly.
Here comes the fun. Fold the back half of the pasta sheet over the filling:
You can see in this photo, the edges of the pasta aren’t set, and everything is still up for grabs. That’s the point. Just gently fold it over, then use your fingers to seal around your filling, trying to force out the air:
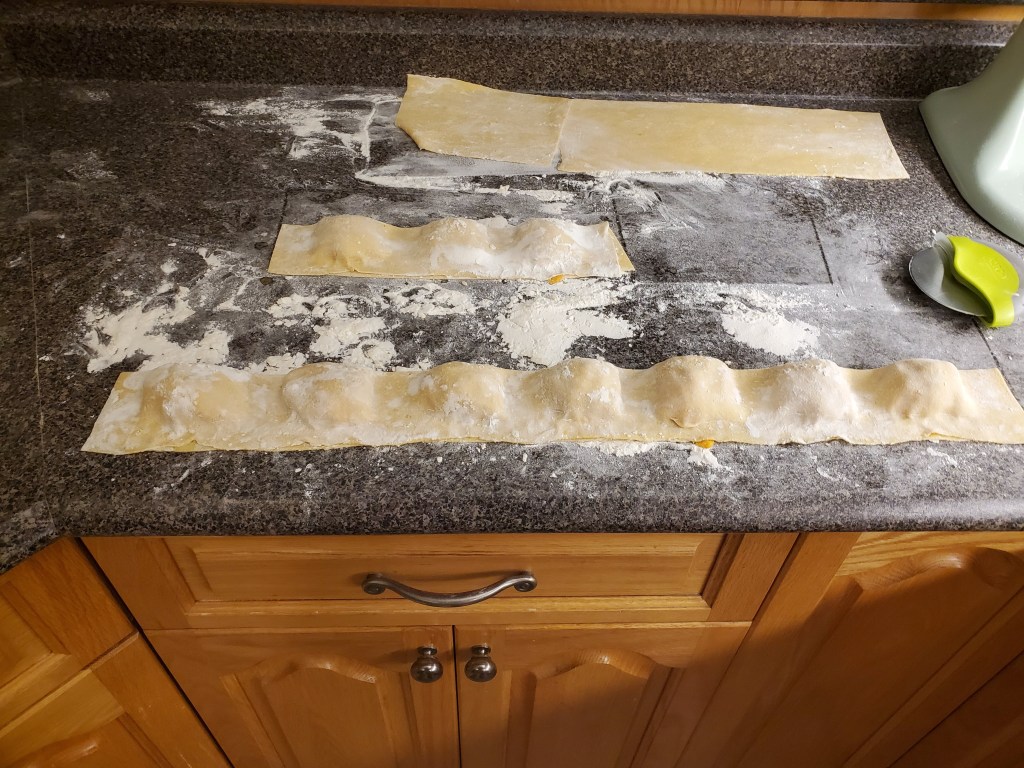
Some filing might press out, and that’s fine (unless it’s a ton, in which case the pasta won’t seal). In the above picture, you can see a couple of spots where the sweet potato is peeking out. I’m happy to report I cooked all of these and ruptured none, so don’t sweat it.
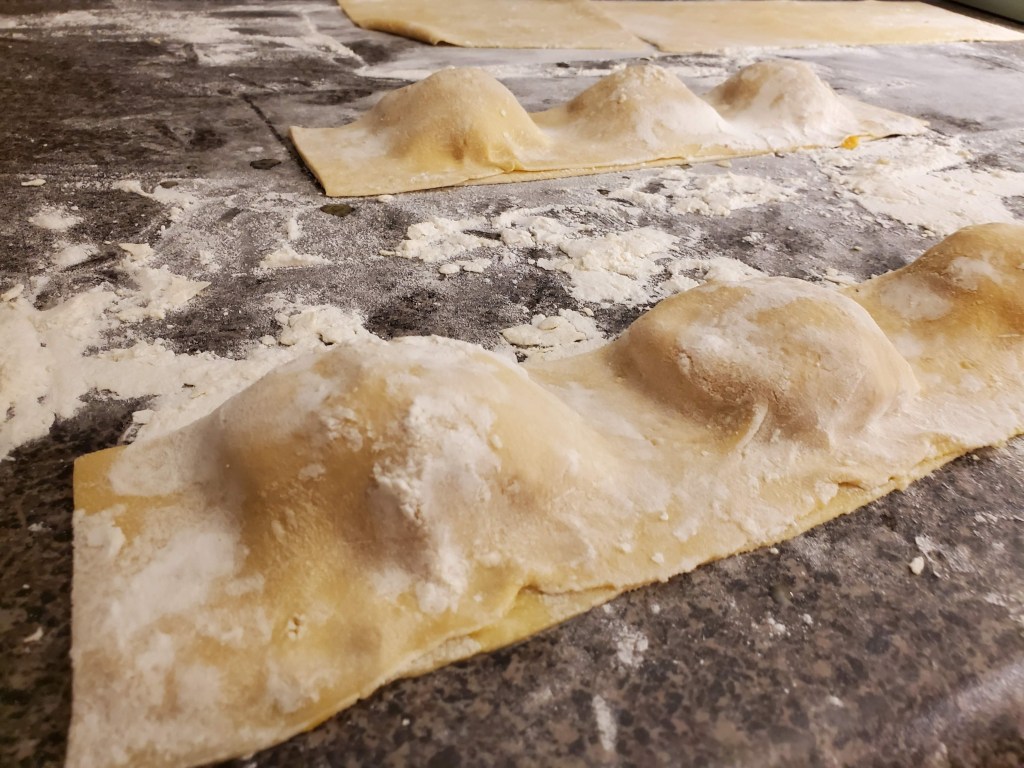
Press down to seal, then use the cutter to trim and cut into individual ravioli. Move to a flour-dusted baking sheet:
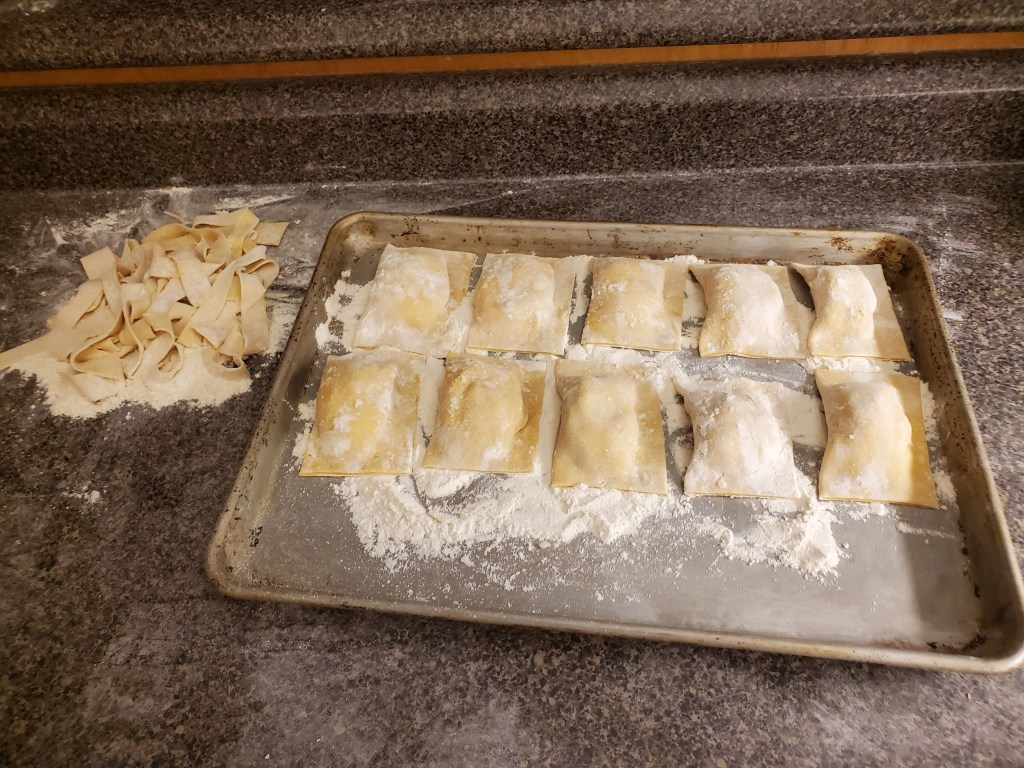
From here, you can freeze these on this sheet, then store them in tupperware or whatever you want. Or, you can cook them immediately. Also, you may have noticed a few steps back that I had way more pasta than filling. Well, I rough-cut them and piled them up to the left. After dinner, I’ll boil those off in the leftover water for a couple of old pups. Again, we’re trying to waste nothing, and these dogs love homemade egg pasta.
For cooking: boil in water for two (2) to three minutes, then fish out with a wire spider or slotted spoon. They will swell up a LOT while cooking, and float, which should help you know when they’re done. Move to a pan with some butter and sage. Keep an eye out at this point because the pasta will want to stick to the pan if it doesn’t keep moving. Once the ravioli are toasty and a little browned, plate and serve with fresh sage or some green onion:
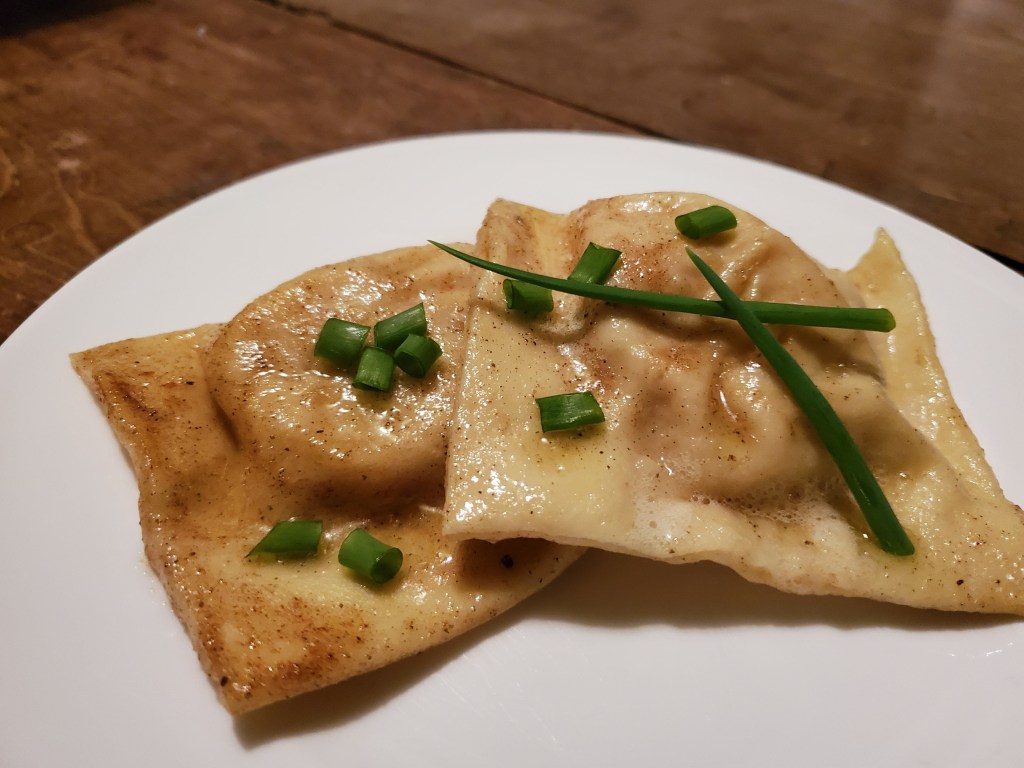

So, that’s it. Serve them with salad. Serve them as an appetizer before a pork dinner. Serve them at breakfast with a sunny side egg. Eat them in bed while watching Harry Potter.
Oh, right, the HYPERSPEED method. Steps as follows: get the potatoes in to steam, and while that’s happening make your pasta dough. When the dough is resting, get the potato mashed and mixed and in the fridge or freezer to chill. Meanwhile, get water boiling NOW for the pasta. Boiling water always takes forever, so get it going. From here, it’s all the same, but you can get pasta water going, the filling done, and the pasta dough done and resting in the same 30-minute period. Then it’s just finishing it when everyone is ready. Trust me, it works, even with two hungry kids staring at you with skepticism.

Wow this sounds amazing!
LikeLiked by 1 person
Thank you!
LikeLike