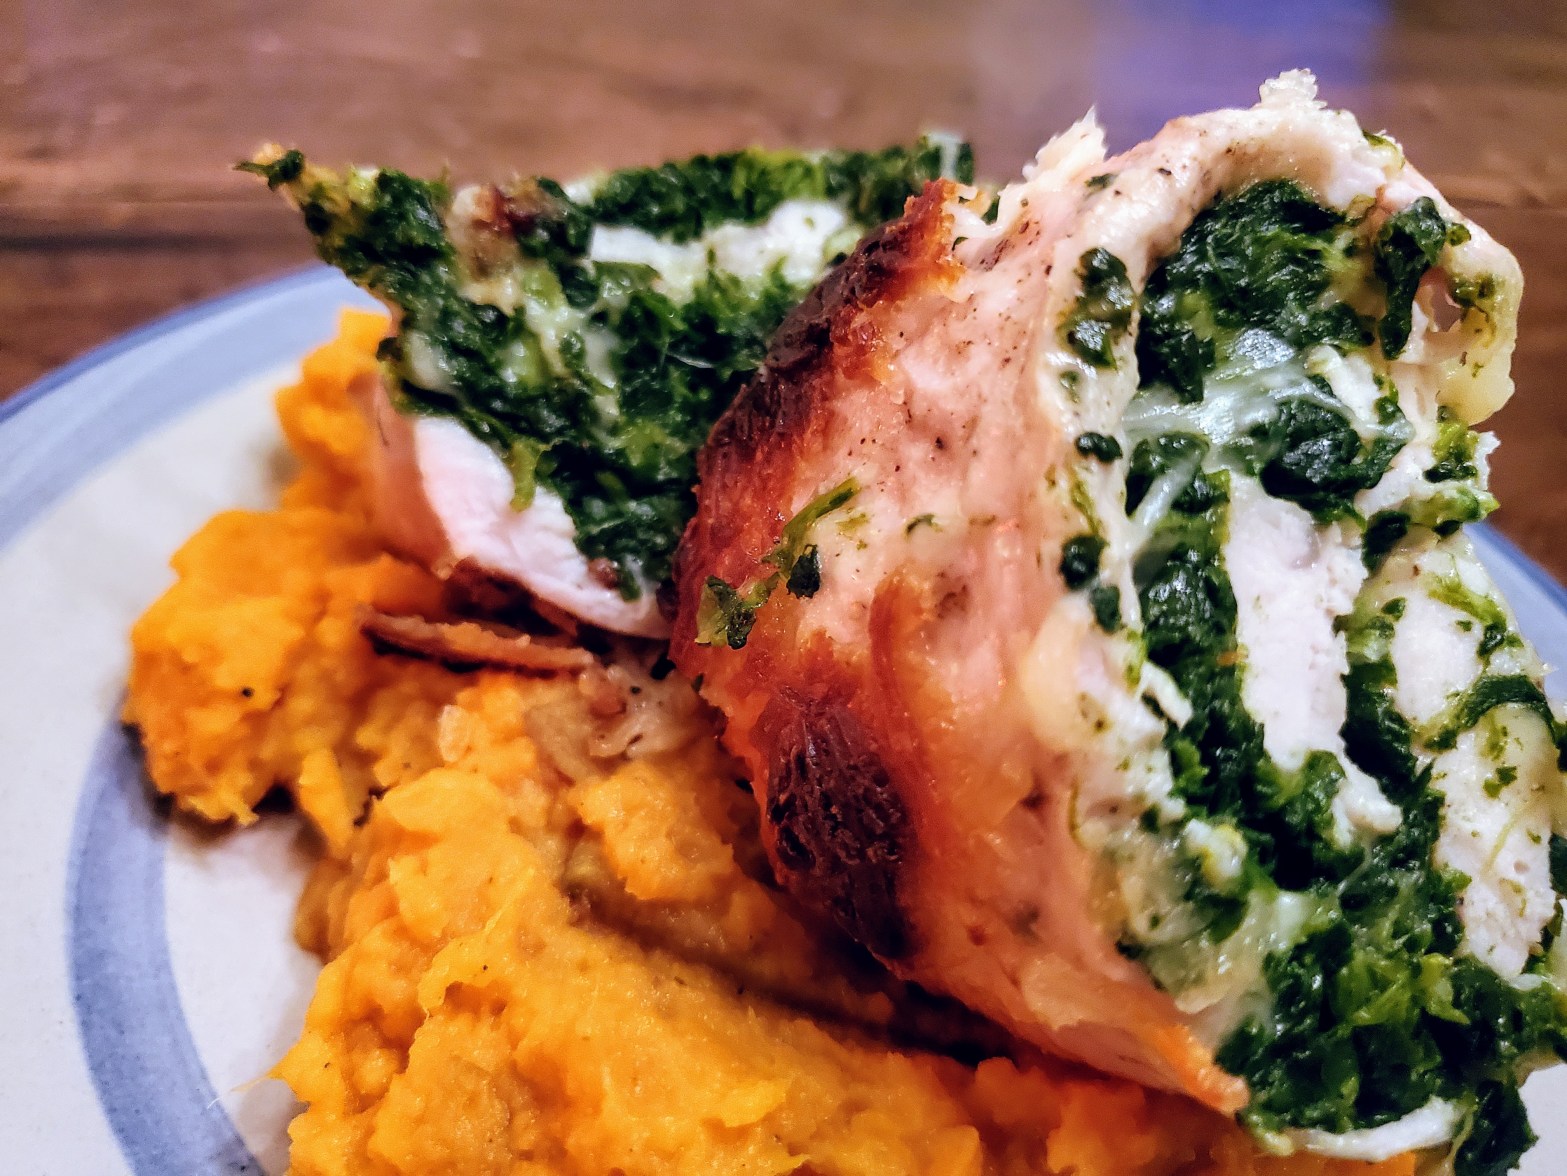
#RecipeUpTop (details below):
- 2 chicken breasts (boneless, skinless);
- 1 large package frozen spinach, drained;
- 1 tablespoon veg oil;
- Shredded mozzarella (varies);
- Salt and pepper (to taste);
Method: Separate the tenders from the breasts, then butterfly the latter. Pound everything to about 1/4 inch thickness, and overlap on plastic wrap. Stuff with mozzarella and spinach, then roll into a roulade. Place in freezer for forty-five (45) minutes, then roast on a wire rack at 375F until an internal temp of 165F (about an hour). Let rest for ten (10) minutes, slice, and serve.

Details
The vast majority of stuff we do here on the blog (and, indeed, in our day-to-day) is built around straight-forward, no-frills utility cooking. Really great food, very cheap, and without a lot of needless flourish.
But, every once in a while, maybe on the eve of a romantic holiday, you may want to flex a little with some stunt cooking. Why even ride a motorcycle if you don’t do a wheelie from time to time?
Anyway, I love this recipe because it’s a great jumping off point for a ton of variations on the roulade (we’ll get to that), and because it uses some basic ingredients. Most of all, I love it because it tastes great, and makes you look like some kind of poultry sorcerer. A chicken-mage, if you will. And relies on a few simple tricks.
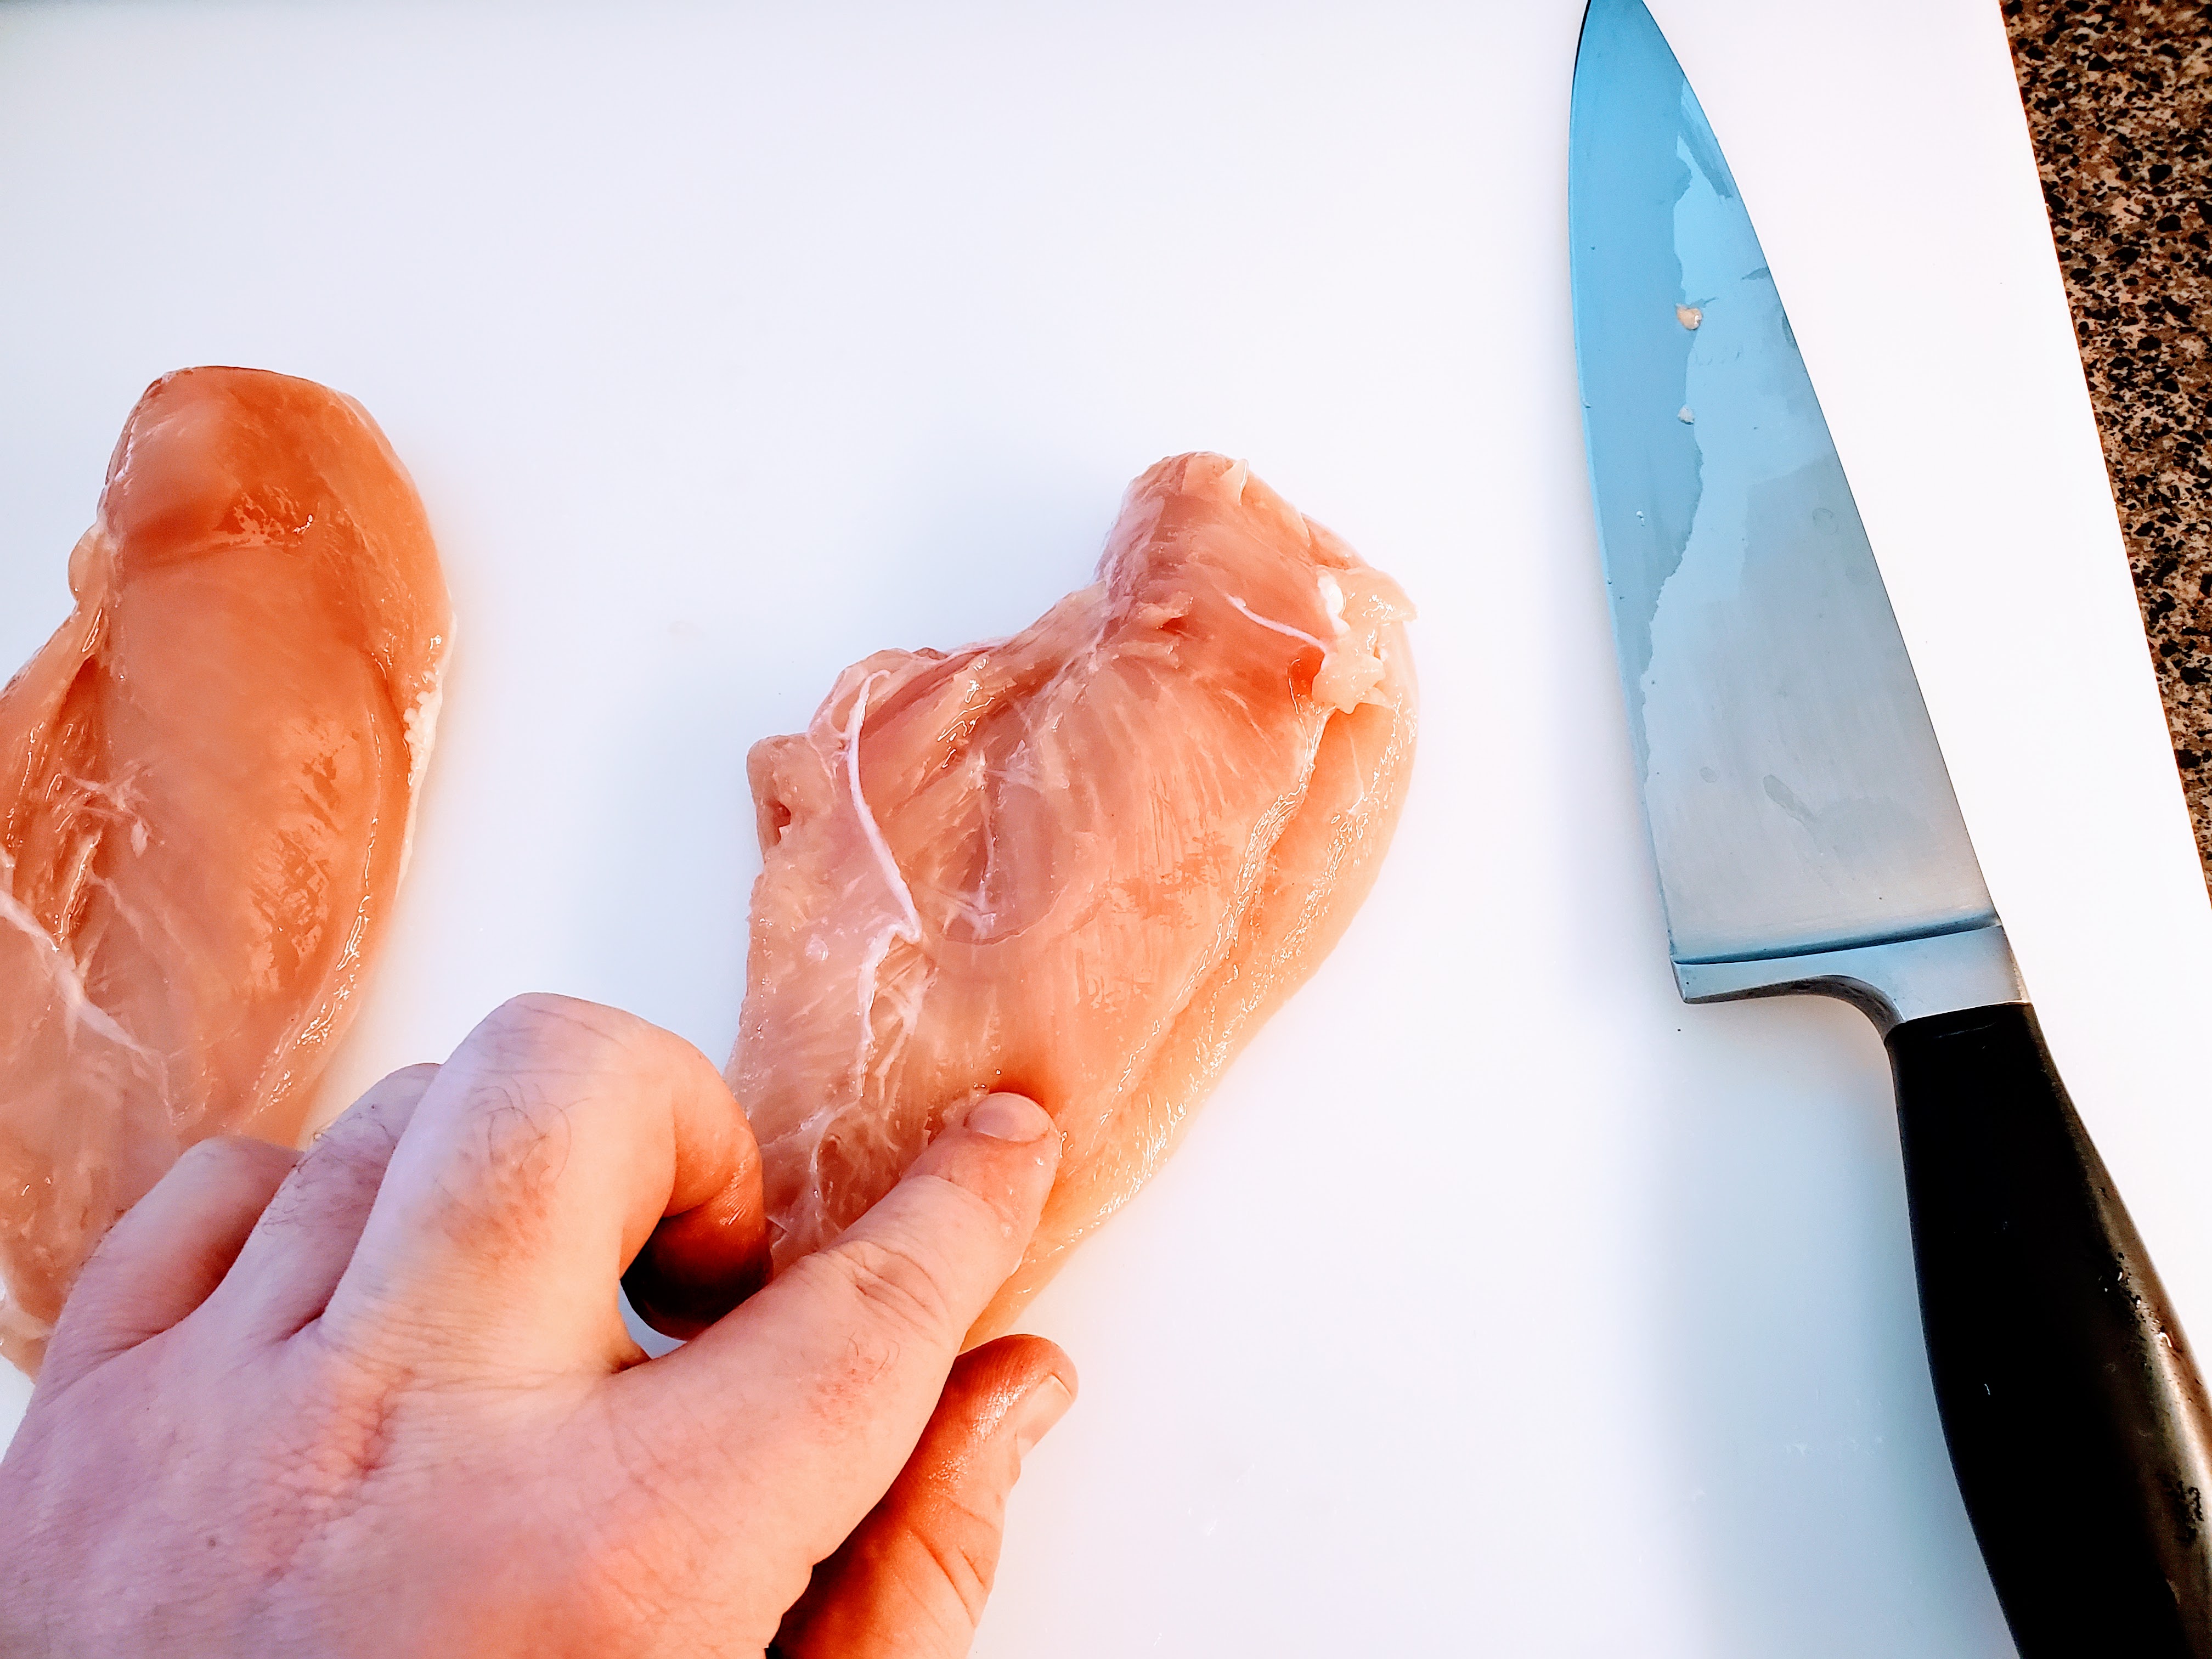
Step one: get your chicken breasts, separate the tenders, and prepare to butterfly.

So, if you’ve read the blog, you know we tend to buy twelve (12) whole chickens at a time, and break them down into the cuts we want for the freezer. That means we have a lot of cheap boneless, skinless breasts around. Here’s two now.
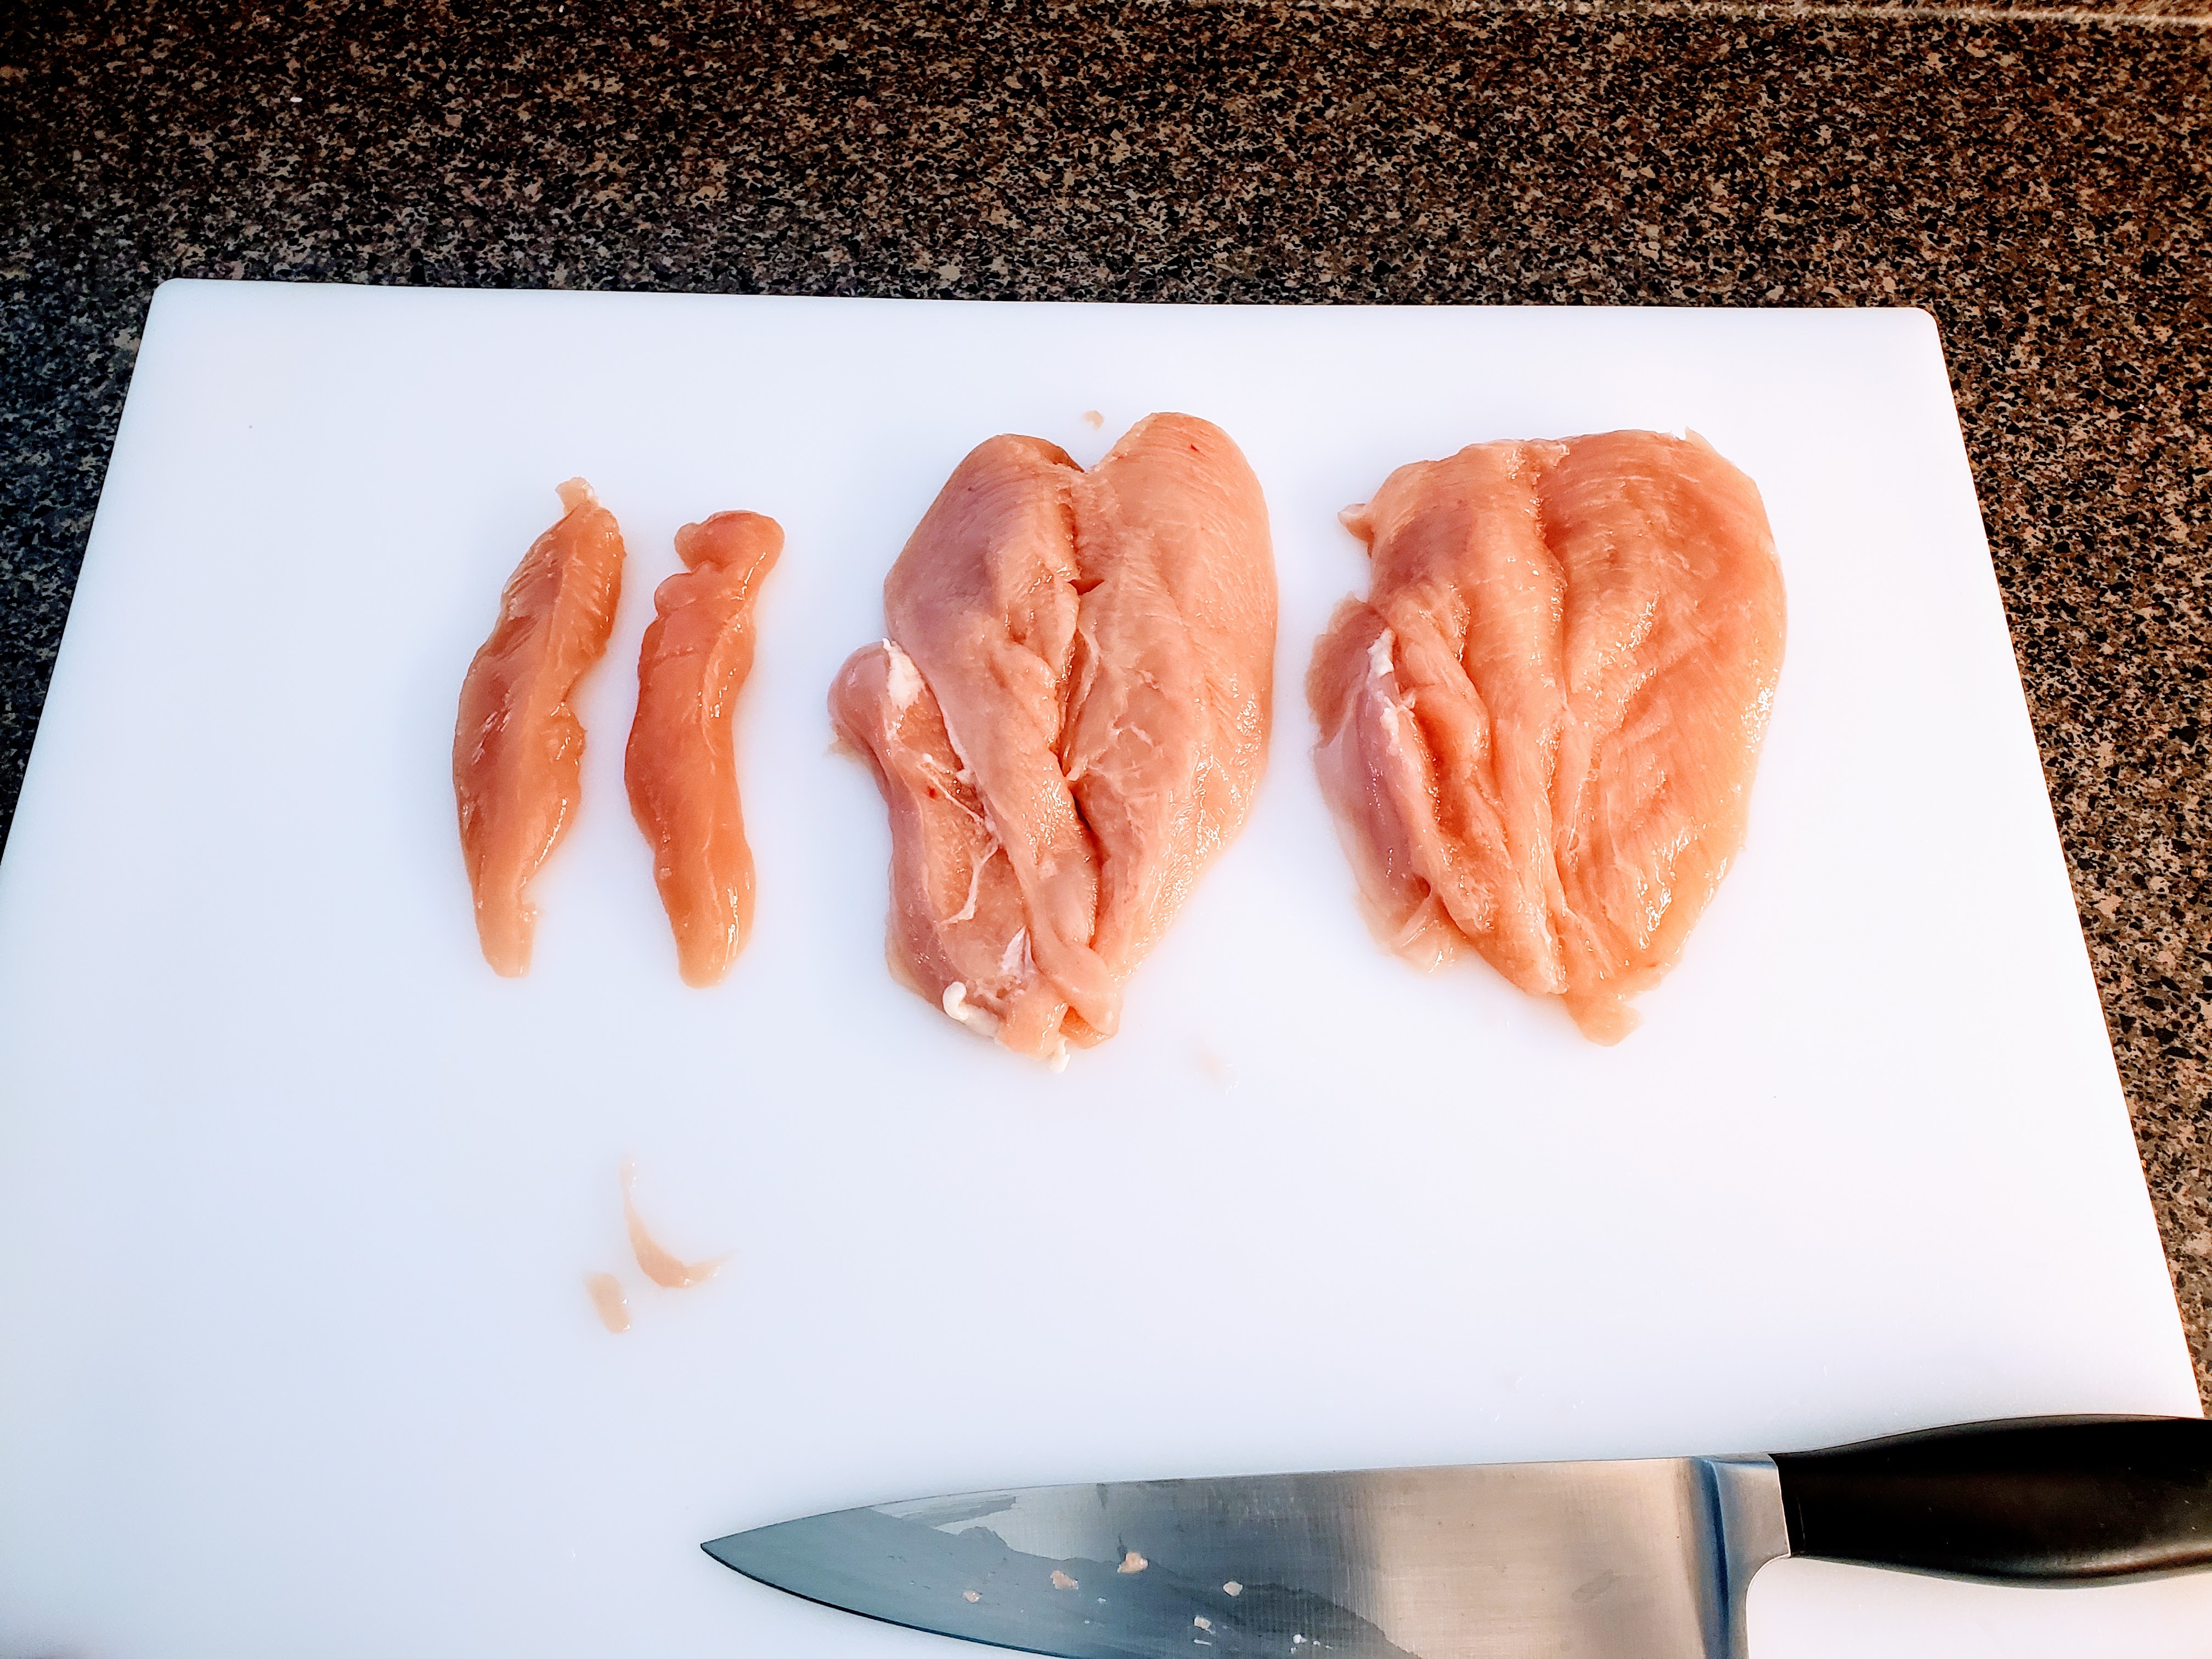
If you buy these pre-cut from the market, they may or may not have the tenders removed from the underside. If they do, no big deal. If they still have them, a quick slice will get them out of the way for the moment:

There they are on the left. Their time is coming.
Next up, we’re butterflying these breasts. This is, admittedly, a tricky cut. But, it’s so absurdly useful that it’s worth the time to learn. It’s also not nearly as difficult as, say, peeling an apple with a paring knife, which most people already know how to do. And look, if you mess up, it’s not like the chicken is ruined. Here we go:
Find the thickest side of the breast, and make an incision that DOES NOT CUT ALL THE WAY THROUGH THE CHICKEN. This is going to take a few knife strokes, which is fine. All we want here is a place to start. Next, peel back the top part of the breast, and continue with the butterfly cut:

Here you can see I’ve folded the top part of the cut over to the left. The next step is putting the knife blade into the “spine of the book” as it were, right where the pages meet, and making another shallow cut. It takes a little practice, but the end result will look like this:
So, here’s why the butterfly cut is so useful: you’ve essentially just doubled the surface-to-mass ratio of these things. Why should you care? Well, more surface means more space for seasoning, for one, but most importantly it means these can be cooked super hot and super fast, which is the ultimate goal for low-fat proteins like chicken breast.
Seriously, from fridge to plate, including the butterfly process, you’re looking at maybe ten (10) minutes.
You can also batter and fry these like a certain chicken fillet restaurant, but that’s a whole different thing, and we’re getting off topic. Just learn the cut, is my point.
Step two: pound ’em out.
So, I hate plastic wrap. I hate everything about it. I hate that it’s a single use plastic. I hate that it turns itself into an intractable ball as soon as my back is turned. I hate that it won’t cut with the cutter on the box (which nicks my fingers JUST FINE) but will tear into ropey shreds if you don’t baby it on the counter. It’s just awful, awful stuff.
But, this is the only application where I haven’t been able to replace it. So, down goes a sheet of evil, with a little water spritzed on, then our butterflied breast, another spritz of water, and the top sheet.
Why the water? well, we don’t want the chicken to tear, and the moisture helps it slide around and even out under the mallet. Just trust me on this. TO THE POUNDING:
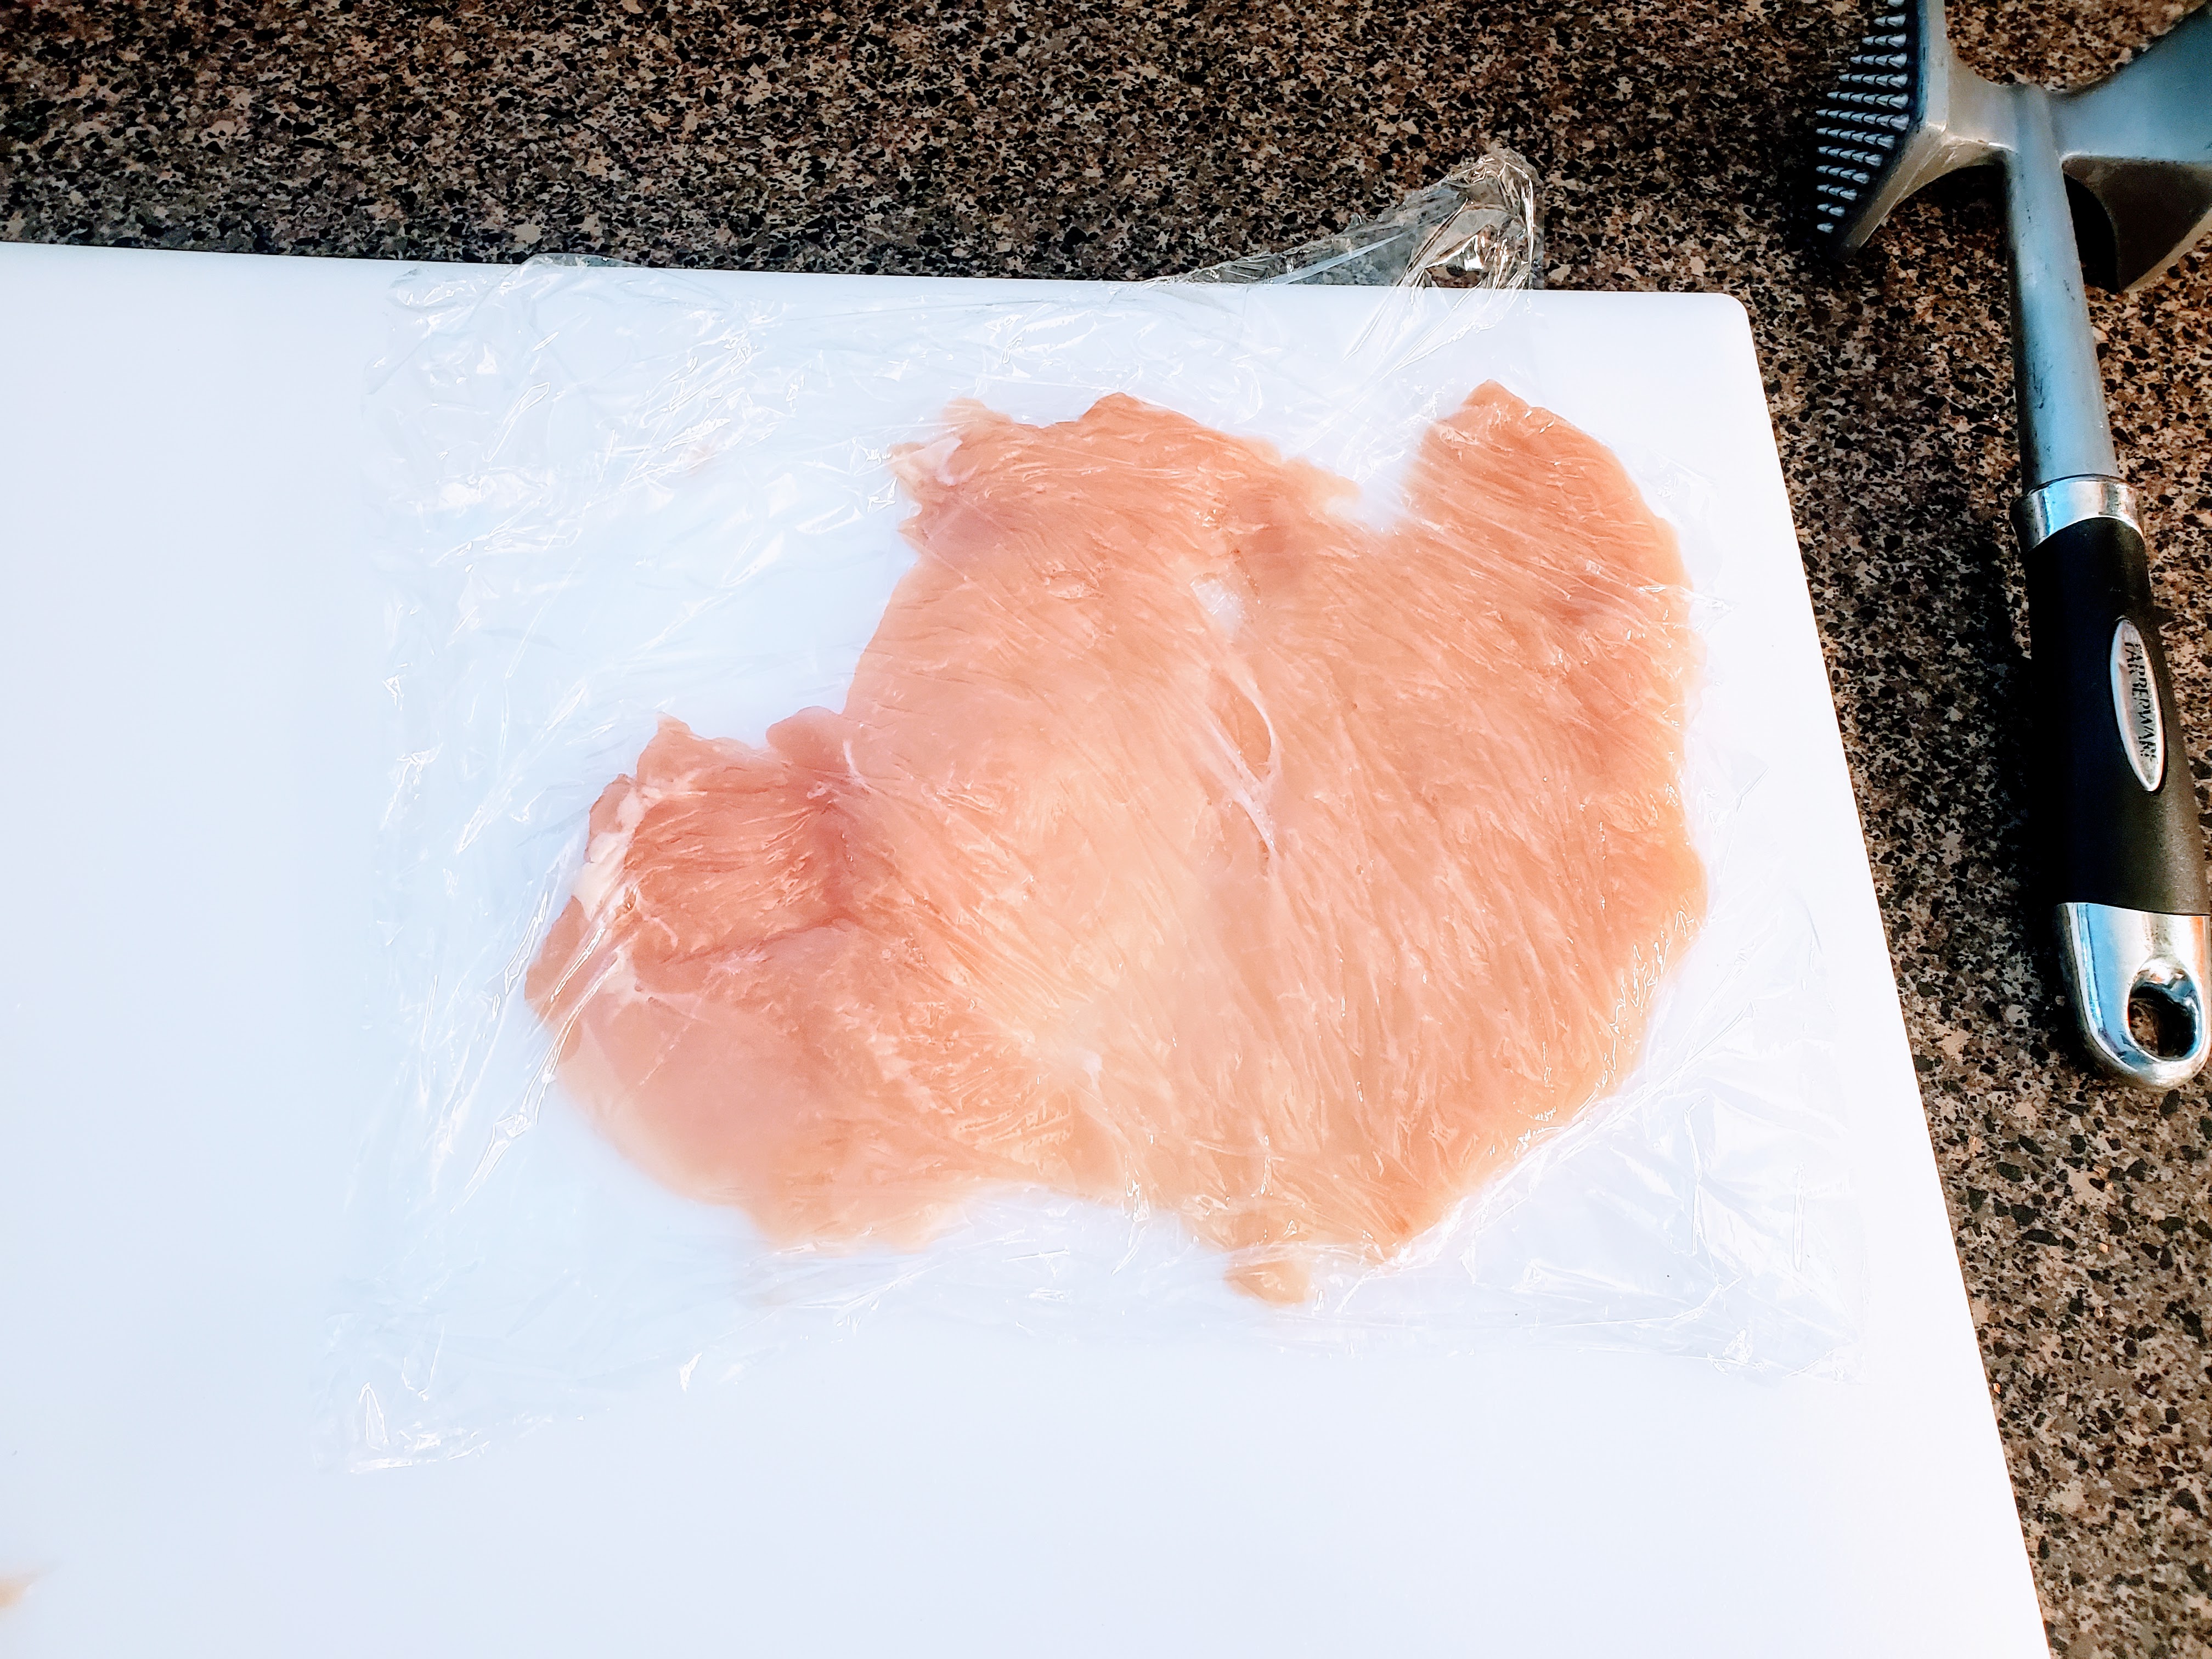
I like to pretend I’m hitting the plastic wrap and not the chicken, but that’s more an emotional/mental thing. Point is, it should look like this when you’re done. Now, do the other one and both of those tenders (if you have them).

Step three: chicken tetris and some rolling.

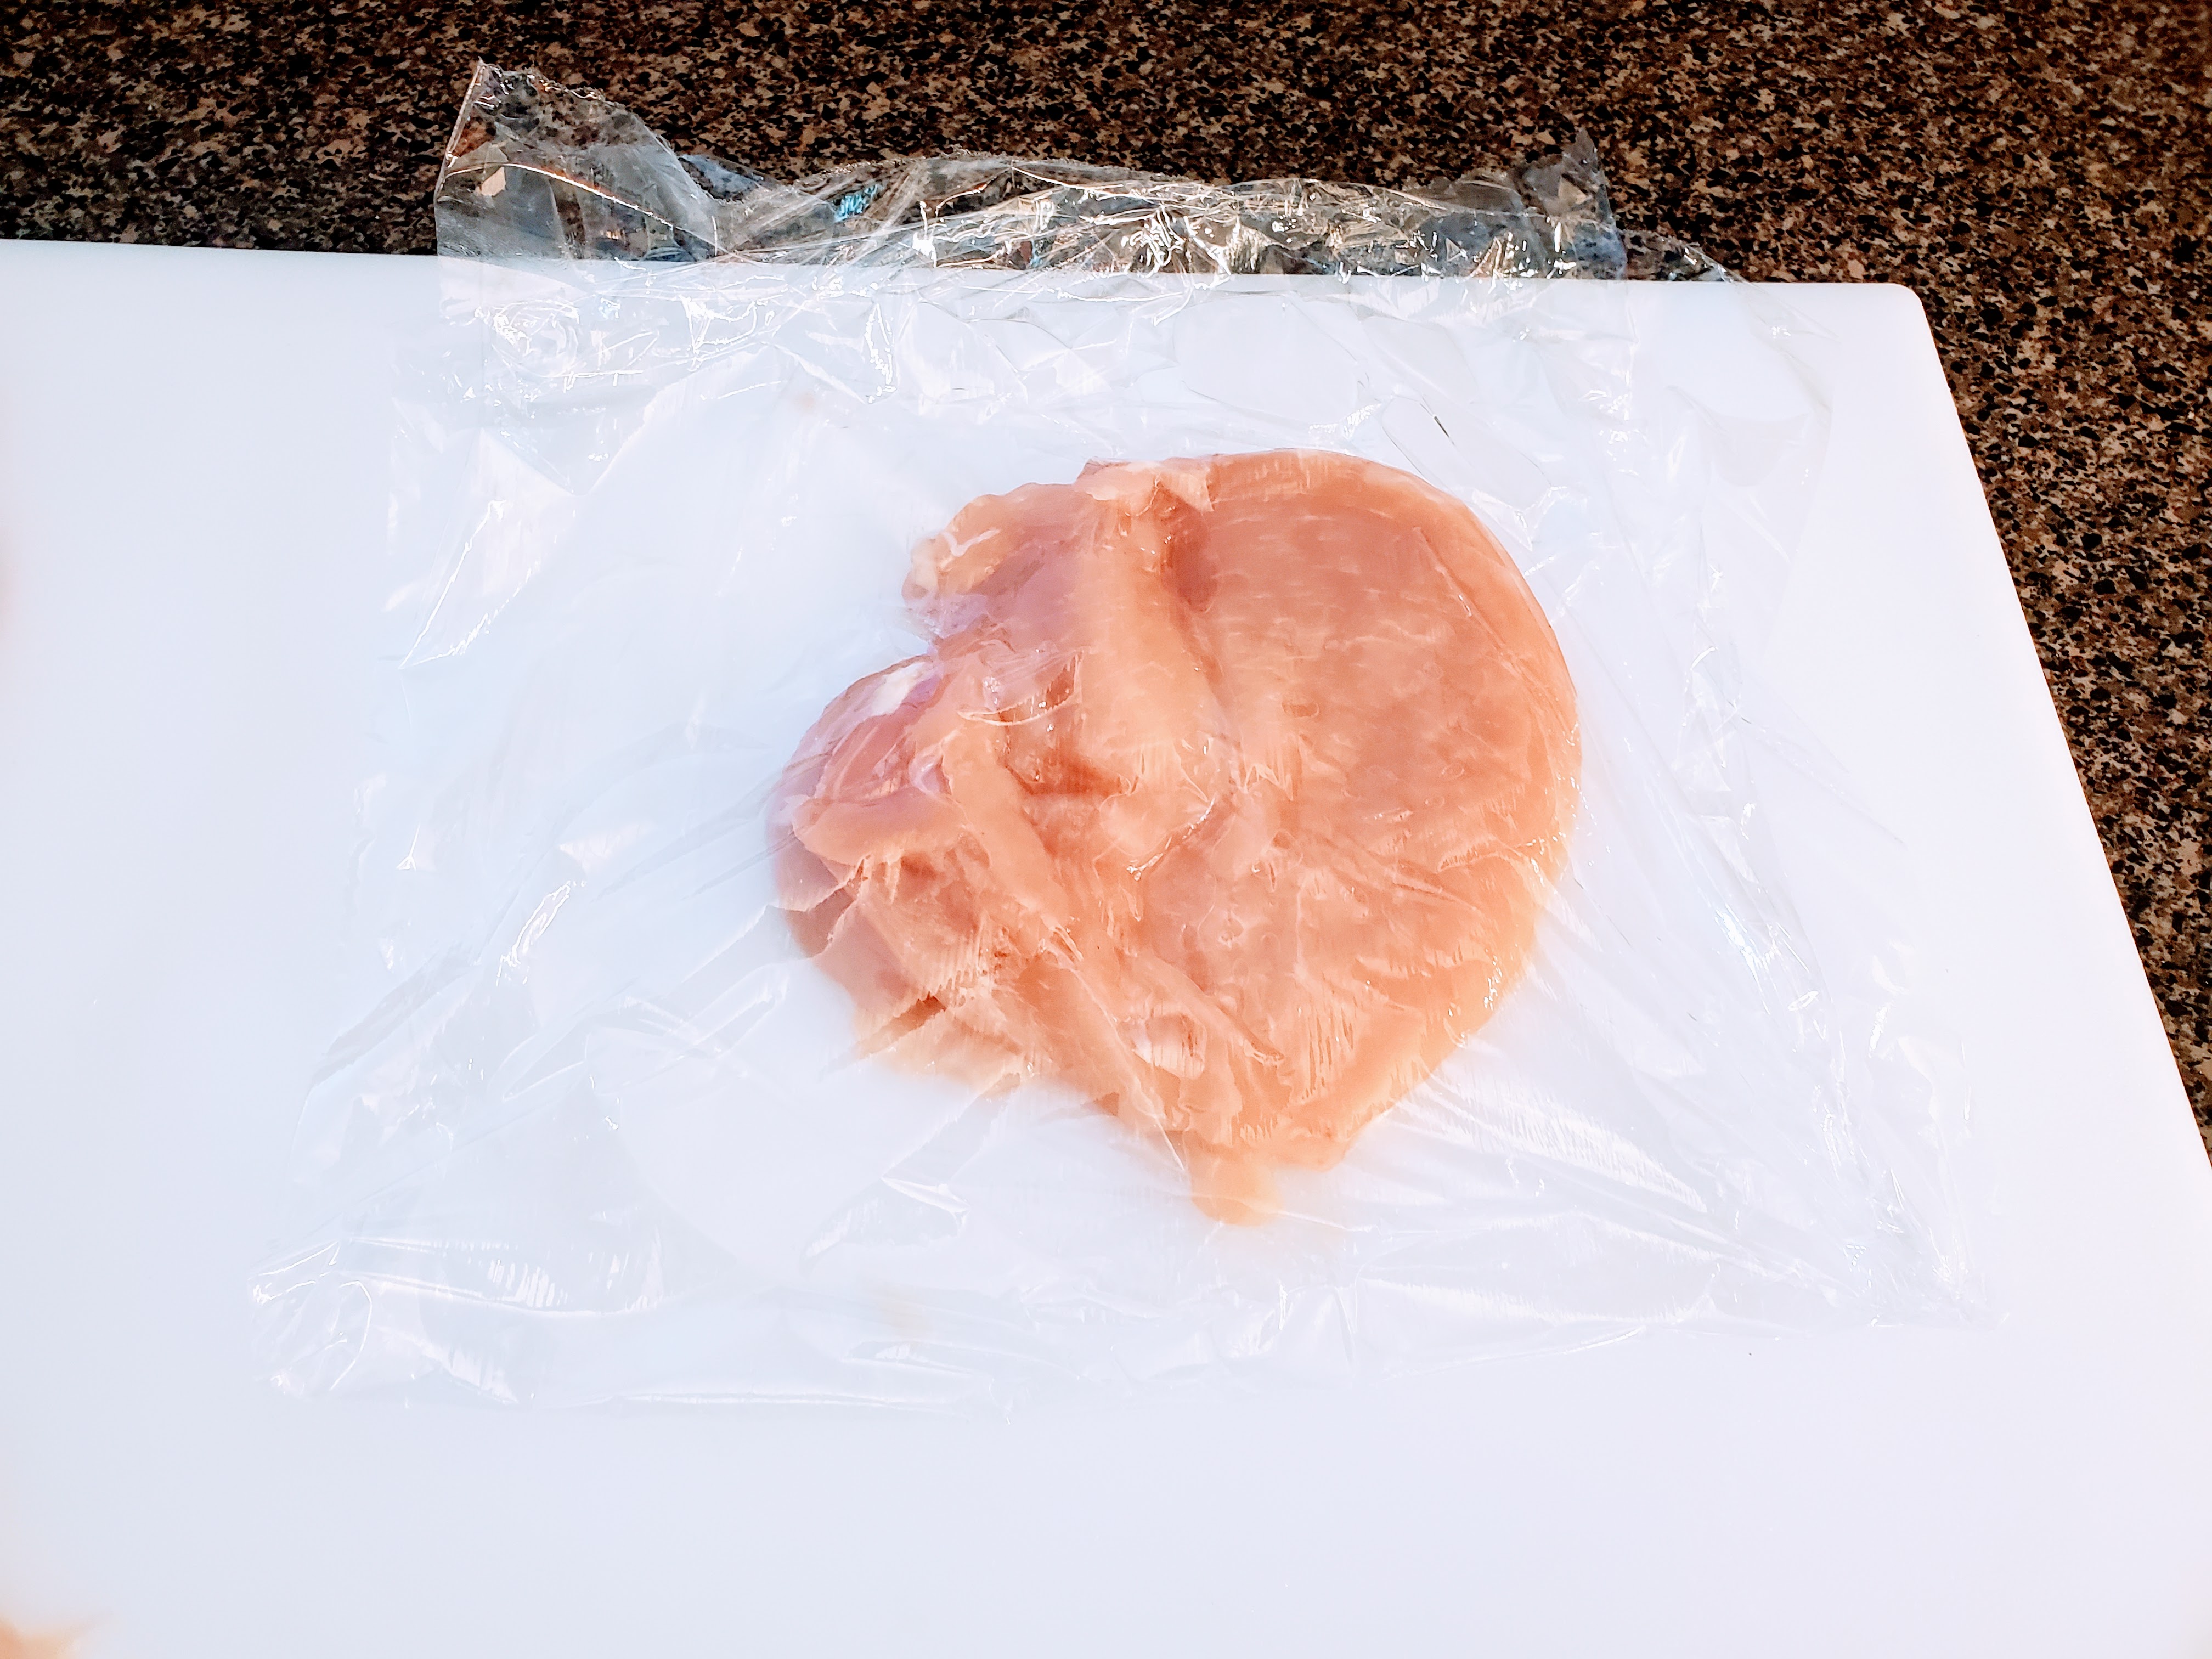
Overlap your two pounded breasts on a sheet of plastic wrap and try to shape them into a rectangle. Use your flattened tenders to bolster the shape (you can see mine at the top here). What’s important is the breasts are on the left and right, and overlap in the middle. This is crucial, because in a few minutes we’re going to roll from top to bottom. If we roll left-to-right, the whole thing will fall apart.
So, to filling. Here’s where this recipe gets really, really interesting. At this point, you can stuff this with whatever you want. Mushroom puree and breadcrumbs. Apples, walnuts, and cranberries. Tomato sauce and ricotta. Really, it’s the gateway to a lot of goofy and impressive chicken offerings.
Today, we’re going to with spinach and mozzarella, and to do so, we’re going to do a quick layer of mozz, followed by the spinach, and then one more mozz layer to hold everything together.
First, salt and pepper your chicken, then a thin layer of shredded mozz:

Next up is the spinach, and there’s no real secret here other than to make sure it’s thawed AND DRAINED. You don’t want that extra moisture trapped inside this thing.

I like to add a little more seasoning here as the spinach really needs it. One last small layer of mozz, as promised:

From here, use the plastic wrap as your friend and roll this as tightly as you can from top to bottom (or vice versa). Don’t worry if it’s not perfect, or has some holes or gaps. We’ll fix that later.
Once it’s rolled in the wrap, move it to the freezer for forty-five (45) minutes or so, until everything is firmed up but not frozen.
Why? Well, I hate toothpicks. And I don’t want to use any to hold this thing together, and I also don’t want to deal with butcher twine and trussing. So, let it firm up in the icebox. Problem solved.
Step four: cook it and eat it.
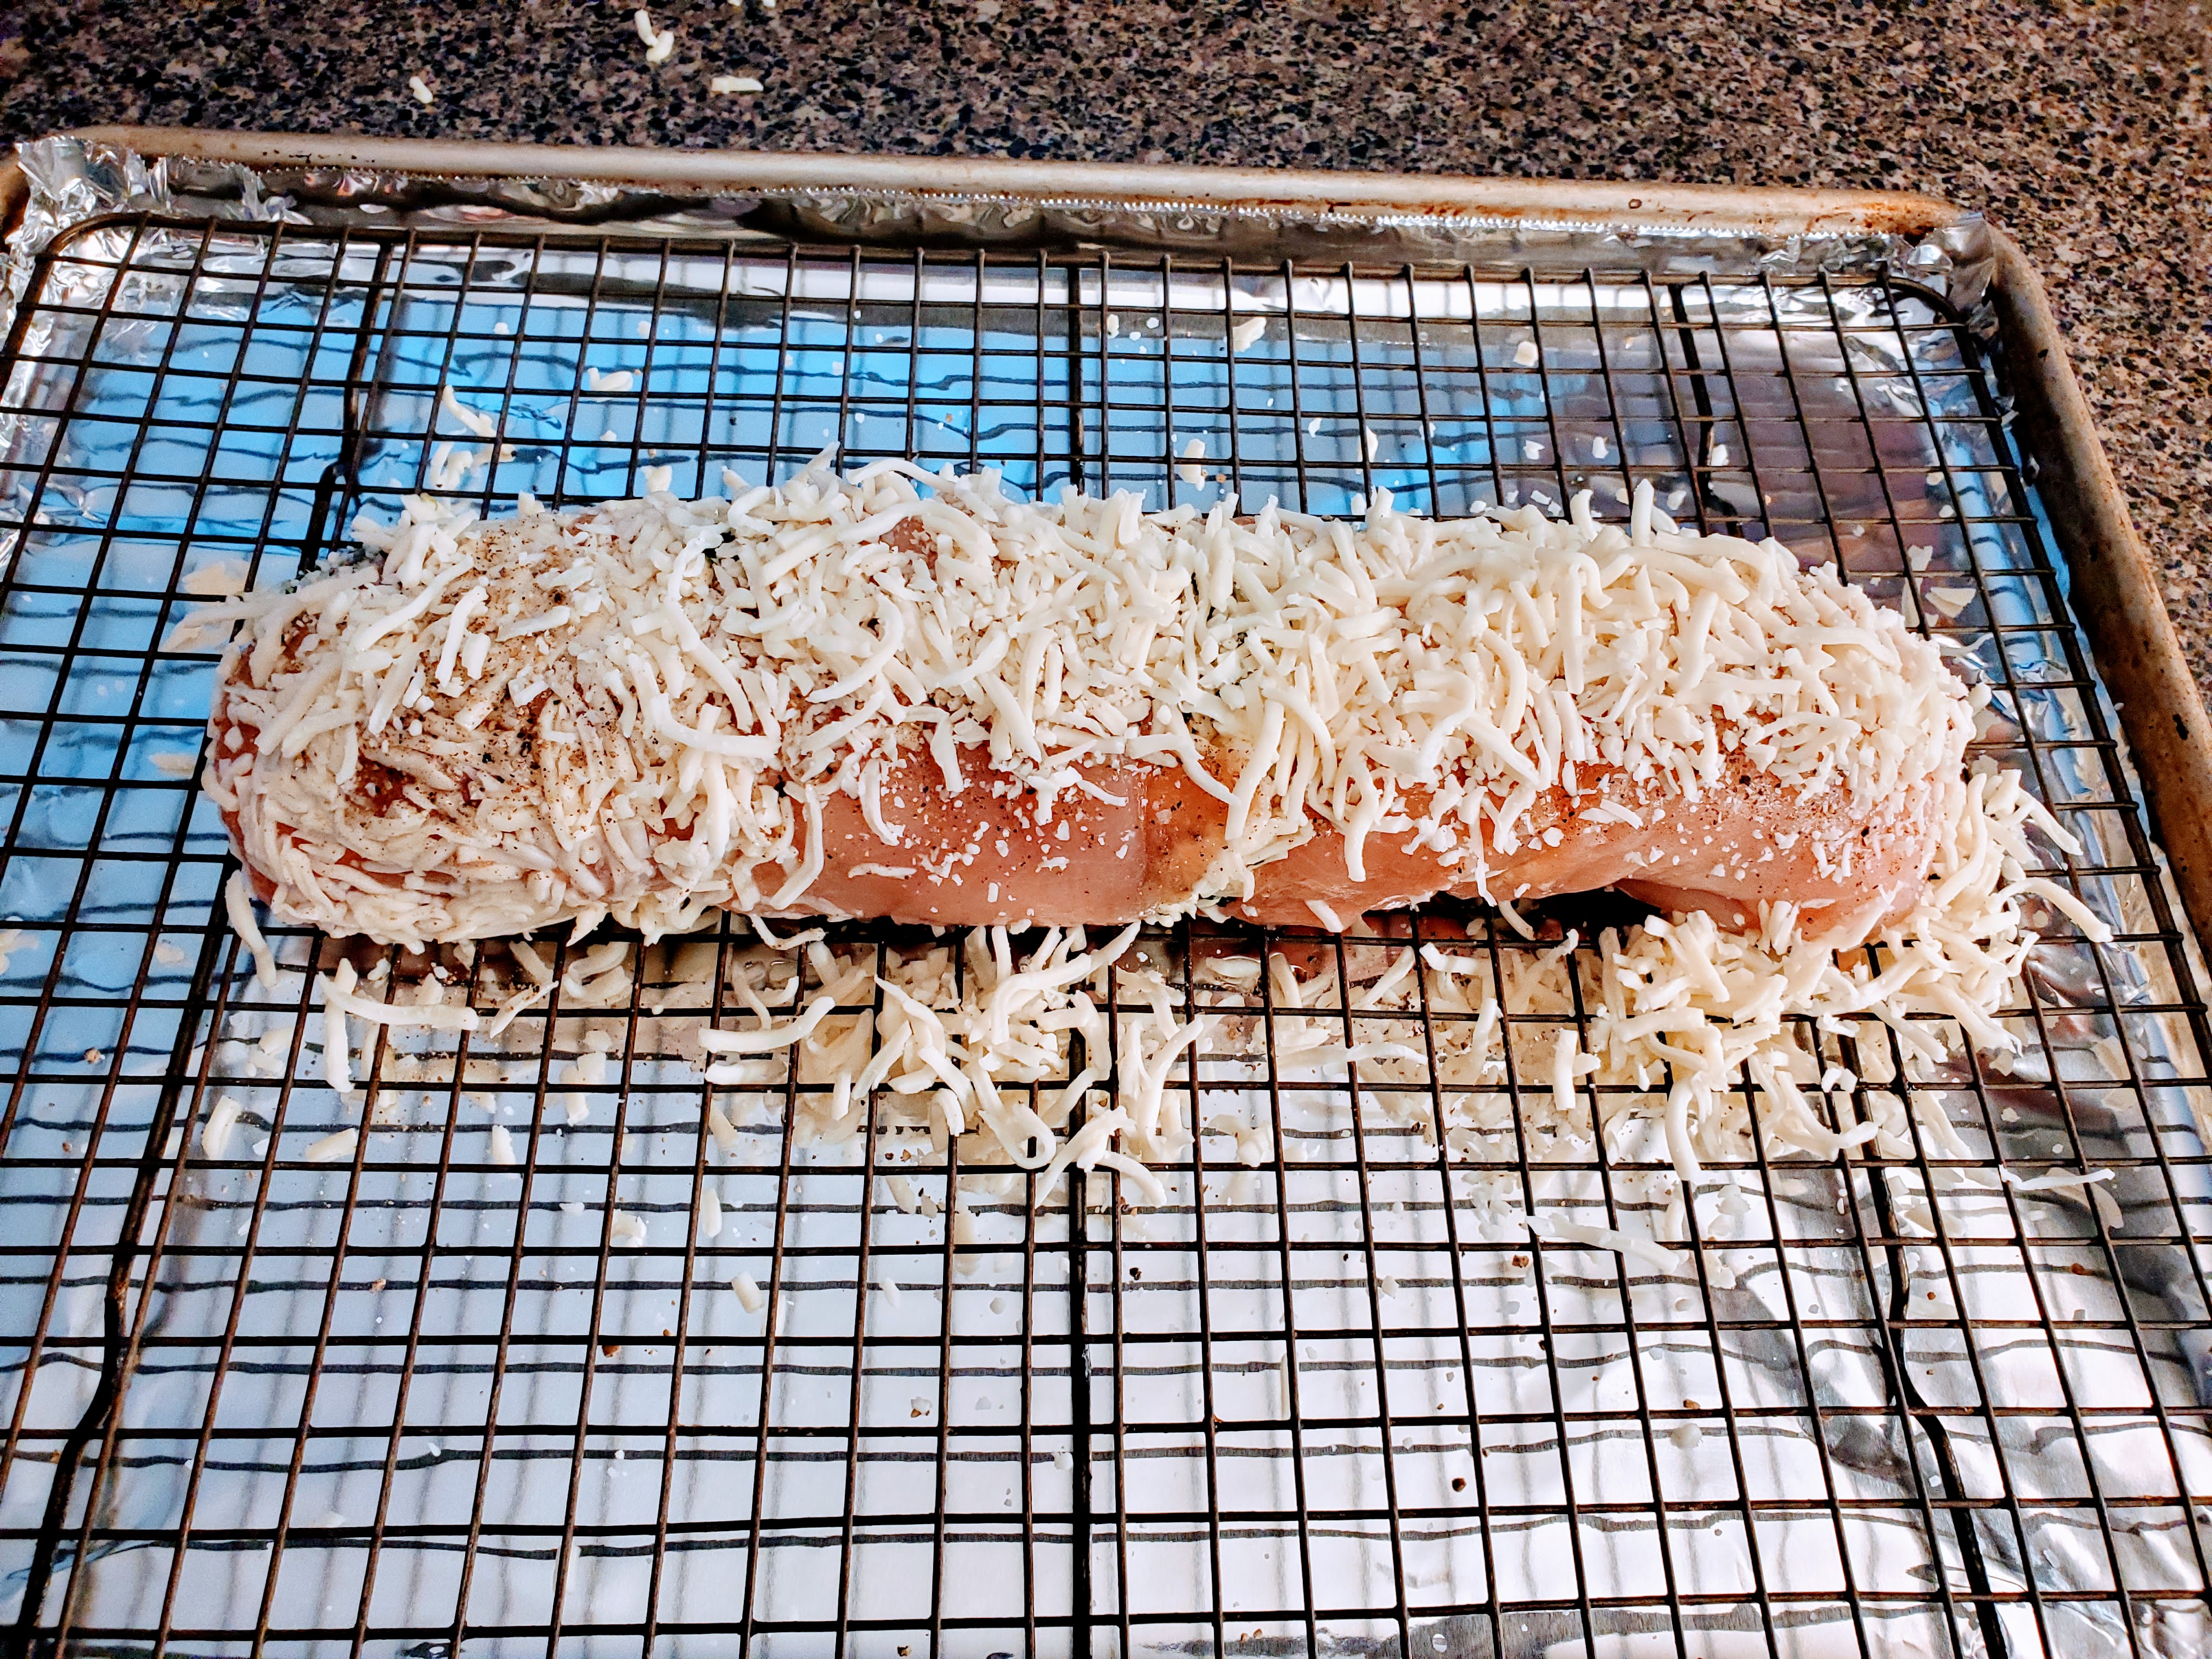
Carefully remove the plastic wrap, and move the roulade to a wire rack set in a half sheet pan.
Brush it with some oil, season with salt and pepper, and toss on a little extra mozz to cover up any imperfections in the rolling process. Roast in a 375F oven until an internal temp of 165F, about an hour.

Let it rest on a cutting board for ten (10) minutes (trust me, the inside of this thing is hot lava), then slice and serve. I like it over a sweet potato mash, but really the sky is the limit here:

The important thing is you get to show off, which, let’s be real, everyone needs now and then.
So, go do that wheelie.
