
#RecipeUpTop:
- 1 part egg (by weight)
- 1 part all-purpose flour (by weight)
- 2 parts whole milk (by weight)
Method: Pre-heat a popover pan in a 450F oven. Mix ingredients in a blender until well-combined, spray pan with non-stick spray, and pour in mixture. Bake at 450F for twenty (20) minutes, then drop the temp to 400F for another twenty (20) minutes, or until set. Poke hot popovers with a knife to allow steam to escape, and move to a rack for cooling. Serve hot.

The Details
I like to bake. Specifically, I like baking long, complicated loaves of bread leavened with yeast; a process that may take a few days, and produces something truly magical and worth the effort.
I also have kids.
And so, frequently, I am looking for something incredibly fast, but still tasty to round out a meal. Be it breakfast, or a savory roast, popovers are the perfect fit. They’re fast, delicious, and made with ingredients you have laying around.
I mean, their origins literally spring from a tired cook waiting for a roast hunk of meat to cool down, staring at a warm hearth and a pan full of drippings, and saying, “there has to be a way to get this into my body.”
Now, looking for popover recipes on the internet, one finds a whole lot of finicky, fragile, complicated processes. These aren’t those. This recipe is the basic huck-it-in-the-oven while you finish something else kinda thing. They are still fantastic – don’t get me wrong – but, well, I just think they’re more in the spirit of the original idea. So, let’s get to it.
Step one: Heat your oven to 450F WITH THE POPOVER PAN INSIDE.
Ah, right, the popover pan.
Here it is sprayed down with cooking spray (we’ll get there). Do you really need this pan? Yeah, kinda. First, standard muffin pans are too stumpy to get the shape we’re going for. Second, the individual spacing between the cups allows for more air circulation, meaning even heat, which then means better lift and consistency. Plus, these things are great for oversized muffins, cupcakes, and all kinds of little tart cups. But, I digress. OF NOTE: I made “popovers” for a long time before tracking one of these down, (heck, I’ve made many a Yorkshire pudding and Dutch baby in a single big cast-iron skillet) so it’s not *strictly* necessary , but it really does make a difference.
So, what’s with the pre-heating? Well, you’ll probably notice there are no leavening agents in this thing. No yeast. No baking powder or soda. Nada. Rather, all of the lift comes from the structure of the eggs and flower themselves, kind of like a sponge cake. However, instead of a bunch of tiny bubbles (like a sponge), these produce one big bubble in the middle.
I will also point out here that, in developing this recipe, I tried several different methods, from cold popover pan, to pre-heating at 400F, to heating on a sheet pan versus without, and this is the best method for those towering, crispy poofs we’re looking for. I did find, however, that using a cold pan or lower heat provides a more stable bottom “cup,” for whatever that’s worth. In the event you’re planning on filling these with soup or ice cream or something, that may be a consideration, but for now, into the oven at 450F.
Step two: blend up the three ingredients.

I like to start with the eggs, since they have the most variation in weight-per-egg. A large one usually runs about fifty (50) grams, but, well, better safe than sorry. For my pan, three (3) eggs is where I start, which puts us at 161g. So, in goes the milk:

Since our recipe calls for two (2) parts milk to our eggs, zero out the scale and shoot for 322 grams (161 of eggs, times 2). This doesn’t have to be absolutely perfect, but it’s good to have goals.
At this point, I like to take this mix for a spin before we add the flour, just to make sure the eggs are fully beaten and the mixture is already homogenous.
Then, flour:

Zero out the scale, in goes the flour…. aaaaaaaand, I overshot by a few grams. No worries.
At this point, we have some decisions to make. We don’t want to over-blend this, or it’ll get chewy and tough as gluten develops. So, any additions we want to make need to happen now. What kind of additions?
Well, these are going to be a sort of pancake stand-in to go with bacon and eggs for kids’ breakfast. So, I’m adding a little sugar (about 50g – understanding more than that may cause them to brown too early… plus, they’re going to be dipped in maple syrup, so they don’t need to be that sweet), two (2) teaspoons of vanilla extract, and some powdered orange zest I made in the dehydrator.
However, I’ve made these to accompany a leg of lamb or a pork roast, in which case I’ll add some extra salt (8g), and eyeball in some of the meat drippings from the roast. Really, so long as you don’t go adding big chunks of things, popovers are built to handle a whole range of modifications. So, play around.
Anyway, once you’ve added whatever other goodies you like, take it for one last spin and get it into the hot pan immediately.
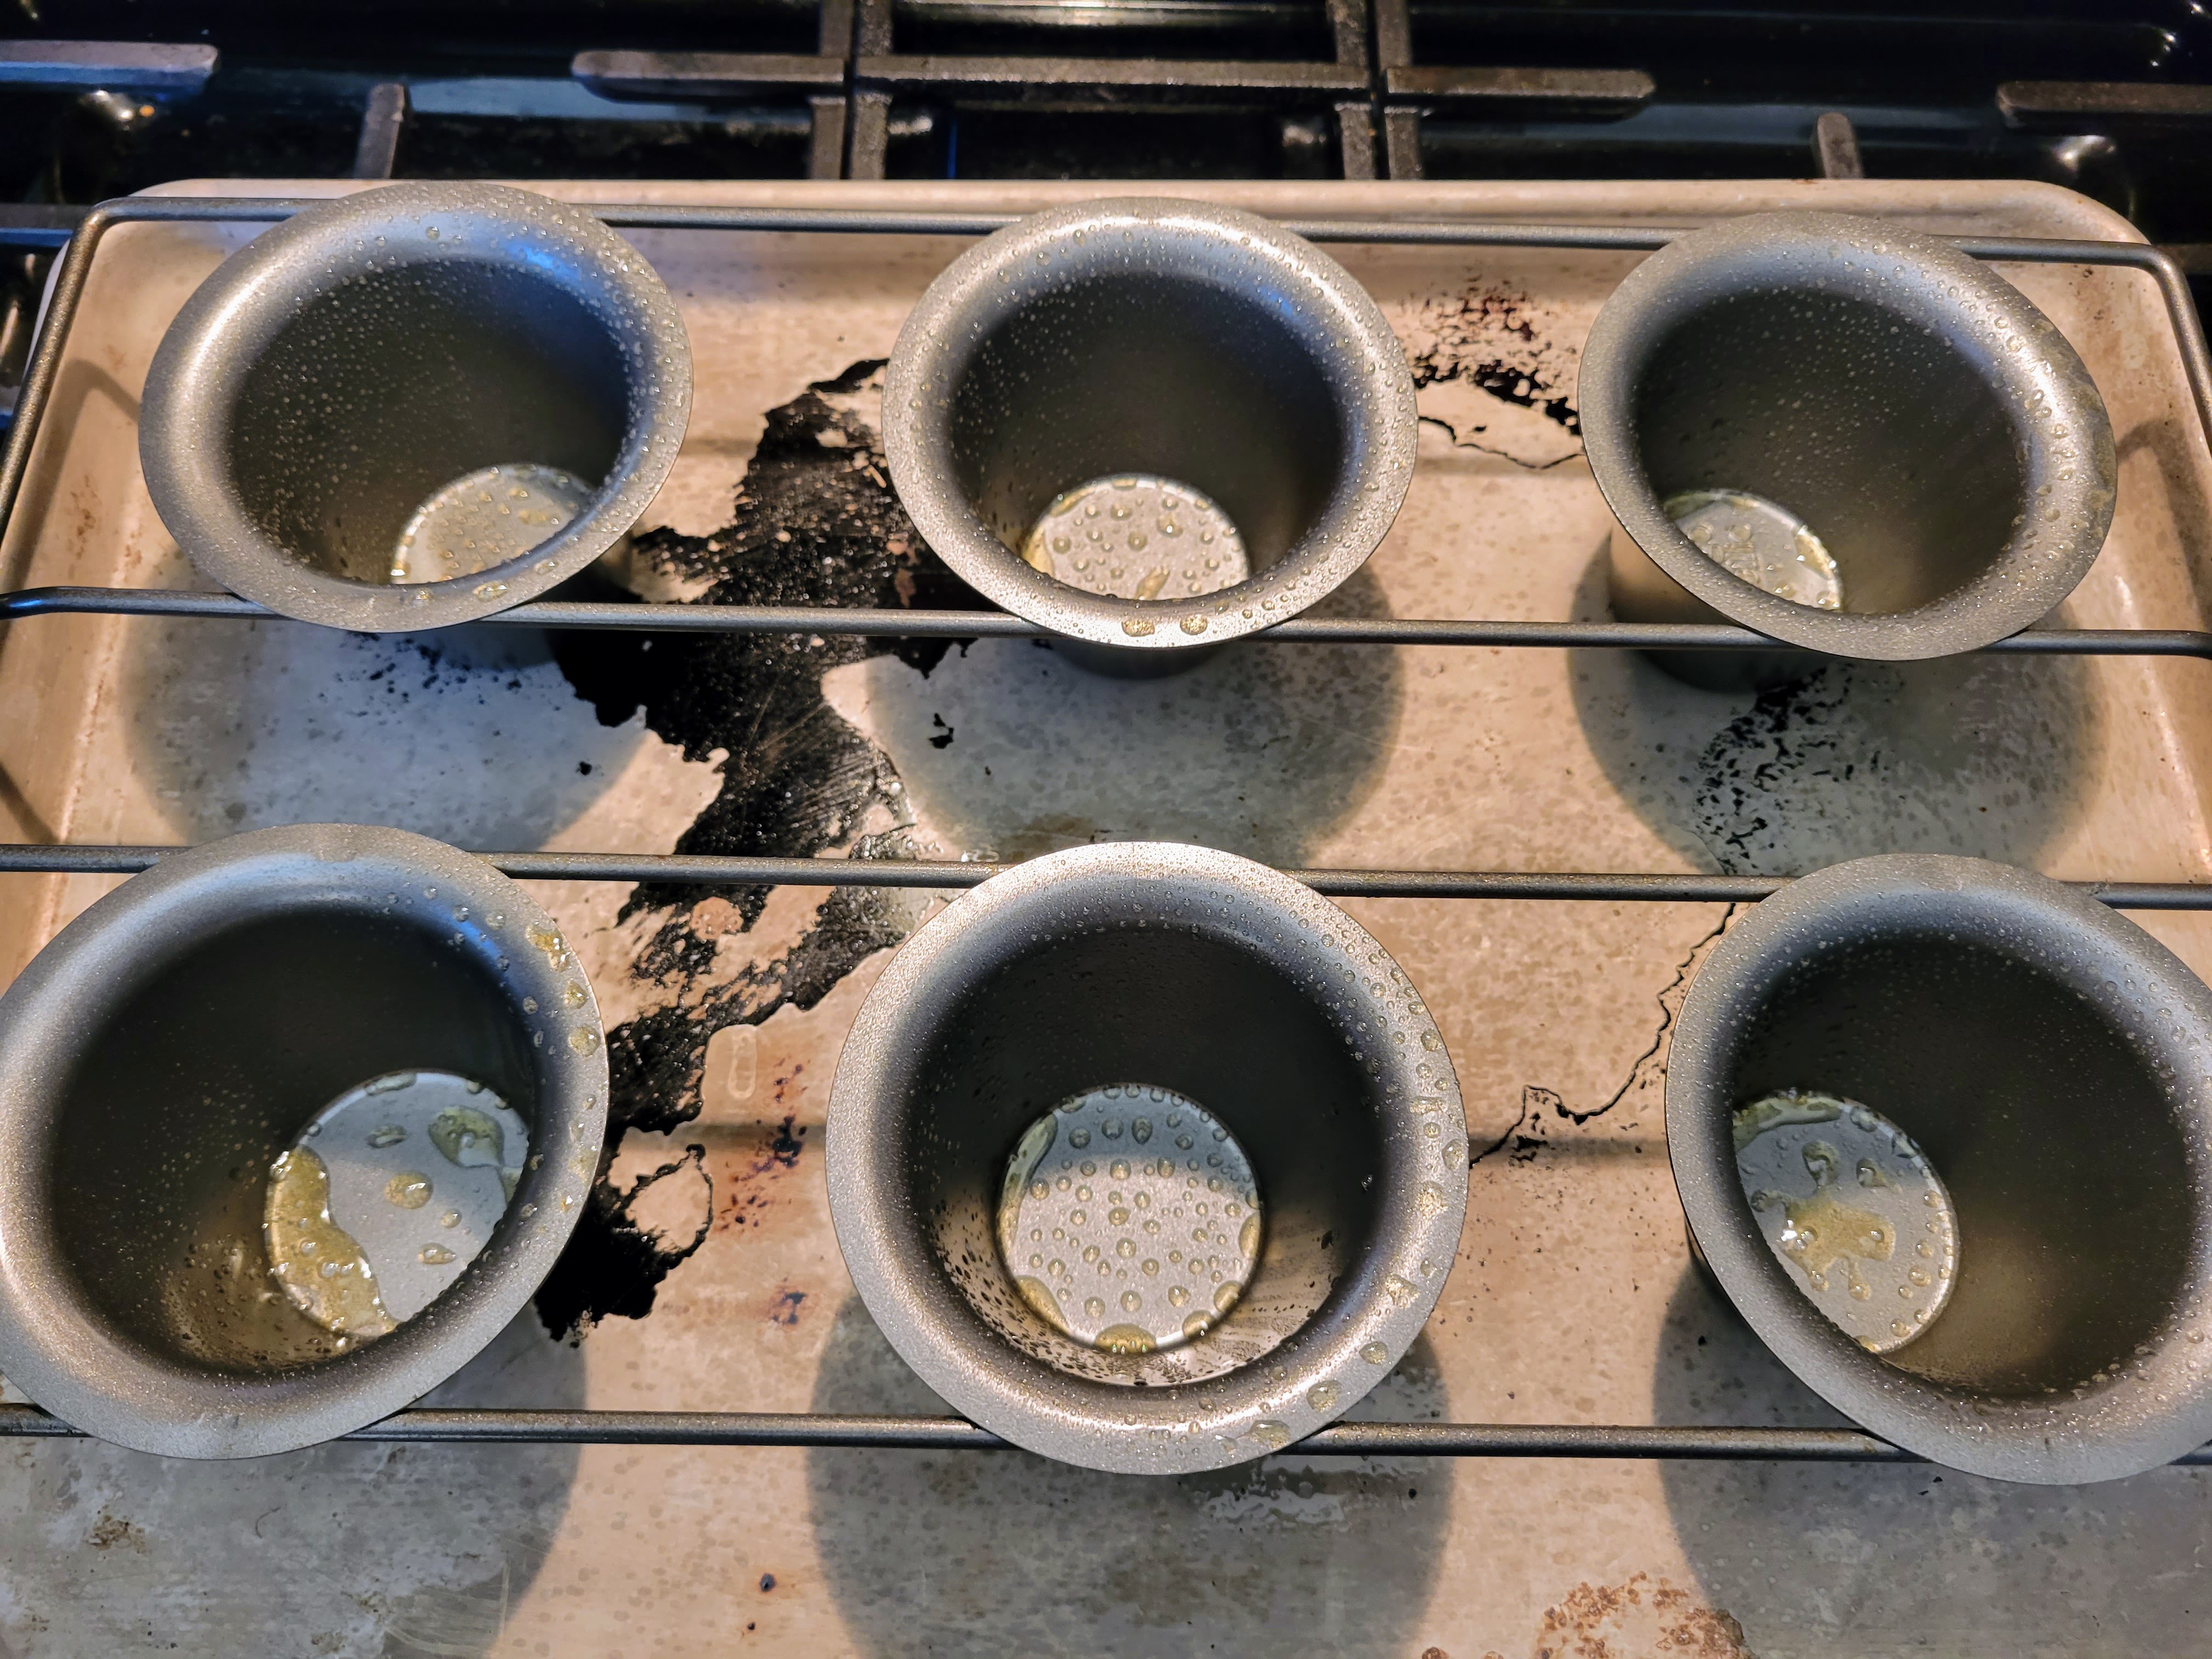
Oh, right, don’t forget to spray the pan with nonstick, even if the material is already “nonstick.” Trust me, it’s worth the ten-second time investment.

A lot of recipes out there will tell you to fill these cups just over halfway, and that’s it. Well, I tried that and it was disappointing, so I pushed the limits to see where we could go before catastrophic structural failure, and it’s this picture. If you’re pushing me, I’d say 3/4 full, or even 4/5ths. Look, I use a sheet pan underneath to catch any runoff if it happens, but really it shouldn’t.
Step three: into the oven at 450F for twenty (20) minutes, then drop the temp to 400F for another twenty (20). At the end of that, take a look to see if they’re set:
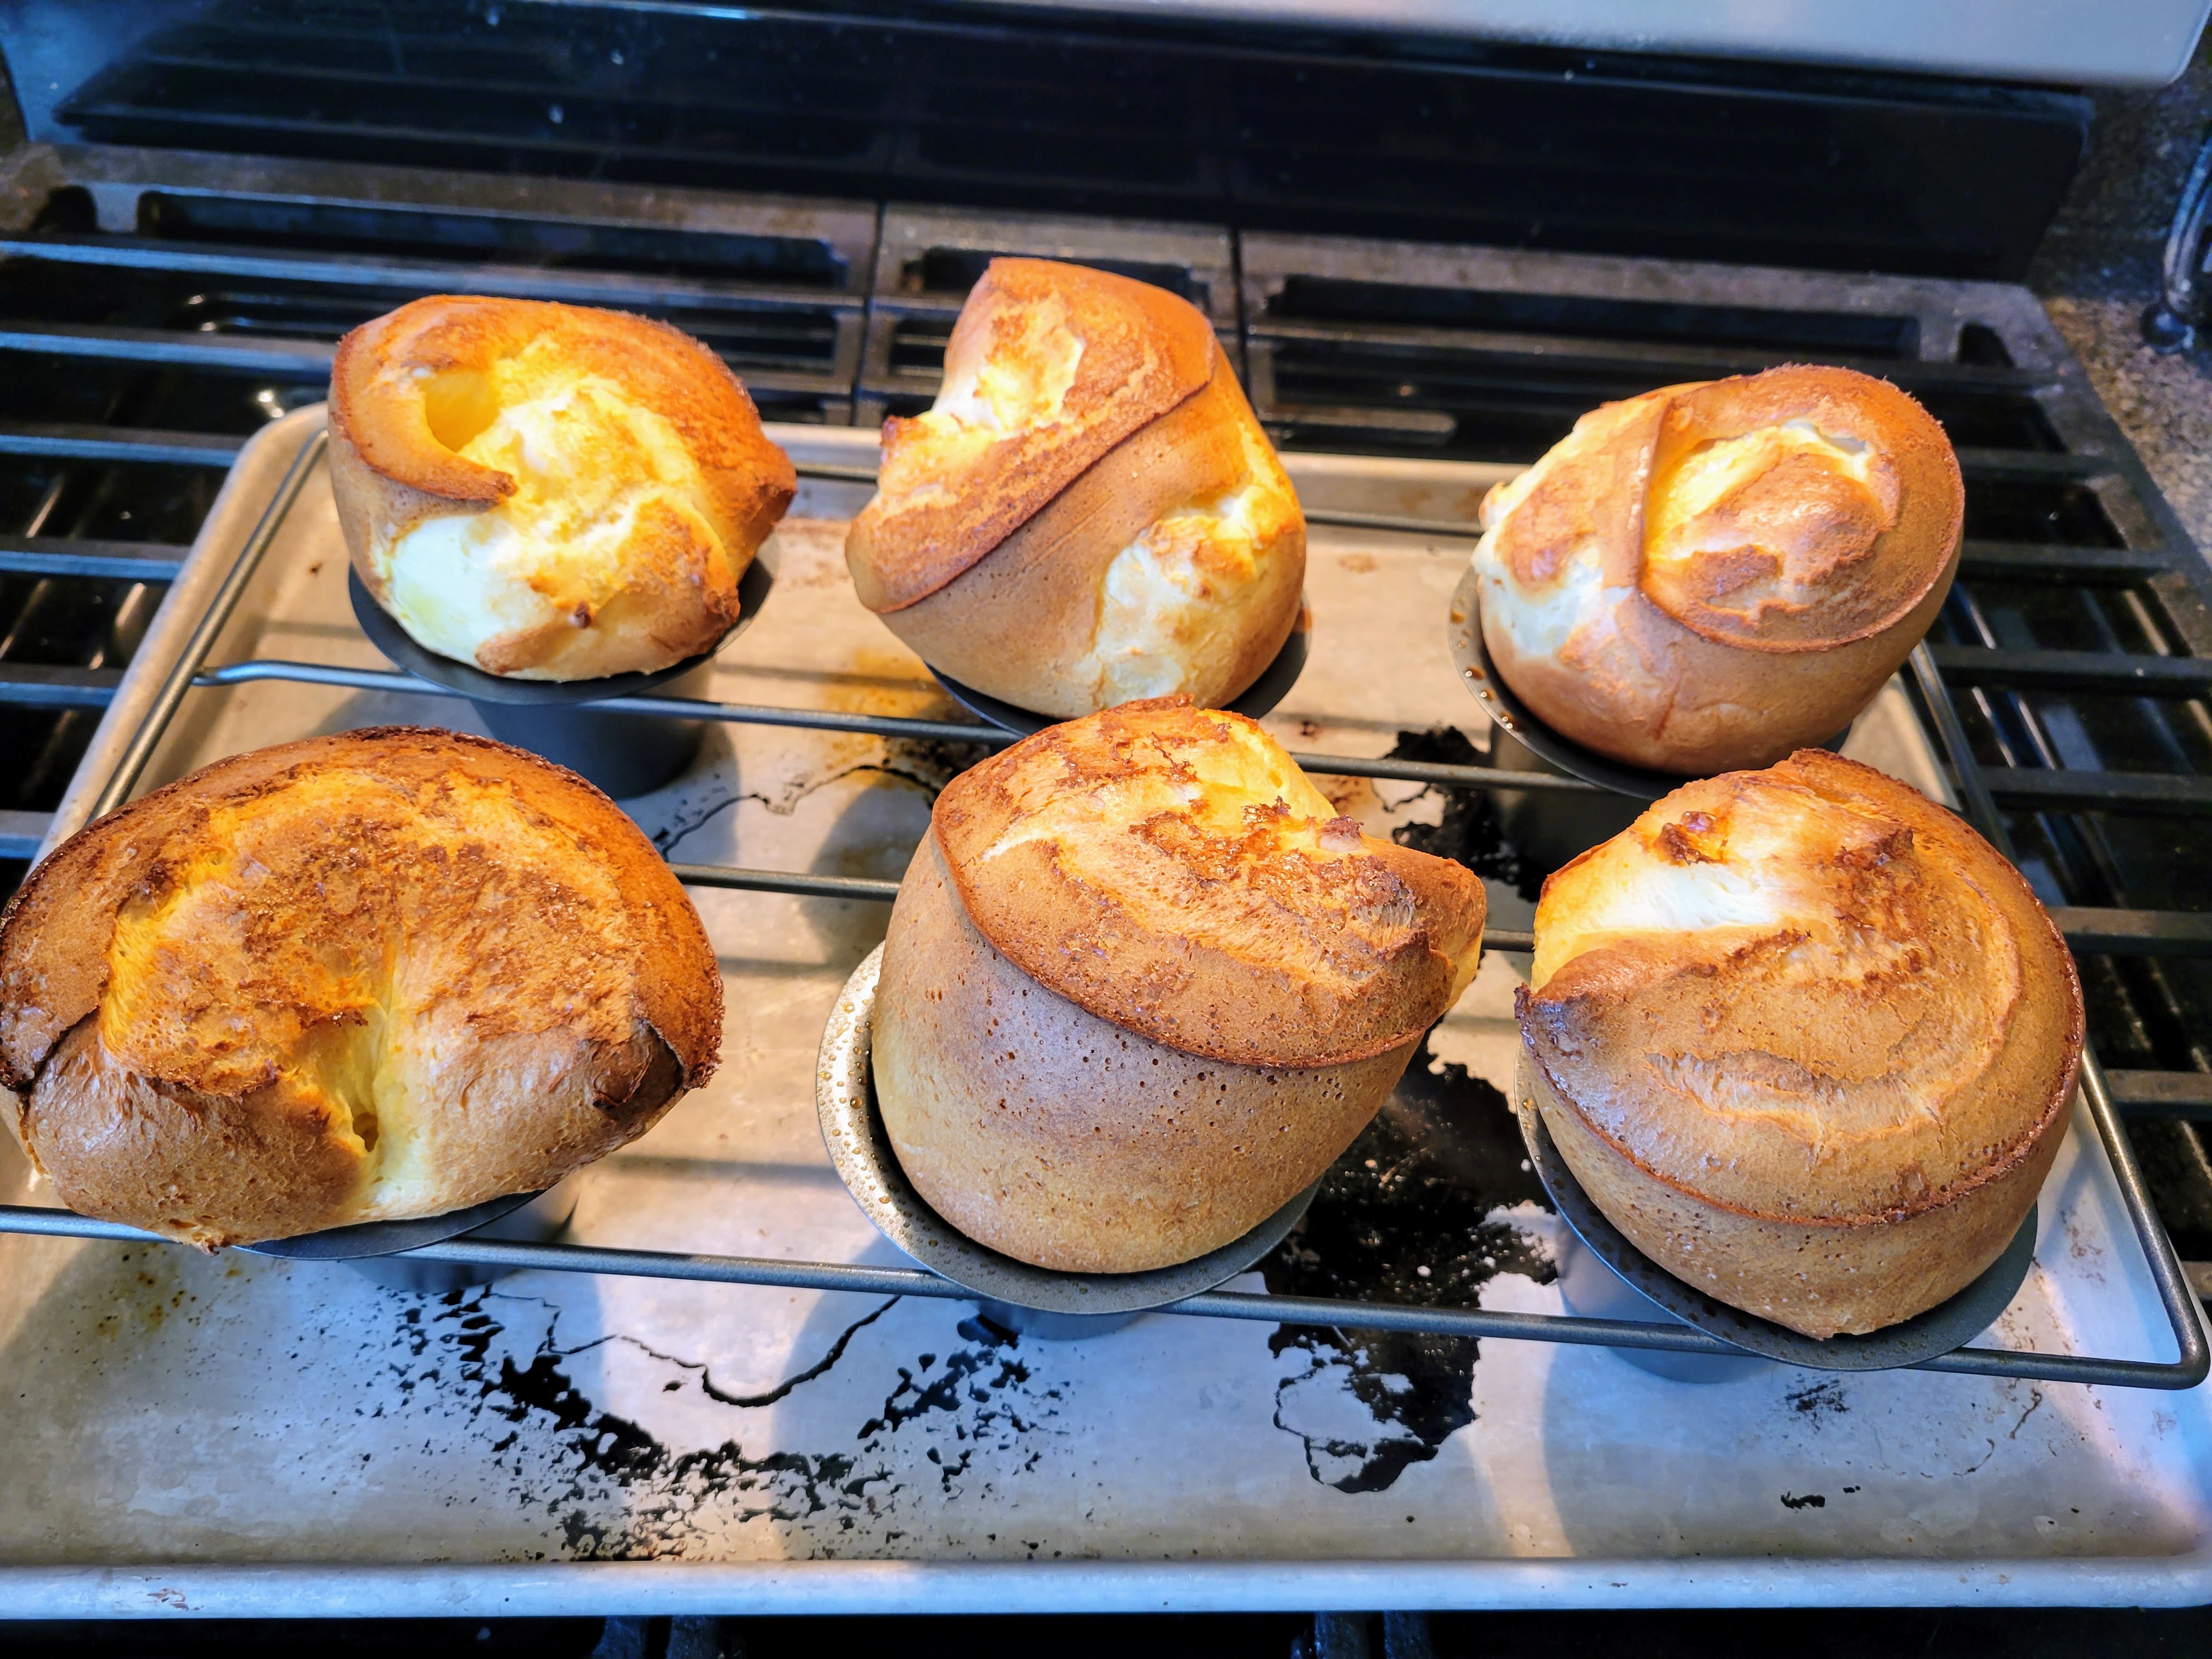
TA-DA! Pretty cool, no? These look relatively set to me, so I’m going to poke them with a skewer at the top to release the interior steam (skipping this step will lead to a weird, slimy-wet interior). If, as has happened to me, you remove these from the oven and they collapse or fall, it’s most likely they weren’t quite done setting up yet. As a result, I tend to go long on my bakes to make sure.
Anyway, move these to a rack so the bottoms don’t get soggy sitting in that pan:

That’s it. From here, I’ll hit these with some powdered sugar and pour a ramekin of syrup, and watch them vanish. Not bad for about a dollar worth of ingredients and three minutes of actual prep time:

So, go grab a popover pan and start adding these things to your arsenal. You’ll be surprised how often you make them, how different they can be, and how quickly they get gobbled.
